🥤 How to Fix Root Rot in Your Pitcher Plant
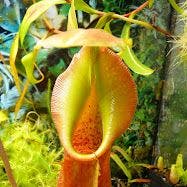
Nepenthes ampullaria
By the Greg Editorial Team
Oct 18, 2024•5 min read
This article was created with the help of AI so we can cover more plants for you. May contain errors. See one? Report it here.
Save your pitcher plant from root rot with essential tips for identification and treatment! 🌱
- 🌱 Recognize root rot symptoms like wilting and foul odors for early intervention.
- 🧪 Use the right soil mix (peat, perlite, sand) to prevent root rot.
- 🔍 Monitor recovery by checking for new growth and adjusting care accordingly.
Identifying Root Rot Symptoms
👀 Visual Signs of Root Rot
Root rot can be a sneaky issue for pitcher plants. Look out for wilting leaves; this is often the first sign that something's off with the roots.
Discoloration is another red flag. If you notice yellowing or browning leaves, it’s time to investigate further.
A foul odor from the soil is a clear indication of decay. If your plant smells off, root rot might be the culprit.
🔍 How to Check for Root Rot (Root Inspection)
To confirm root rot, start with a gentle removal of the plant from its pot. This step is crucial for a thorough inspection.
Next, inspect the roots closely. Look for mushy, blackened areas that signal rot.
Finally, assess the soil. Excessive moisture and a bad smell can confirm your suspicions.
⚖️ Distinguishing Root Rot from Other Issues
It's essential to differentiate root rot from other plant problems. Compare symptoms carefully; nutrient deficiencies can mimic root rot but often present differently.
Also, check for pest damage. Signs like holes in leaves or visible insects can lead to confusion, so be vigilant in your observations.
Understanding these distinctions will help you tackle the issue effectively.
With these identification techniques in hand, you’re ready to move on to treating root rot and restoring your pitcher plant to health.
Treating Root Rot
Step-by-Step Guide to Treating Root Rot 🌱
Remove the plant from the pot and inspect roots. Gently take your pitcher plant out of its container, being careful not to damage the roots. This initial step is crucial for assessing the extent of the root rot.
Trim away affected roots. Use sterilized scissors to cut away any mushy or blackened roots. Clean cuts help prevent further infection and promote healthy regrowth.
Prepare a new pot with suitable soil mix. Choose a pot that allows for good drainage and fill it with a mix of peat, perlite, and sand. This combination provides the right balance of moisture retention and aeration.
Repot the plant. Position the plant correctly in the new pot, ensuring that the roots are spread out and not cramped. Good drainage is essential, so make sure the pot has adequate holes at the bottom.
Recommended Treatments 💊
Use of fungicides. Consider applying a fungicide specifically designed for root rot. Follow the instructions carefully for effective treatment.
Natural remedies. If you prefer organic options, try using a solution of diluted hydrogen peroxide. This can help eliminate pathogens without harsh chemicals.
How to Properly Prune Affected Roots ✂️
Identifying healthy vs. unhealthy roots. Healthy roots are firm and white, while unhealthy ones are mushy and dark. Knowing the difference is key to effective pruning.
Techniques for effective pruning. When pruning, aim to minimize stress on the plant. Make clean cuts and avoid removing too many roots at once to help your pitcher plant bounce back quickly.
By following these steps, you can effectively treat root rot and give your pitcher plant a fighting chance. Next, let’s explore how to prevent root rot from occurring in the first place.
Preventing Root Rot
🌊 Best Practices for Watering Pitcher Plants
Establishing a consistent watering schedule is crucial for your pitcher plant's health. Aim to water when the top inch of soil feels dry, ensuring you don’t drown the roots.
Recognizing signs of overwatering is equally important. Look for yellowing leaves or a soggy soil texture, and adjust your watering habits accordingly.
🪴 Ideal Soil Mix for Pitcher Plants
Creating the right soil mix is vital for preventing root rot. A blend of peat, perlite, and sand in a 2:1:1 ratio promotes aeration and drainage.
Acidity plays a significant role in your plant's growth. Aim for a pH level between 5.5 and 6.5 to keep your pitcher plant thriving.
🕳️ Importance of Drainage and Pot Selection
Choosing the right pot can make all the difference. Opt for pots with drainage holes to prevent water from pooling at the bottom.
To enhance drainage, consider adding materials like gravel or orchid bark to your soil mix. This simple step can significantly reduce the risk of root rot.
By following these preventive measures, you can help your pitcher plant flourish and avoid the pitfalls of root rot. Next, we’ll explore post-treatment care to ensure your plant recovers fully.
Post-Treatment Care
Monitoring Recovery of Pitcher Plant 🌱
Regularly check your pitcher plant to observe its leaf health and growth patterns. Look for signs of new growth, which indicate that your plant is bouncing back from root rot.
Adjust your care based on the recovery progress. Tailor your watering schedule and light exposure to meet the plant's needs as it heals.
Signs of Improvement After Treatment 🌟
New growth is a clear indicator of successful recovery. If you notice fresh leaves sprouting, your plant is on the right track.
Color changes also signal health improvements. A return to vibrant green hues means your pitcher plant is regaining its vitality.
Long-Term Care Strategies to Prevent Recurrence 🔄
Establish a consistent care routine to promote longevity. Regular watering and monitoring will help keep root rot at bay.
Make seasonal adjustments to your care practices based on environmental changes. This proactive approach ensures your pitcher plant thrives year-round.
By staying attentive and responsive to your plant's needs, you can foster a healthy environment that prevents root rot from returning. Next, let’s explore the best practices for watering pitcher plants to further enhance their care.
⚠️ Safety First
This content is for general information and may contain errors, omissions, or outdated details. It is not medical, veterinary advice, or an endorsement of therapeutic claims.
Always consult a qualified healthcare professional before using any plant as food, medicine, or supplement.
Never eat any plant (or feed one to pets) without confirming its identity with at least two trusted sources.
If you suspect poisoning, call Poison Control (800) 222-1222, the Pet Poison Helpline (800) 213-6680, or your local emergency service immediately.
Spotted an error? Please report it here.
Revive your pitcher plant's roots with Greg's tailored care tips 🌱 that help you recognize root rot early and establish a consistent watering routine for vibrant health!