🪴 How to Cure Black Spots on Your Pitcher Plant
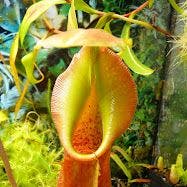
Nepenthes ampullaria
By the Greg Editorial Team
Oct 18, 2024•7 min read
This article was created with the help of AI so we can cover more plants for you. May contain errors. See one? Report it here.
Learn to combat black spots on your Pitcher Plant and help it thrive! 🌱
- 🌱 Black spots arise from fungal infections, environmental stress, and nutrient deficiencies.
- 💧 Maintain humidity (50%-70%) and optimal temperatures (70°F-85°F) to prevent issues.
- 🧪 Use natural remedies like neem oil and baking soda for effective treatment.
Causes of Black Spots
🦠 Fungal Infections
Fungal infections are a primary culprit behind black spots on Pitcher Plants. Common pathogens include Botrytis cinerea and Fusarium spp., which thrive in damp conditions.
Symptoms of these infections often manifest as dark, water-soaked spots on leaves. If left untreated, these spots can expand, leading to leaf decay.
Conditions that promote fungal growth include high humidity and poor air circulation. Keeping your plant in a well-ventilated area can help mitigate these risks.
🦠 Bacterial Infections
Bacterial infections can also lead to unsightly black spots. Notable bacteria include Pseudomonas and Erwinia, which can wreak havoc on your plant's health.
Signs of bacterial infections often include dark lesions and a foul odor. These symptoms can indicate that the infection is severe and requires immediate attention.
Environmental factors such as excessive moisture and high temperatures contribute to bacterial growth. Maintaining a balanced watering routine is crucial for prevention.
🌧️ Environmental Stress
💧 Humidity
Pitcher Plants thrive in high humidity, ideally between 50% and 70%. Low humidity can cause leaf tips to brown and develop black spots.
When humidity drops, the plant struggles to retain moisture, leading to stress. This stress can manifest as black spots, signaling that your plant needs a more humid environment.
🌡️ Temperature
The optimal temperature range for Sarracenia is between 70°F and 85°F (21°C to 29°C). Extreme fluctuations can weaken the plant, making it more susceptible to diseases.
Temperature extremes can lead to stress symptoms, including black spots. Keeping your plant in a stable environment is essential for its overall health.
🥦 Nutrient Deficiencies
Key nutrients like nitrogen, phosphorus, and potassium are vital for Pitcher Plant health. A deficiency in these nutrients can lead to poor growth and black spots.
Symptoms of nutrient deficiencies often include yellowing leaves and stunted growth. Addressing these deficiencies promptly can help restore your plant's vitality.
Understanding the causes of black spots is the first step in effective treatment. Next, we’ll explore how to identify the symptoms associated with these issues.
Identifying Symptoms
🕵️♂️ Appearance of Black Spots
Black spots on your Pitcher Plant can be alarming. These spots often appear as dark, irregular patches on the leaves, signaling potential issues.
The size and shape of these spots can vary significantly. They may be small and round or larger and more spread out, often accompanied by a darkened edge that can be a telltale sign of distress.
🔍 Other Related Symptoms
Yellowing leaves are another common symptom to watch for. This discoloration can indicate nutrient deficiencies or environmental stress, both of which can exacerbate black spots.
Wilting is also a crucial sign to consider. When your plant wilts, it often connects directly to the health of the leaves, including the presence of black spots, indicating that immediate attention may be needed.
Understanding these symptoms can help you take proactive steps to restore your Pitcher Plant's health. Next, we'll explore how to diagnose the underlying causes of these black spots effectively.
Diagnosing Black Spots
Step-by-Step Diagnosis 🌱
Observing Plant Conditions
Start by assessing the overall health of your Pitcher Plant. Look for signs of distress, such as drooping leaves or discoloration.Checking for Pests
Inspect the plant for any visible pests. Common culprits include aphids and spider mites, which can exacerbate black spots.Analyzing Watering Habits
Evaluate your watering routine. Are you watering too frequently or not enough? Both extremes can lead to stress and black spots.
Tools for Diagnosis 🔍
Magnifying Glass
Use a magnifying glass for a closer look at any pests. This tool helps you spot tiny invaders that could be harming your plant.Soil Moisture Meter
A soil moisture meter is essential for ensuring proper moisture levels. It helps you avoid overwatering or underwatering, both of which can contribute to black spots.
By following these steps and utilizing the right tools, you can effectively diagnose the issues affecting your Pitcher Plant. This understanding sets the stage for effective treatment and prevention strategies.
Treating Black Spots
🌿 Treatment Options
When it comes to treating black spots on your Pitcher Plant, you have several effective options. These range from chemical treatments to natural remedies, each suited for different types of infections.
🦠 Fungicides for Fungal Infections
Fungal infections are a common culprit behind those pesky black spots. Recommended fungicides include:
- Copper-based fungicides: Effective against a variety of fungal pathogens.
- Chlorothalonil: A broad-spectrum fungicide that targets multiple fungi.
Always follow application guidelines closely. Wear gloves and a mask to protect yourself, and apply in the early morning or late afternoon to avoid direct sunlight.
🧪 Bacterial Treatments
Bacterial infections can also lead to black spots. Effective treatments include:
- Antibiotic sprays: Such as streptomycin, which can help combat bacterial pathogens.
- Copper soap: This can be effective against certain bacterial infections.
Timing is crucial; apply treatments during the plant's active growth period for the best results. Monitor your plant closely after treatment to assess effectiveness.
🌱 Natural Remedies
If you prefer a gentler approach, natural remedies can be quite effective.
- Neem oil: This natural pesticide not only helps with black spots but also deters pests. Mix it with water and a few drops of dish soap for better adhesion.
- Baking soda solution: A mixture of baking soda and water can help combat fungal issues.
Apply these remedies every two weeks for optimal results. They are less harsh on the plant and the environment.
📋 Step-by-Step Treatment Guide
To effectively treat black spots, follow these steps:
- Application methods: Use a spray bottle for fungicides and natural remedies. Ensure even coverage on affected areas.
- Frequency of treatment: For chemical treatments, apply every 7-14 days. For natural remedies, every two weeks is usually sufficient.
By following these guidelines, you can help your Pitcher Plant recover and thrive. Next, let’s explore how to prevent black spots from occurring in the first place.
Preventing Black Spots
🌱 Best Practices for Care
Proper Watering Techniques
Watering your Pitcher Plants correctly is crucial to prevent black spots. Aim to water them every 1-2 weeks, ensuring the soil remains moist but not soggy.
Using distilled or rainwater is essential. Tap water can contain minerals that harm these sensitive plants.
Ideal Humidity Levels
Maintaining high humidity is vital for Pitcher Plants to thrive. Aim for humidity levels between 50-70%, which can be achieved with humidity trays or misting.
Watch for signs of inadequate humidity, such as browning leaf tips or wilting. These indicators suggest your plant needs a moisture boost.
Soil Composition and Drainage
Choosing the right soil is key to preventing black spots. Use sphagnum moss or a specialized carnivorous plant mix to provide the right nutrients and drainage.
Good drainage is non-negotiable. Ensure your pots have drainage holes to prevent waterlogging, which can lead to fungal growth.
🍂 Seasonal Care Adjustments
Adjusting care based on the seasons can make a significant difference. In winter, reduce watering frequency as plants enter dormancy.
Consider seasonal humidity and temperature changes. During summer, increase humidity and monitor temperature to keep your Pitcher Plants healthy.
By following these best practices, you can significantly reduce the risk of black spots on your Pitcher Plants. Next, let’s explore common misconceptions surrounding these issues.
Common Misconceptions
🕵️♂️ Myths About Black Spots
Many plant enthusiasts hold misconceptions about the causes of black spots on their pitcher plants. One common myth is that these spots are always due to pests or diseases, but they can also stem from environmental stressors or nutrient deficiencies.
Accurate diagnosis is crucial for effective treatment. Misunderstanding the root cause can lead to ineffective remedies and further plant decline.
💧 Overwatering vs. Underwatering
Another prevalent myth is the confusion between overwatering and underwatering symptoms. Overwatered plants often exhibit yellowing leaves and mushy roots, while underwatered plants may show wilting and crispy leaf edges.
To maintain proper moisture levels, it's essential to monitor your watering habits. Use distilled or rainwater, and ensure your pitcher plant's soil drains well to prevent root rot.
⚠️ Safety First
This content is for general information and may contain errors, omissions, or outdated details. It is not medical, veterinary advice, or an endorsement of therapeutic claims.
Always consult a qualified healthcare professional before using any plant as food, medicine, or supplement.
Never eat any plant (or feed one to pets) without confirming its identity with at least two trusted sources.
If you suspect poisoning, call Poison Control (800) 222-1222, the Pet Poison Helpline (800) 213-6680, or your local emergency service immediately.
Spotted an error? Please report it here.
Keep your Pitcher Plant spot-free 🌱 by using Greg's tailored care tips and reminders to create the perfect environment for thriving growth!