🩹 How to Fix Brown Spots on Your Pitcher Plant
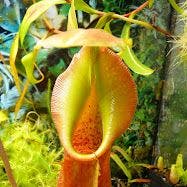
Nepenthes ampullaria
By the Greg Editorial Team
Oct 18, 2024•4 min read
This article was created with the help of AI so we can cover more plants for you. May contain errors. See one? Report it here.
Transform your pitcher plant's health 🌱 by tackling brown spots with these expert care tips for vibrant growth!
- 🌬️ Maintain 50-80% humidity to prevent browning and curling in pitcher plants.
- ☀️ Provide bright, indirect sunlight to avoid leaf burn and discoloration.
- 🔍 Regularly inspect for pests and diseases to catch issues early and protect your plant.
Diagnosing the Problem
🌱 Assessing Environmental Factors
Humidity Levels
Maintaining the right humidity is crucial for your pitcher plant's health. Aim for a range of 50-80% humidity; anything lower can lead to leaf curling and browning.
Light Conditions
Your plant thrives in bright, indirect sunlight. Too much direct light can cause leaf burn and discoloration, so keep an eye on its exposure.
🐛 Checking for Pests and Diseases
Inspecting for Pests
Pests can wreak havoc on your pitcher plant. Look for sticky residue, webbing, or visible insects; using a magnifying glass can help you spot these issues more easily.
Identifying Diseases
Fungal infections often manifest as discoloration and mold, while bacterial infections show up as water-soaked spots on leaves. Regular checks can help you catch these problems early.
💧 Evaluating Watering Practices
Water Quality
Using distilled or rainwater is essential for your plant's well-being. Poor water quality can lead to leaf tip burn and browning, so be mindful of what you use.
Watering Frequency
Keep the soil consistently moist but not soggy. Overwatering can cause wilting and mushy roots, so adjust your watering schedule as needed.
By diagnosing these key areas, you can effectively address the brown spots on your pitcher plant. Next, let’s explore treatment options to restore its health.
Treatment Options
Step-by-Step Guide to Treating Brown Spots 🌱
- Identify the cause of brown spots: Start by assessing environmental factors, pests, and watering practices.
- Remove affected leaves: This helps prevent the spread of any potential issues.
- Adjust watering practices: Tailor your watering based on the diagnosis to ensure optimal moisture levels.
- Increase humidity levels: If humidity is low, take steps to raise it for your plant's health.
- Apply appropriate treatments: Use targeted treatments for any pests or diseases identified.
Recommended Fungicides or Treatments 🧪
- Types of fungicides suitable for Pitcher Plants:
- Organic options: Consider using neem oil or sulfur-based fungicides for a natural approach.
- Chemical options: Copper fungicides can be effective but should be used sparingly to avoid harming your plant.
Adjusting Watering and Humidity Levels 💧
Techniques for increasing humidity:
- Humidity trays or misting: These methods can help create a more favorable environment.
- Placement in a terrarium or greenhouse: This can significantly boost humidity levels around your plant.
-
- Frequency: Regularly monitor soil moisture to maintain the right balance.
- Techniques: Consider bottom watering to keep leaves dry and prevent browning.
By following these treatment options, you can effectively address brown spots on your pitcher plant and promote its overall health. Next, let’s explore preventive measures to keep your plant thriving long-term.
Preventive Measures
Best Practices for Care 🌱
Maintaining a regular feeding schedule is crucial for your pitcher plant's health. Use a low-nitrogen, carnivorous plant-specific fertilizer every 4-6 weeks during the growing season to keep it thriving.
Soil and Potting Recommendations 🪴
The right soil mix is essential for optimal growth. Combine peat moss, perlite, and orchid bark to create a well-draining environment, as compacted soil can lead to serious issues.
Seasonal Adjustments to Care Routine 🌦️
As seasons change, so should your care routine. Move your plants to prevent sunburn during the hot summer months and ensure they receive adequate light during the shorter days of winter.
By implementing these preventive measures, you can help your pitcher plant flourish and reduce the risk of brown spots. Next, let's explore effective monitoring and maintenance strategies to keep your plant in top shape.
Monitoring and Maintenance
Regular Inspection Techniques 🌱
To keep your pitcher plant thriving, conduct weekly inspections. Look closely at leaf color, texture, and overall plant vigor to catch any issues early.
Signs of Recovery or Further Issues 🌼
As your plant heals, watch for indicators of improvement like new growth and vibrant color. Conversely, if you notice continued browning or wilting, it may signal ongoing problems that need addressing.
Long-Term Care Strategies for Healthy Growth 🌿
Establishing a consistent care routine is crucial for your plant's health. Keep a record of your watering and feeding schedules to track what works best.
Adapt your care based on how your plant responds and the changing seasons. This flexibility will help ensure your pitcher plant remains healthy and vibrant throughout the year.
⚠️ Safety First
This content is for general information and may contain errors, omissions, or outdated details. It is not medical, veterinary advice, or an endorsement of therapeutic claims.
Always consult a qualified healthcare professional before using any plant as food, medicine, or supplement.
Never eat any plant (or feed one to pets) without confirming its identity with at least two trusted sources.
If you suspect poisoning, call Poison Control (800) 222-1222, the Pet Poison Helpline (800) 213-6680, or your local emergency service immediately.
Spotted an error? Please report it here.
Keep your pitcher plant spotless 🌱 by using Greg's tailored care reminders to maintain the perfect humidity and light conditions for thriving growth!