🌸 How to Recognize and Treat Root Rot in Your Paphiopedilum
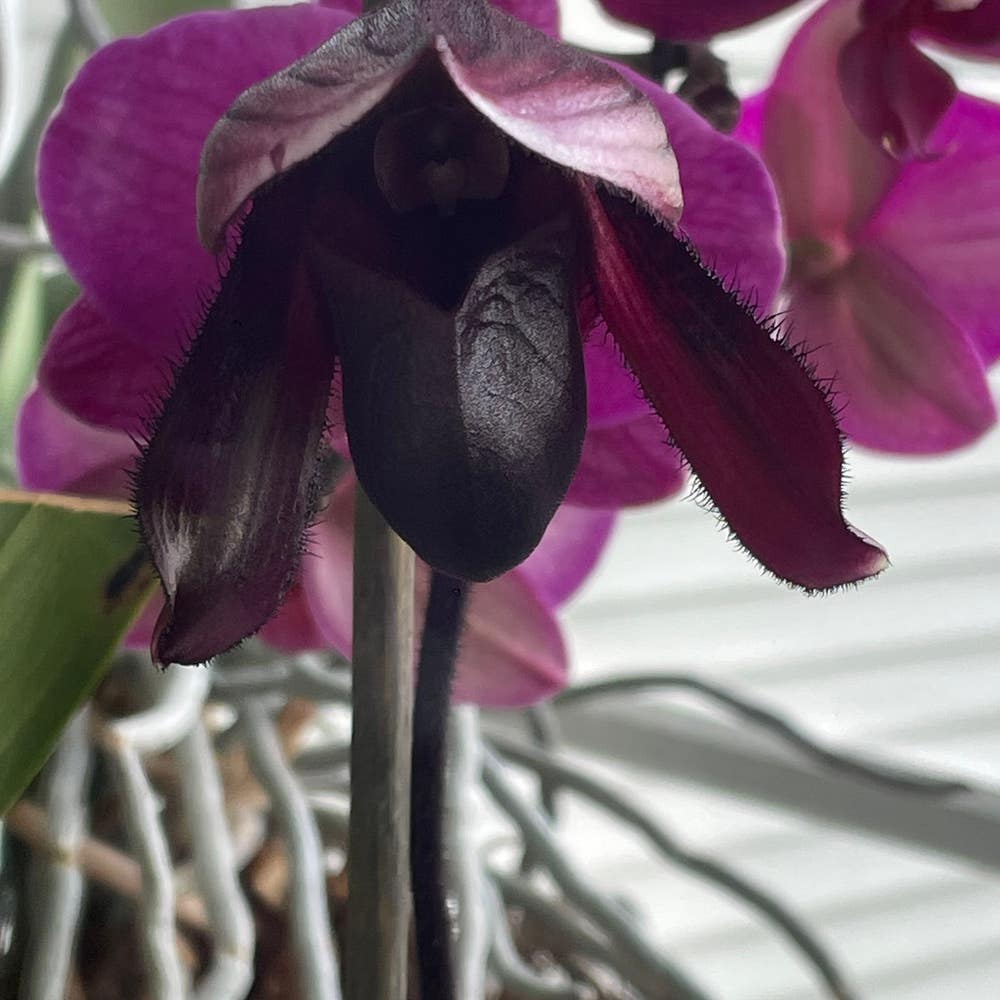
Paphiopedilum hirsutissimum
By the Greg Editorial Team
Oct 25, 2024•6 min read
This article was created with the help of AI so we can cover more plants for you. May contain errors. See one? Report it here.
Revive your Paphiopedilum and prevent root rot with these vital tips for thriving orchids! 🌿
- 🌿 Yellowing leaves and wilting indicate root rot in Paphiopedilum. Act quickly!
- 🔍 Inspect roots: Healthy roots are firm and white; rot is dark and mushy.
- 💧 Repot with well-draining mix and adjust watering to prevent future rot.
Identifying Root Rot Symptoms
👀 Visual Signs of Root Rot
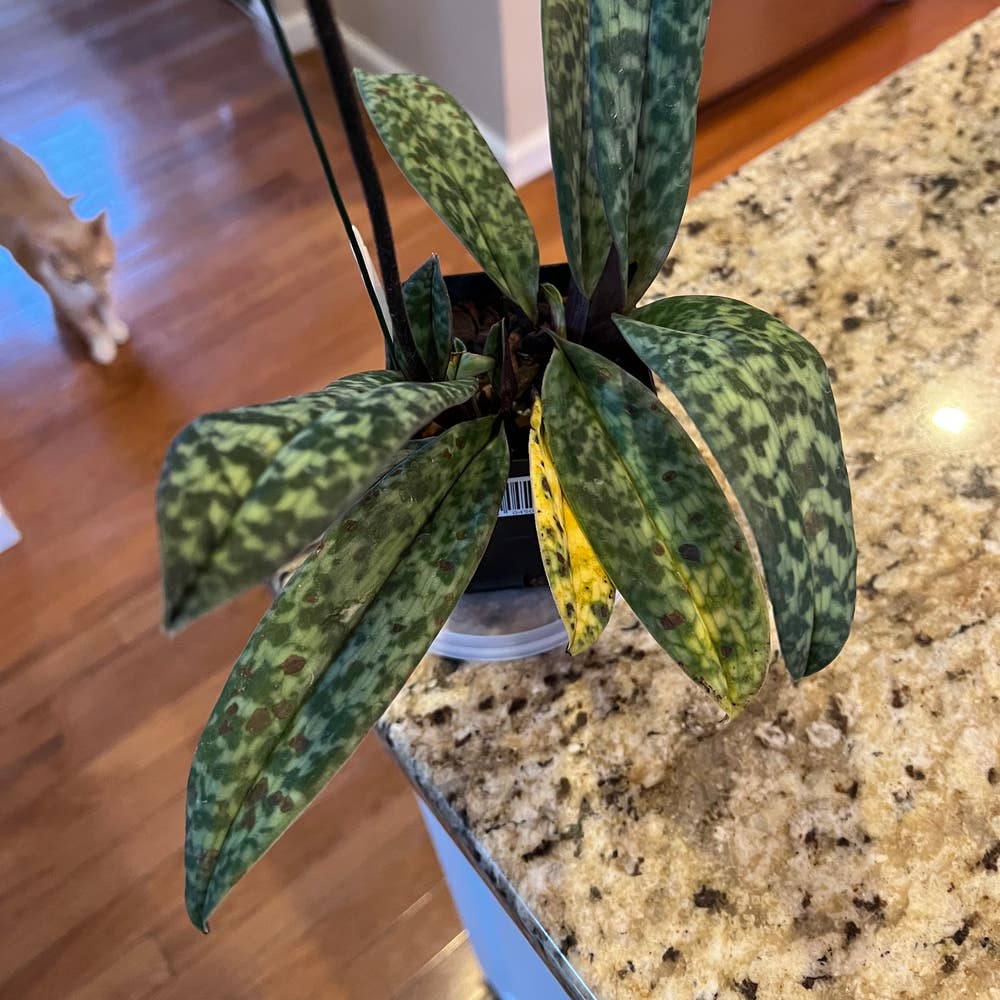
Recognizing root rot in your Paphiopedilum starts with observing the plant's leaves. Yellowing leaves often signal stress, hinting at potential root issues.
Another red flag is wilting or drooping foliage. This occurs when the roots fail to provide adequate turgor pressure, leading to a sad, droopy appearance.
🔍 How to Check the Roots for Rot
To confirm root rot, follow these simple steps:
- Remove the plant from its pot carefully. This minimizes damage to the roots.
- Inspect the root system. Look for color, texture, and firmness.
- Identify affected areas. Focus on dark, soft, or slimy roots that indicate rot.
⚖️ Distinguishing Between Healthy and Rotting Roots
Understanding the difference between healthy and rotting roots is crucial. Healthy roots are firm, with a white to green coloration and a plump texture.
In contrast, rotting roots appear dark brown or black, mushy, and often emit a foul smell. Recognizing these signs early can save your plant from further decline.
By keeping an eye out for these symptoms, you can take action before it's too late. Next, let’s explore how to treat root rot effectively.
Treating Root Rot
Step-by-Step Guide to Treatment 🌱
Dealing with root rot can feel overwhelming, but following these steps will help you restore your Paphiopedilum to health.
- Remove the plant from its pot and inspect the roots. Gently take the plant out, being careful not to damage the remaining healthy roots.
- Prune away all affected roots using sterilized scissors. Cut back any dark, mushy roots to prevent further spread of rot.
- Rinse healthy roots gently to remove any remaining pathogens. This step is crucial for ensuring that no harmful bacteria linger.
- Allow the plant to dry for a few hours before repotting. This helps the roots recover and reduces the risk of further rot.
- Repot in fresh, well-draining potting mix. Choose a mix designed for orchids to promote healthy growth.
Recommended Treatments and Products 🛒
After addressing the immediate issue, consider these treatments to support recovery:
- Fungicides: Look for products specifically formulated for treating fungal infections in orchids. They can help eliminate any lingering pathogens.
- Root stimulants: These products encourage healthy root growth post-treatment, giving your plant the boost it needs.
How to Properly Prune Affected Roots ✂️
Proper pruning is essential for recovery.
- Use sterilized tools to prevent further infection. This simple step can make a big difference in your plant's health.
- Cut back to healthy tissue, ensuring clean cuts to minimize stress. This will help your plant focus its energy on recovery rather than healing from jagged cuts.
By following these steps, you can effectively treat root rot and give your Paphiopedilum a fighting chance.
Next, let’s explore how to prevent root rot from occurring in the first place.
Preventing Root Rot
🌊 Best Practices for Watering
Watering your Paphiopedilum correctly is crucial for preventing root rot. Allow the top inch of the potting mix to dry out between waterings to avoid over-saturation.
When you do water, ensure you do so thoroughly. This means soaking the mix but allowing excess water to drain away completely.
🪴 Choosing the Right Potting Mix
Selecting the right potting mix can make all the difference. A blend of bark, perlite, and sphagnum moss provides optimal drainage while retaining just enough moisture.
It's essential to strike a balance. You want to meet your plant's moisture needs without risking waterlogging, which can lead to rot.
🌬️ Importance of Drainage and Air Circulation
Good drainage is non-negotiable when it comes to pot selection. Always opt for pots with adequate drainage holes to facilitate excess water flow.
Additionally, ensure your plant has good air circulation. This helps prevent humidity buildup, which can create a breeding ground for root rot.
By following these preventive measures, you can help your Paphiopedilum thrive and avoid the pitfalls of root rot. Next, let's explore how to effectively repot your plant when the time comes.
Repotting Paphiopedilum
🕒 When and How to Repot
Repotting your Paphiopedilum is essential for its health. Aim to repot every 1-2 years or whenever the potting mix starts to break down.
Look for signs that indicate it's time to repot. If the roots are outgrowing the pot or if you notice visible rot, it’s time to take action.
🪴 Selecting the Right Pot Size and Type
Choosing the right pot size is crucial. Opt for a pot that is slightly larger than the current one to give your plant room to grow.
Consider the material of the pot as well. Clay pots offer excellent breathability, while plastic pots help retain moisture, making them suitable for different needs.
✋ Techniques for Repotting Without Damaging Roots
Repotting can be tricky, but with care, you can do it successfully. Start by gently removing the plant from its pot.
Next, loosen the root ball carefully, ensuring you don’t break any healthy roots. This step is vital for maintaining the plant's health.
Finally, position the plant in the new pot, spreading the roots out evenly. This will help your Paphiopedilum thrive in its new environment.
With these steps, your plant will be well on its way to a healthier life. Now, let’s explore how to monitor and maintain your Paphiopedilum for ongoing success.
Monitoring and Maintenance
Regular Checks for Root Health 🌱
To keep your Paphiopedilum thriving, conduct monthly inspections for any signs of root rot or distress. Focus on the root color, texture, and the overall vigor of the plant.
Seasonal Care Adjustments 🌦️
Adjust your watering schedule based on the season. Water more frequently during the growing season and reduce it during dormancy to prevent overwatering.
Modifying Humidity Levels 💧
Humidity plays a crucial role in your orchid's health. Consider using humidity trays or misting to maintain optimal moisture levels, especially in drier months.
Signs of a Healthy Paphiopedilum 🌿
Look for vibrant foliage with deep green leaves, free from yellowing or wilting. A robust root system should be firm and healthy, visible during your inspections.
Overall Growth Indicators 🌸
New leaf and flower growth are excellent indicators of your plant's health. Regular monitoring will help you catch any issues early, ensuring your Paphiopedilum remains a stunning centerpiece in your collection.
By staying vigilant and adjusting care as needed, you can foster a thriving environment for your orchid. This proactive approach not only enhances your plant's health but also enriches your gardening experience.
⚠️ Safety First
This content is for general information and may contain errors, omissions, or outdated details. It is not medical, veterinary advice, or an endorsement of therapeutic claims.
Always consult a qualified healthcare professional before using any plant as food, medicine, or supplement.
Never eat any plant (or feed one to pets) without confirming its identity with at least two trusted sources.
If you suspect poisoning, call Poison Control (800) 222-1222, the Pet Poison Helpline (800) 213-6680, or your local emergency service immediately.
Spotted an error? Please report it here.
Keep your Paphiopedilum thriving 🌼 by using Greg's tailored care reminders to prevent root rot and ensure your orchid flourishes with vibrant health!