How to Prune Paphiopedilum fairrieanum
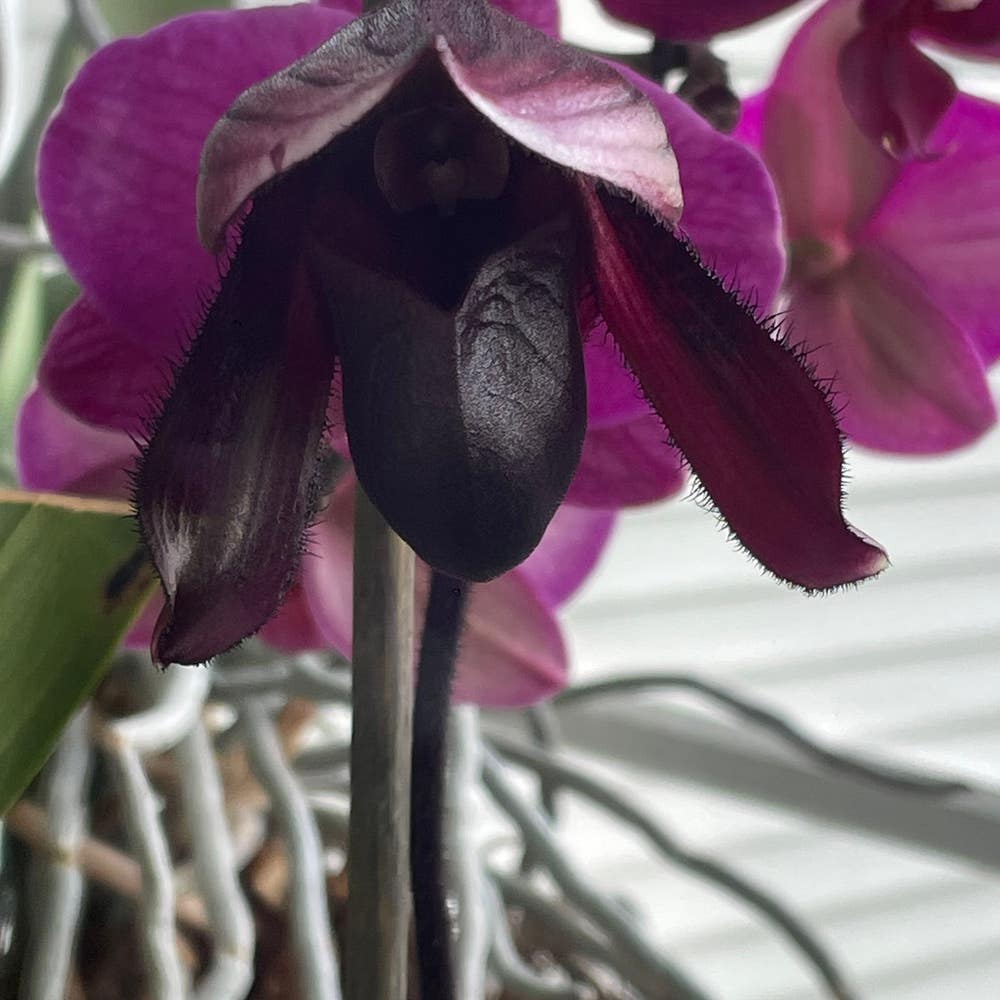
Paphiopedilum fairrieanum
By the Greg Editorial Team
Apr 06, 2024•4 min read
This article was created with the help of AI so we can cover more plants for you. May contain errors. See one? Report it here.
- Prune post-bloom for orchid's growth focus, not spent flower maintenance.
- 🌿 Use sterilized shears for clean cuts and disease prevention.
- Avoid over-pruning; don't cut more than 30% of growth.
Timing is Everything: When to Prune Your Orchid
🌸 After the Bloom: The Best Time to Prune
Pruning your Paphiopedilum fairrieanum should be post-bloom. This timing allows the orchid to channel energy into growth rather than sustaining spent flowers.
📅 Seasonal Considerations for Pruning
Seasons matter. While these orchids don't strictly adhere to a calendar, they often rest after blooming. This lull is your cue to prune.
🚩 Signs Your Orchid is Ready for Pruning
Look for faded flowers and a general pause in the plant's display. These signs suggest your orchid is ready for its trim.
Gear Up: Tools of the Trade
🔪 Choosing the Right Pruning Tools
Sharp, sterilized pruning shears are the orchid enthusiast's best friend. They're like a surgeon's scalpel, precise and clean. Opt for a pair that fits comfortably in your hand, because awkward tools lead to awkward cuts, and that's just sad for everyone involved.
🧼 Sterilization: Keeping Your Orchid Safe
Sterilization isn't just for hospitals; it's a critical step in orchid care. Wipe down your shears with isopropyl alcohol before and after each use. This isn't just about making clean cuts; it's about preventing a microbial mutiny against your Paphiopedilum fairrieanum.
🛠 Preparing Your Workspace
Before you play plant surgeon, clear a workspace. Lay down newspaper or a tarp – this isn't just about being tidy; it's about being ready to dispose of trimmings properly. Have all your tools within easy reach, and ensure your orchid is stable and ready for its trim. Remember, a cluttered space is a cluttered mind, and neither is conducive to the delicate art of orchid pruning.
Pruning Step by Step
✂️ Trimming Spent Flower Spikes
After your Paphiopedilum fairrieanum has finished blooming, it's time to trim the flower spikes. Identify the node closest to the base of the spike; this is where future growth may emerge. With sterilized shears, make a clean cut above the node at a 45-degree angle. This encourages the plant to focus its energy on new growth rather than sustaining the old spike.
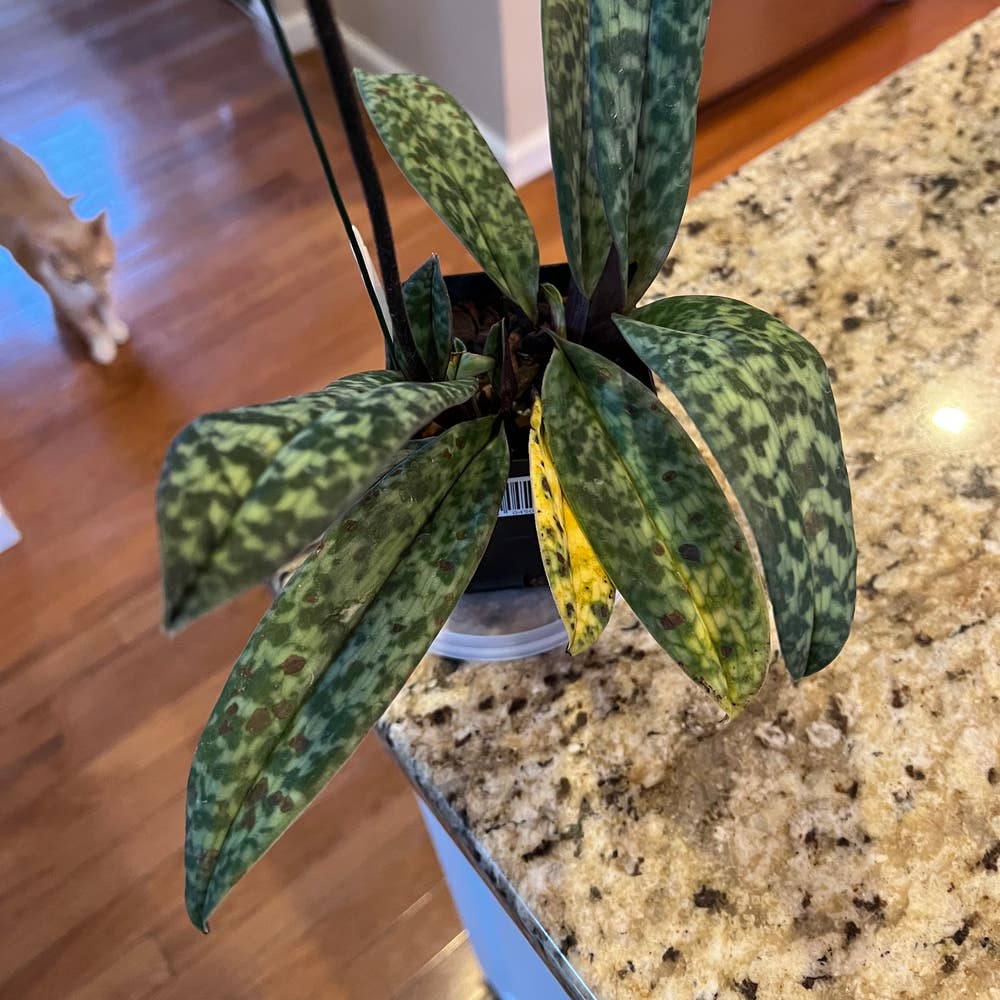
🍂 Removing Yellowing or Damaged Leaves
Yellow or damaged leaves are not just unsightly; they can be a drain on the plant's resources and a magnet for pests and diseases. Inspect your orchid and snip off these leaves at their base, close to the main stem. Ensure your cuts are clean and precise to minimize stress on the plant. Regular removal of such foliage helps maintain a healthy and vibrant orchid.
✂️ Cutting Back Overgrown Roots
Overgrown roots can lead to a host of issues, including poor nutrient uptake and waterlogging. If you notice roots that are circling the pot or growing extensively outside of it, it's time for a trim. Gently remove the orchid from its pot and use your sterilized shears to cut back any long or rotting roots. This will help the orchid to better absorb water and nutrients, promoting overall health. Remember, a little off the top is often all that's needed; don't go overboard.
Post-Pruning Care
💧 Watering After Pruning
Water is like first aid for your freshly pruned Paphiopedilum fairrieanum. It's essential, but too much can cause harm. After pruning, wait until the top inch of soil is dry before watering again. This helps the plant recover without risking root rot.
🌞 Adjusting Light and Temperature
Post-pruning, your orchid is in a vulnerable state. Place it in bright, indirect light to avoid the shock of direct sunlight. Keep the temperature steady; think of it as creating a recovery room for your plant.
🚨 Monitoring for Signs of Stress or Disease
Be vigilant. Look for yellowing leaves, drooping, or stunted growth—these are distress signals from your orchid. If you notice any of these symptoms, reassess your care routine immediately. Remember, your plant won't speak up; it's on you to spot the signs.
Pruning Pitfalls: Common Mistakes to Avoid
🌱 Over-Pruning: How Much is Too Much?
Pruning can be like opening a bag of chips—once you start, it's hard to stop. Over-pruning is a common blunder. It's crucial to resist the urge to keep snipping; never remove more than 30% of your orchid's growth at once. Your plant isn't auditioning for a minimalist art piece; it needs its leaves and stems to thrive.
🌿 Incorrect Cuts: Where to Snip for Health
Precision is your best friend when pruning. Random cuts are the enemy, leaving your orchid as confused as a GPS with bad signal. Always cut just above a leaf node or branching point. This encourages healthy new growth and prevents the orchid equivalent of a bad hair day.
🛁 Ignoring Hygiene: The Risks of Dirty Tools
Imagine serving dinner with dirty utensils; it's a big no-no. The same goes for pruning—dirty tools can spread disease like wildfire. Always clean and sterilize your shears before you start. It's simple: clean cuts, clean tools, happy orchid.
⚠️ Safety First
This content is for general information and may contain errors, omissions, or outdated details. It is not medical, veterinary advice, or an endorsement of therapeutic claims.
Always consult a qualified healthcare professional before using any plant as food, medicine, or supplement.
Never eat any plant (or feed one to pets) without confirming its identity with at least two trusted sources.
If you suspect poisoning, call Poison Control (800) 222-1222, the Pet Poison Helpline (800) 213-6680, or your local emergency service immediately.
Spotted an error? Please report it here.
Trim your orchid to perfection and boost its health 🌿 with Greg's tailored pruning reminders, based on the expert tips from this guide.