Propagating My Coryphantha pallida: Step-by-Step Guide
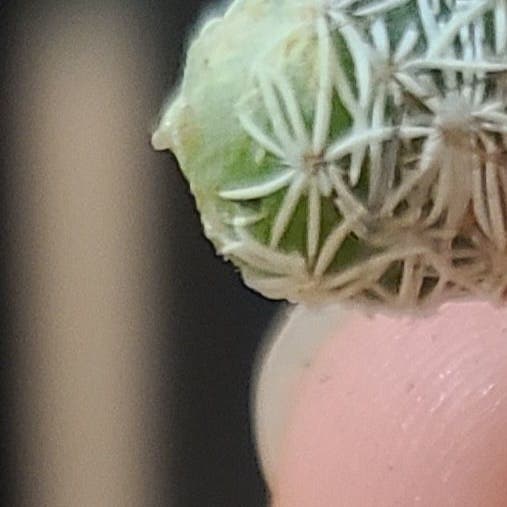
Coryphantha pallida
By the Greg Editorial Team
Apr 13, 2024•6 min read
This article was created with the help of AI so we can cover more plants for you. May contain errors. See one? Report it here.
Propagate your own spiky wonders 🌵 with this easy guide to multiplying Coryphantha pallida at home!
- Seed success: Select ripe seeds, disinfect, and use well-draining soil.
- Offsets & cuttings: Choose healthy, calloused offsets and vibrant stem cuttings.
- Grafting mastery: Sterilize tools, align cuts precisely, and support the graft.
Getting Started with Seed Propagation
🌱 Choosing and Collecting Seeds
Seed selection is crucial. Seek out mature, unblemished Coryphantha pallida seeds. Timing is everything; harvest when fruits are ripe, typically after the summer bloom. Use a delicate touch to avoid seed damage.
🌱 Sowing and Germinating Seeds
🌱 Soil and Environment Preparation
A fine-grained pumice or similar well-draining substrate is ideal. Disinfect seeds and soil to fend off diseases. A closed container can maintain necessary humidity.
🌱 Planting Steps
Surface-sow the seeds, pressing them gently into the soil. They need light to germinate, so don't bury them. Keep the soil moist, not soggy, and cover with clear plastic to trap humidity. Aim for a temperature range of 20-32°C.
🌱 Seedling Care
🌱 Post-Germination
Once sprouted, gradually introduce seedlings to less humid conditions. Protect them from direct sunlight initially, then increase light exposure to strengthen them.
🌱 Transplanting
When seedlings boast several true leaves, it's time to transplant. Give each its own pot to avoid competition and promote healthy root development. Continue with bright light and moderate watering.
Budding New Life: Offsets Division
🌱 Identifying and Separating Offsets
Offsets are the Coryphantha pallida's natural way of cloning itself. Spotting the right ones for propagation is like picking the ripest fruit on the tree. Look for plump offsets that mimic the parent plant but have their own roots. They should be sturdy enough to withstand a gentle tug, signaling they're ready to go solo.
Separating offsets is a delicate task. Sterilize your tools first to prevent infection. Then, with a sharp knife or pair of scissors, make a clean cut to detach the offset, ensuring it retains some roots. If the offset resists, a careful twist might be all it takes. After separation, let the offset dry for a day or two to form a callous. This step is crucial—it's like giving the offset a suit of armor against rot.
🌱 Planting and Caring for Offsets
Once your offsets have calloused, it's time to give them a new home. Choose a pot with drainage holes and fill it with a well-draining soil mix. This will prevent the dreaded soggy-bottom syndrome that can lead to root rot.
Plant the offset shallowly, allowing the roots to spread comfortably. Initially, water sparingly—think of it as a teaser, just enough to quench the offset's thirst without drowning it. Place the pot in an area with indirect light; direct sunlight is a no-go as it can scorch the young plants. As the offsets establish themselves, gradually introduce more water and sunlight, tailoring care to their growth pace. Remember, it's not a sprint; it's a marathon to healthy, independent plants.
Stem Cuttings: A Quick Propagation Method
🌱 Taking the Right Cut
Select a vibrant stem free of disease or damage. Use sterilized shears for a clean cut below a leaf node. Strip lower leaves to expose additional nodes. Allow the cutting to callous for a few days before planting.
🌿 Rooting Your Cuttings
Choose a well-draining medium and appropriately sized containers. Dip the calloused end in rooting hormone to encourage growth. Maintain high humidity with a plastic cover but ensure air circulation. Place in bright, indirect light and water sparingly until roots establish.
Mastering the Art of Grafting
🌱 Selecting Rootstocks and Scions
In the grafting arena, compatibility reigns supreme. Your rootstock should be a sturdy, disease-resistant specimen, closely related to your scion. It's like choosing a dance partner; you need rhythm and resilience. Prepare both by making sure they're clean and the cuts are precise—no jagged edges allowed.
🌿 The Grafting Process
Step 1: Sterilize Your Tools
Before you play plant surgeon, sterilize your tools. Bacteria and fungi love a fresh cut as much as a kid loves candy.
Step 2: Make the Cut
On the rootstock, execute a clean, vertical slice to form a 'cleft'. Carve your scion into a matching wedge. This isn't a time for abstract expressionism; precision is key.
Step 3: Join Forces
Insert the scion into the rootstock's cleft with the finesse of a lockpicker. Align the cambium layers—they're the lifelines for this botanical bond.
Step 4: Secure the Union
Bind the duo with rubber bands like a money stack. Then, swaddle the graft with tape as if tucking in a newborn.
Step 5: Post-Grafting TLC
Post-op, the grafted plant needs a bright but not sun-drenched spot to recuperate. Humidity is a friend, but like any friendship, don't let it get smothering—a plastic cover can help, but watch for condensation.
Remember, grafting is more alchemy than science. It's a delicate balance of knowledge, skill, and a sprinkle of luck. Keep your hands steady and your wits about you, and you might just pull off a horticultural masterpiece.
Overcoming Propagation Pitfalls
🌱 Common Propagation Challenges
Rot and poor rooting often crash the propagation party. These issues can turn your green dreams into compost nightmares. Rot is like the unwanted guest that shows up uninvited and refuses to leave, while poor rooting is akin to a plant that just can't seem to settle down.
💡 Solutions and Preventative Measures
🚰 Avoiding Rot
Overwatering is the root of all evil when it comes to rot. To steer clear, water only when the soil is dry to the touch. Imagine your watering can as a precision instrument, not a rain cloud. Drainage holes are non-negotiable; they're your safety net against soggy soil.
🌱 Ensuring Root Development
If your cuttings are more barren than a desert, it's time to reassess. Rooting medium should be the Goldilocks of soils—not too wet, not too dry. Humidity and warmth are your best friends for encouraging roots to sprout. Think of them as the cheerleaders rooting for your plant's success.
🛡️ Pest and Disease Control
Pests and diseases can turn propagation into a horror show. Keep an eye out for the telltale signs of trouble—yellowing leaves, stunted growth, or the dreaded black spots. Isolation is key; quarantine any affected plants faster than you'd unfriend a spoiler-happy acquaintance on social media.
🌞 Environmental Consistency
Plants are creatures of habit. Temperature swings and lighting changes can stress them out more than a Monday morning. Keep conditions as consistent as a favorite playlist—no drastic skips or shuffles.
🛡️ Physical Protection
Handle your plants with the care of a bomb disposal expert. Physical damage can set you back weeks. If you're moving plants around, think of them as fine china, not gym weights.
Remember, propagation is not a sprint; it's a marathon with hurdles. Each challenge is a chance to grow—both your plants and your skills. Keep the faith, and with a bit of grit, you'll become the plant whisperer you were always meant to be.
⚠️ Safety First
This content is for general information and may contain errors, omissions, or outdated details. It is not medical, veterinary advice, or an endorsement of therapeutic claims.
Always consult a qualified healthcare professional before using any plant as food, medicine, or supplement.
Never eat any plant (or feed one to pets) without confirming its identity with at least two trusted sources.
If you suspect poisoning, call Poison Control (800) 222-1222, the Pet Poison Helpline (800) 213-6680, or your local emergency service immediately.
Spotted an error? Please report it here.
Ensure your Coryphantha pallida thrives from seed to sprout with Greg's 🌱 custom care reminders and community advice for every step of your propagation journey.