3 Tips for Healing Black Spots on Your Desert Orchid 🩹
Eulophia petersii
By the Greg Editorial Team
Jan 07, 2025•5 min read
This article was created with the help of AI so we can cover more plants for you. May contain errors. See one? Report it here.
Transform your Desert Orchid's health 🌱 by conquering black spots with expert diagnosis and treatment tips!
- 🌱 Identify causes of black spots for effective treatment on your Desert Orchid.
- 💧 Maintain 40-60% humidity and proper light to prevent stress-related black spots.
- ✂️ Isolate and prune affected leaves to minimize infection spread and promote recovery.
Diagnosing the Problem
🌟 Differentiating between causes
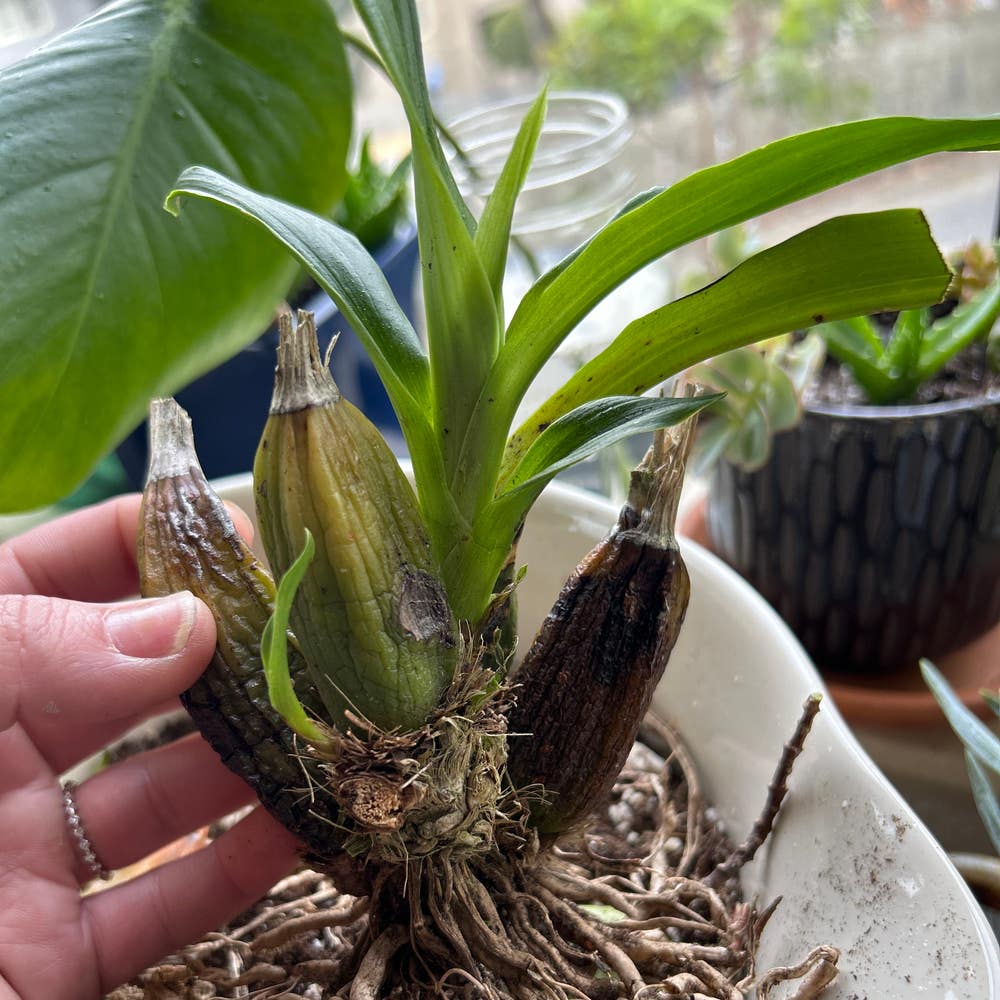
Identifying the cause of black spots on your Desert Orchid is crucial for effective treatment.
Fungal infections are often characterized by fuzzy or powdery growth near the spots. If you notice this, it’s a strong indicator of a fungal issue.
Bacterial infections, on the other hand, usually come with a foul odor and a mushy texture. If your plant has these symptoms, it’s likely suffering from bacterial rot.
Lastly, environmental causes can also lead to black spots. Symptoms linked to specific stressors, like improper light or humidity levels, can manifest as discoloration on the leaves.
🌍 Assessing environmental conditions affecting the Desert Orchid
Understanding the environmental conditions is key to maintaining a healthy Desert Orchid.
Humidity levels should ideally be between 40-60%. Too much or too little humidity can stress the plant, leading to black spots.
Light requirements are also essential. Desert Orchids thrive in full indirect sunlight; signs of too much light include scorched leaves, while too little can cause weak growth.
Finally, consider the temperature. The optimal range is 65°F to 80°F (18°C to 27°C). Temperatures outside this range can negatively impact leaf health, making your orchid more susceptible to issues like black spots.
By diagnosing the problem accurately, you can take the necessary steps to restore your Desert Orchid to its vibrant self. Next, let’s explore effective treatment options to tackle those pesky black spots.
Treatment Options
Step-by-step guide to treating black spots 🌱
Treating black spots on your Desert Orchid requires a careful approach. Start by isolating the affected plant to prevent any potential spread of the issue.
Next, use sterilized scissors to remove any severely affected leaves. This helps to minimize the risk of further infection.
After that, apply a suitable fungicide according to the package instructions. Be sure to follow the guidelines closely for the best results.
Finally, adjust your watering practices to prevent future issues. Overwatering can lead to a recurrence of black spots, so it's crucial to find a balance.
Recommended fungicides and treatments 💊
When it comes to fungicides, there are several chemical options that are effective against common orchid fungi. Look for products specifically designed for orchids to ensure safety and efficacy.
Reapplication frequency will depend on the severity of the infection. Generally, follow the manufacturer's recommendations for the best outcomes.
Natural remedies for black spots 🌿
If you prefer a more natural approach, neem oil is an excellent option. To use it, mix neem oil with water and spray it directly onto the affected areas. This not only treats the spots but also provides additional benefits for your plant.
Another effective remedy is a baking soda solution. Mix one tablespoon of baking soda with a quart of water and spray it on the leaves. This simple solution can help combat fungal issues while being gentle on your plant.
By following these treatment options, you can effectively address black spots on your Desert Orchid and promote its health and vitality.
Next, let’s explore preventive measures to keep your plant thriving and free from future issues.
Preventive Measures
Best practices for watering and humidity 🌊
Maintaining the right watering schedule is crucial for your Desert Orchid's health. Water your plant when the top inch of soil feels dry, ensuring you don’t overwater, which can lead to root rot.
Humidity is another key factor. Aim for a humidity level between 40-60%. You can achieve this by placing humidity trays filled with water near the plant or misting it regularly.
Optimal light conditions for Desert Orchid ☀️
Desert Orchids thrive in indirect sunlight. Too much direct light can scorch their leaves, while too little can stunt their growth.
Finding the right placement is essential. Consider a spot near a window with filtered light or use sheer curtains to diffuse harsh rays.
Regular maintenance and inspection tips 🔍
Routine checks are vital for early detection of black spots. Inspect your plant's leaves weekly to catch any issues before they escalate.
Cleaning the leaves is equally important. Dust can accumulate and block sunlight, so gently wipe the leaves with a damp cloth to keep them healthy and vibrant.
By following these preventive measures, you can significantly reduce the risk of black spots and ensure your Desert Orchid remains a stunning addition to your home. Next, let’s explore post-treatment care to help your plant recover effectively.
Post-Treatment Care
Monitoring recovery after treatment 🌱
After treating your Desert Orchid, it's crucial to monitor its recovery closely. Look for signs of new growth, such as fresh leaves emerging or existing leaves regaining their vibrant color.
Additionally, keep an eye out for any lingering black spots. If they start to fade, that's a positive indicator that your treatment is working.
Timeline for recovery ⏳
Recovery timelines can vary, but you should expect to see noticeable changes within a few weeks. Typically, healthy growth should begin to appear within 2 to 4 weeks after treatment.
Be patient, as some plants may take longer to bounce back. Consistent care during this period is essential for a successful recovery.
Adjusting care routine to prevent recurrence 🔄
To prevent black spots from returning, modifying your watering habits is key. Establish a consistent watering schedule that allows the soil to dry out slightly between waterings.
This helps prevent overwatering, which can lead to fungal issues.
Environmental adjustments 🌤️
Fine-tuning your orchid's environment is equally important. Ensure that humidity levels remain between 40-60% and adjust light exposure to provide ample indirect sunlight.
Regularly check the placement of your plant to avoid stress from too much or too little light.
By staying vigilant and making these adjustments, you can help your Desert Orchid thrive and keep those pesky black spots at bay.
⚠️ Safety First
This content is for general information and may contain errors, omissions, or outdated details. It is not medical, veterinary advice, or an endorsement of therapeutic claims.
Always consult a qualified healthcare professional before using any plant as food, medicine, or supplement.
Never eat any plant (or feed one to pets) without confirming its identity with at least two trusted sources.
If you suspect poisoning, call Poison Control (800) 222-1222, the Pet Poison Helpline (800) 213-6680, or your local emergency service immediately.
Spotted an error? Please report it here.
Revitalize your Desert Orchid and banish black spots 🌱 with Greg's tailored watering reminders and humidity tips that ensure your plant thrives in its ideal environment!