What to Do About Coco Palm Root Rot 🥥
Syagrus cocoides
By the Greg Editorial Team
Nov 23, 2024•5 min read
This article was created with the help of AI so we can cover more plants for you. May contain errors. See one? Report it here.
Ensure your Coco Palm thrives 🌿 by mastering root rot diagnosis and prevention with these essential tips!
- 💧 Overwatering and poor drainage are the main causes of Coco Palm root rot.
- 🌱 Healthy roots should be firm and white; mushy roots indicate rot.
- 🛠️ Repot in well-draining soil and remove affected roots for recovery.
Causes of Root Rot
💧 Overwatering and Poor Drainage
Excessive moisture is a primary culprit behind root rot in Coco Palms. When the soil remains waterlogged, it suffocates the roots, leading to decay and ultimately, plant death.
Good soil drainage is crucial for the health of your Coco Palm. Signs of overwatering include waterlogged soil and persistent dampness, which can be detrimental to your plant's vitality.
🍄 Fungal Infections
Fungi like Phytophthora and Pythium are common offenders when it comes to root rot in Coco Palms. These fungi thrive in conditions of high humidity and poor air circulation, making it essential to monitor your plant's environment.
There's a direct link between overwatering and fungal infections. When the soil is too wet, it creates a perfect breeding ground for these harmful organisms.
🌱 Soil Composition and Quality
Coco Palms thrive in sandy, well-draining soil. Poor soil quality can trap moisture, leading to root rot and other issues.
To combat this, consider soil amendments that improve drainage. Adding materials like perlite or sand can significantly enhance soil quality, ensuring your Coco Palm has the best chance to flourish.
Symptoms of Root Rot
👀 Visual Signs
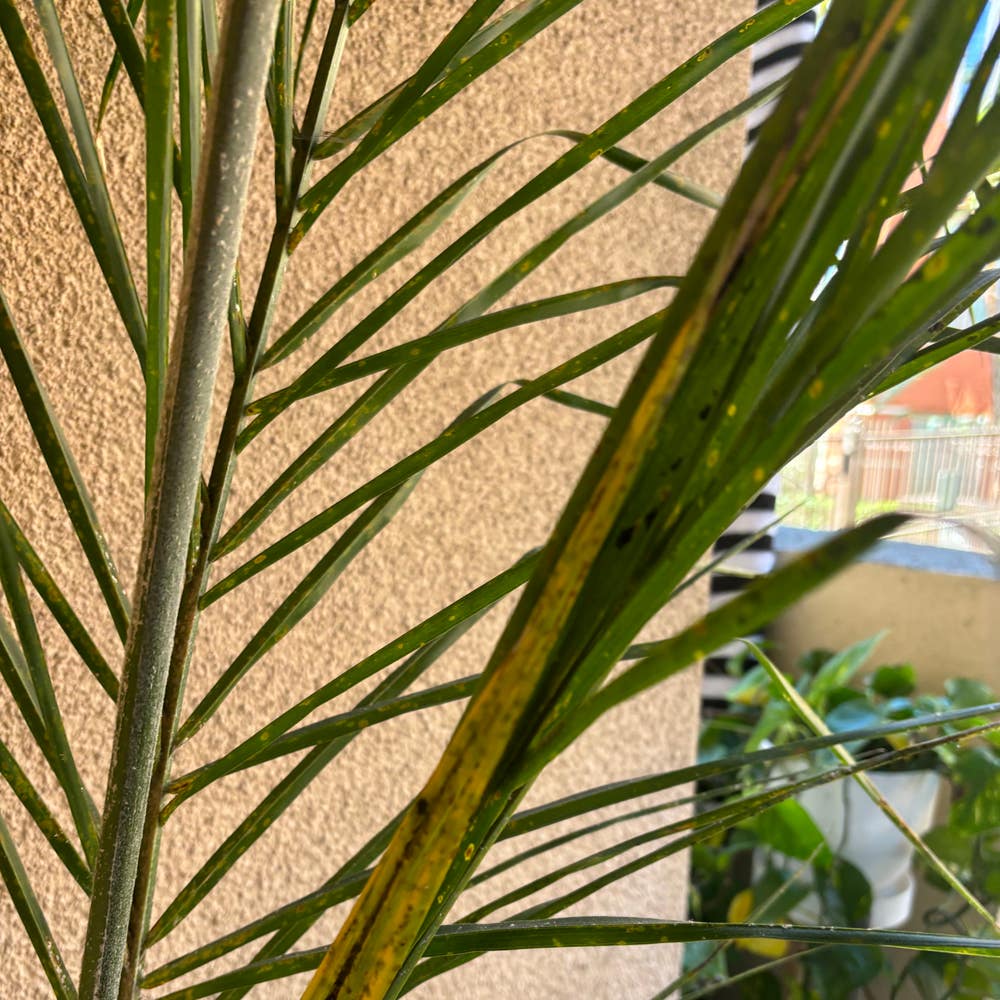
Recognizing the visual signs of root rot in your Coco Palm is crucial for timely intervention. One of the first indicators is yellowing leaves, which often signals nutrient deficiency and stress.
Wilting fronds are another telltale sign, as they indicate a loss of turgor pressure due to root damage. You might also notice browning leaf tips and stunted growth, both of which further suggest that your plant is struggling.
🔍 Root Examination
To confirm root rot, a thorough root examination is essential. Start by gently removing the plant from its pot to inspect the roots for any signs of decay.
Affected roots typically exhibit a mushy texture and dark discoloration. Healthy roots should be firm and white, so any deviation from this indicates a problem. Remember, maintaining root health is vital for the overall vitality of your Coco Palm.
Understanding these symptoms can empower you to take action before the situation worsens. Next, we’ll explore how to diagnose root rot effectively.
Diagnosing Root Rot
How to Check for Root Rot 🌱
Diagnosing root rot in your Coco Palm is crucial for its recovery. Follow these simple steps to assess the health of your plant.
Assess Soil Moisture Levels: Start by checking the moisture in the soil. If it feels consistently wet or soggy, overwatering may be the culprit.
Gently Remove the Plant from Its Pot: Carefully take the plant out of its pot to avoid damaging the roots. This step allows you to inspect the root system directly.
Inspect Roots for Signs of Rot: Look for any mushy, dark, or discolored roots. Healthy roots should be firm and white; any signs of decay indicate root rot.
Tools Needed for Diagnosis 🛠️
Having the right tools makes diagnosing root rot easier and more effective. Here are the essentials you’ll need:
- Clean Pruning Shears: Use these for trimming any affected roots.
- Gloves: Protect your hands while handling the plant and soil.
- Trowel: This tool helps you remove the plant from its pot without causing damage.
Using sterilized tools is vital to prevent further infection. Clean tools help ensure that you don’t introduce new pathogens to your Coco Palm during the diagnosis process.
In the next section, we’ll explore effective treatment options to help your Coco Palm recover from root rot.
Treatment Options
Removing Affected Roots 🌱
When dealing with root rot, the first step is to remove the affected roots.
- Identify and cut away mushy or discolored roots, as these are signs of rot.
- Clean the cuts with a sterilizing solution to prevent further infection.
Repotting with Fresh Soil 🌿
Repotting your Coco Palm in fresh, well-draining soil is crucial for recovery.
Using a sandy loam mixed with perlite will provide the ideal environment for your plant.
- Prepare a new pot with drainage holes to ensure excess water can escape.
- Fill the pot with fresh soil and position the plant correctly to promote healthy growth.
Fungicide Application 🧪
Applying fungicides can be an effective way to combat root rot.
It's important to know when and how to apply them for the best results.
Choose fungicides specifically recommended for Coco Palms, and always follow the instructions on the label.
Additionally, take safety precautions when using chemical treatments to protect yourself and your plant.
With these treatment options, you can help your Coco Palm recover from root rot and thrive once again. Next, let’s explore how to prevent root rot from occurring in the first place.
Preventing Root Rot
💧 Best Watering Practices
To keep your Coco Palm thriving, it's crucial to master the art of watering. Aim to let the top inch of soil dry out between waterings, as this helps prevent excess moisture that can lead to root rot.
Utilizing the Greg plant care app can be a game-changer. This handy tool sends reminders, ensuring you never forget to check your plant's moisture levels.
🪴 Soil Selection and Drainage Improvement
Choosing the right soil is vital for your Coco Palm's health. Look for a sandy, well-draining mix that allows excess water to escape easily.
To enhance drainage, consider adding perlite or sand to your soil mix. Additionally, always opt for pots with adequate drainage holes to prevent water from pooling at the bottom.
🌬️ Environmental Conditions
Creating the right environment is key to preventing stress in your Coco Palm. Ensure it receives optimal light—bright, indirect sunlight is ideal.
Humidity levels also play a significant role; aim for moderate humidity to support healthy growth. Lastly, don't underestimate the importance of air circulation around your plant, as it helps keep fungal issues at bay.
By following these preventive measures, you can significantly reduce the risk of root rot and enjoy a flourishing Coco Palm. Next, let’s dive into the symptoms of root rot, so you can identify any issues early on.
⚠️ Safety First
This content is for general information and may contain errors, omissions, or outdated details. It is not medical, veterinary advice, or an endorsement of therapeutic claims.
Always consult a qualified healthcare professional before using any plant as food, medicine, or supplement.
Never eat any plant (or feed one to pets) without confirming its identity with at least two trusted sources.
If you suspect poisoning, call Poison Control (800) 222-1222, the Pet Poison Helpline (800) 213-6680, or your local emergency service immediately.
Spotted an error? Please report it here.
Prevent root rot and keep your Coco Palm thriving 🌱 with Greg's tailored watering reminders and expert care tips that ensure your plant enjoys the perfect environment!