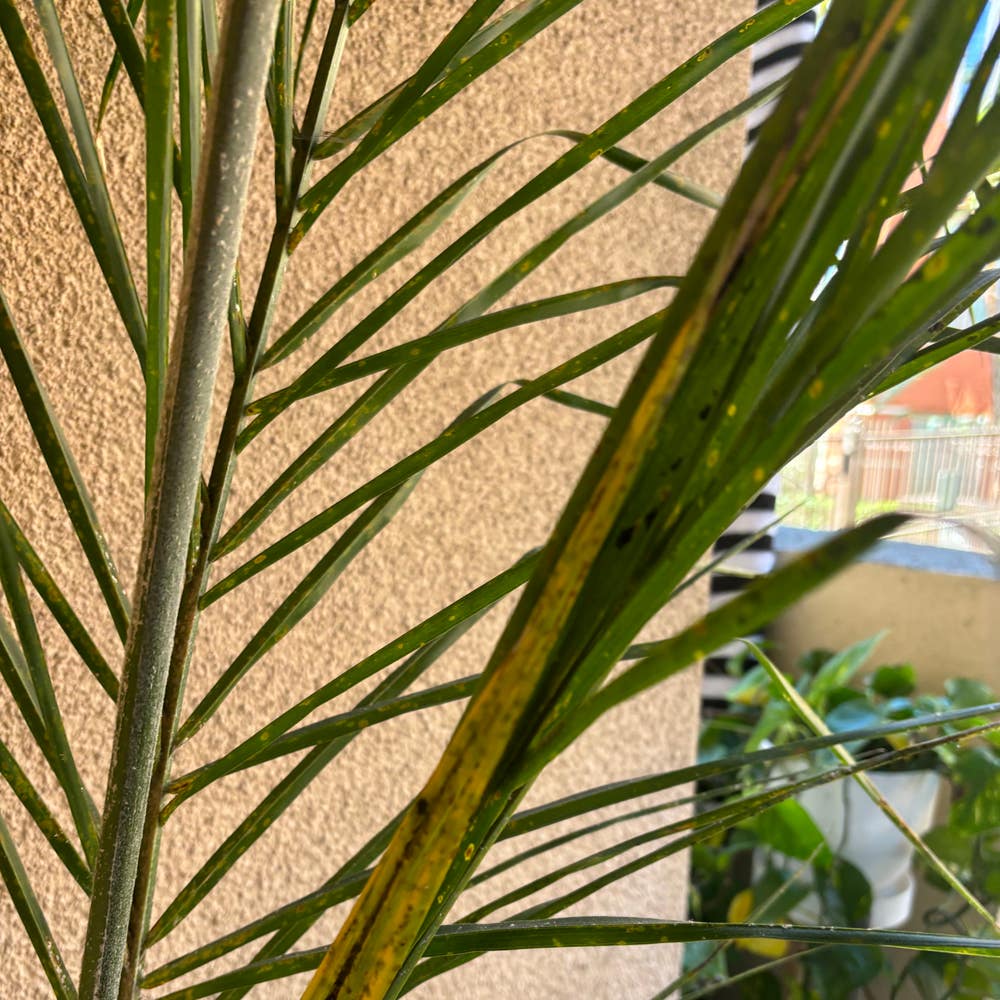
How to Fix Dropping Leaves on Your Coco Palm 🥥
Syagrus cocoides
By the Greg Editorial Team
Nov 23, 2024•6 min read
This article was created with the help of AI so we can cover more plants for you. May contain errors. See one? Report it here.
Restore your Coco Palm's vitality 🌴 by uncovering the secrets to preventing leaf drop and ensuring lush growth!
- 💧 Overwatering and underwatering both cause leaf drop; balance is essential for Coco Palms.
- 🌞 Bright, indirect light is crucial; position near east or west-facing windows.
- 🌿 Monitor humidity levels (50-70%) and use a hygrometer for optimal health.
Causes of Dropping Leaves
💧 Overwatering
Overwatering is a common issue for Coco Palms. Symptoms include yellowing leaves and mushy roots, which can lead to root rot and ultimately cause leaf drop.
🚰 Underwatering
On the flip side, underwatering can also stress your Coco Palm. Look for browning leaf tips and dry fronds as signs that your plant is not getting enough water.
🌫️ Low Humidity
Coco Palms thrive in humidity levels between 50-70%. When humidity is too low, you may notice leaf curling and browning edges, indicating your palm is struggling.
💡 Insufficient Light
These palms require bright, indirect light to flourish. Insufficient light can stunt growth and lead to leaf drop, so placement is key.
🍽️ Nutrient Deficiencies
Nutrient deficiencies, particularly in nitrogen and potassium, can affect your Coco Palm's health. Symptoms include yellowing leaves and poor growth, signaling that your plant needs a nutrient boost.
🐛 Pest Infestations
Pests like spider mites and mealybugs can wreak havoc on your Coco Palm. Visible pests and leaf discoloration are clear indicators that your plant may be infested.
🦠 Disease Issues
Common diseases such as Fusarium wilt and root rot can also cause dropping leaves. Symptoms like wilting and yellowing leaves suggest that your palm may be facing a serious health issue.
Understanding these causes is crucial for maintaining a healthy Coco Palm. By identifying the problem early, you can take the necessary steps to restore your plant's vitality. Next, we’ll explore how to diagnose the specific issues affecting your palm.
Diagnosing the Problem
🌊 Assessing Watering Practices
Understanding your watering habits is crucial for maintaining a healthy Coco Palm. Overwatering and underwatering can both lead to significant leaf drop, so let’s break down the signs.
Signs of Overwatering
Overwatering is often the culprit behind drooping leaves. Look for dark, mushy roots and yellowing leaves as key indicators of root rot.
Signs of Underwatering
On the flip side, underwatering can stress your plant. If you notice browning tips and edges on the leaves, along with dry, hard soil, it’s time to reassess your watering routine.
🌤️ Evaluating Environmental Conditions
Environmental factors play a significant role in your Coco Palm's health. Two critical areas to evaluate are humidity and light exposure.
Checking Humidity Levels
Coco Palms thrive in humidity levels between 50-70%. A hygrometer can help you accurately measure the humidity in your space.
Assessing Light Exposure
Your Coco Palm needs bright, indirect light to flourish. If you observe stunted growth or leaf drop, it may not be receiving enough light.
🐛 Identifying Pests and Diseases
Pests and diseases can wreak havoc on your Coco Palm. Identifying these issues early can save your plant from further damage.
Common Pests Affecting Coco Palm
Keep an eye out for spider mites, which leave fine webbing and cause leaf stippling. Mealybugs, identifiable by their cotton-like clusters on leaves, are another common pest.
Recognizing Disease Symptoms
Diseases like Fusarium wilt can cause yellowing leaves and wilting. Root rot may also occur, leading to wilting even when you’re watering adequately.
By carefully assessing watering practices, environmental conditions, and potential pests or diseases, you can pinpoint the issues affecting your Coco Palm. This understanding sets the stage for effective solutions and treatments to restore your plant's health.
Solutions and Treatments
🌊 Adjusting Watering Techniques
Proper Watering Schedule
To keep your Coco Palm thriving, establish a proper watering routine. Water your plant when the top 1-2 inches of soil feel dry, ensuring you provide enough water until it drains from the bottom.
Best Practices for Coco Palm
Using well-draining soil is crucial to prevent waterlogging, which can lead to root rot. Always ensure your pots have drainage holes to facilitate excess water escape.
🌫️ Improving Humidity and Light
Humidity-Boosting Methods
Maintaining the right humidity levels is essential for your Coco Palm's health. Use a humidifier to keep humidity between 50-70%, or group your plants together to increase local humidity through transpiration.
Optimal Light Conditions
Position your Coco Palm near east or west-facing windows to provide the bright, indirect light it craves. If natural light is insufficient, consider supplementing with grow lights to ensure your plant receives adequate illumination.
🌱 Fertilization and Nutrient Management
Recommended Fertilizers
For optimal growth, use a balanced liquid fertilizer with a 20-20-20 NPK ratio. Apply this every 4-6 weeks during the growing season to keep your Coco Palm nourished.
Nutrient Application Schedule
Focus on fertilizing during the spring and summer when your plant is actively growing. As the seasons change, reduce or stop fertilization in fall and winter to prevent nutrient buildup.
🐛 Pest and Disease Management
Organic Pest Control Methods
Combat pests naturally by using neem oil, which is effective against spider mites and mealybugs. Insecticidal soap is another safe option for indoor use, helping to keep your plant pest-free.
Treatment for Common Diseases
If you notice signs of Fusarium wilt, promptly remove affected plants and improve drainage to prevent further spread. For root rot, repot your Coco Palm in fresh, well-draining soil to give it a fresh start.
With these solutions and treatments, your Coco Palm can thrive and flourish. Next, let’s explore preventive measures to keep your plant healthy and vibrant for the long term.
Preventive Measures
Regular Maintenance Practices 🌱
Keeping your Coco Palm healthy starts with regular maintenance. Inspect leaves weekly for any signs of pest infestations, as early detection is key to preventing larger issues.
Using sticky traps can help monitor pest populations effectively. These simple tools can catch unwanted visitors before they wreak havoc on your plant.
Seasonal Care Adjustments 🍂
As the seasons change, so should your care routine. Adjust watering and humidity levels to match the needs of your Coco Palm throughout the year.
Rotating your plants can also ensure they receive even light exposure. This practice helps prevent uneven growth and keeps your palm thriving.
Ideal Growing Conditions 🌞
Creating the right environment is crucial for your Coco Palm's success. Start with the best potting mix to promote healthy growth.
Best Potting Mix for Coco Palm
A mix of peat, perlite, and pine bark is ideal for drainage. This combination allows for proper aeration and moisture retention, which is essential for your palm's roots.
Recommended Pot Size and Drainage
When choosing a pot, select one that is 1-2 inches larger than the root ball. Ensure that your pots have adequate drainage holes to prevent waterlogging, which can lead to root rot.
By following these preventive measures, you can maintain a healthy Coco Palm and enjoy its beauty for years to come. Next, let’s explore solutions and treatments to address any issues that may arise.
⚠️ Safety First
This content is for general information and may contain errors, omissions, or outdated details. It is not medical, veterinary advice, or an endorsement of therapeutic claims.
Always consult a qualified healthcare professional before using any plant as food, medicine, or supplement.
Never eat any plant (or feed one to pets) without confirming its identity with at least two trusted sources.
If you suspect poisoning, call Poison Control (800) 222-1222, the Pet Poison Helpline (800) 213-6680, or your local emergency service immediately.
Spotted an error? Please report it here.
Keep your Coco Palm thriving and healthy 🌴 by using Greg's tailored watering alerts and care tips to prevent leaf drop and ensure optimal growth!