Propagating My Brazilian Edelweiss: Step-by-Step Guide
Sinningia leucotricha
By the Greg Editorial Team
Feb 14, 2024•4 min read
This article was created with the help of AI so we can cover more plants for you. May contain errors. See one? Report it here.
Propagate Brazilian Edelweiss effortlessly with this step-by-step guide—watch your garden flourish! 🌱✂️
- Select the right stem or division for successful propagation.
- Rooting hormone boosts growth; apply to cuttings.
- Monitor light, water, and pests for thriving propagations.
Choosing Your Propagation Path
🌱 Stem Cuttings: A Snip Away from New Growth
Selecting the right stem is crucial. Look for robust, green stems with no blemishes.
Making the cut requires a disinfected, sharp tool. Snip below a node for the best chance of rooting.
Rooting hormone can be your ace in the hole. Apply it to the cut end to stimulate root growth.
➗ Division: Multiplying Beauty
When to divide your plant is key. Look for signs of overcrowding or roots peeking out of drainage holes.
The division dance involves gently teasing apart the root ball, ensuring each section has roots and shoots.
Planting divided sections should be done in well-draining soil, with care taken to maintain humidity.
Creating the Perfect Propagation Environment
🏡 Home Sweet Home: Setting Up
Your Brazilian Edelweiss cuttings and divisions need the right pot and soil mix to call home. Choose a container with drainage holes to prevent waterlogging—a silent killer in the plant world. A well-draining potting mix, perhaps with a dash of perlite or sand, will do wonders.
Temperature and humidity are your invisible allies. Aim for a cozy atmosphere with temperatures around 75° to 80°F and humidity reminiscent of a misty morning. This encourages roots to emerge and flourish.
💡 Light and Water: The Life Source
Watering is a delicate dance—too much, and you risk root rot; too little, and your propagations will thirst. The soil should be moist, like a well-wrung sponge, never drenched.
Light is your propagation's silent cheerleader. Bright, indirect sunlight is the sweet spot, fostering growth without the harshness of direct rays. Keep an eye on the balance of these elements to ensure your Brazilian Edelweiss thrives.
Monitoring and Nurturing Your Propagations
🌱 Growth Watch: Signs of Success
🌿 Rooting Progress
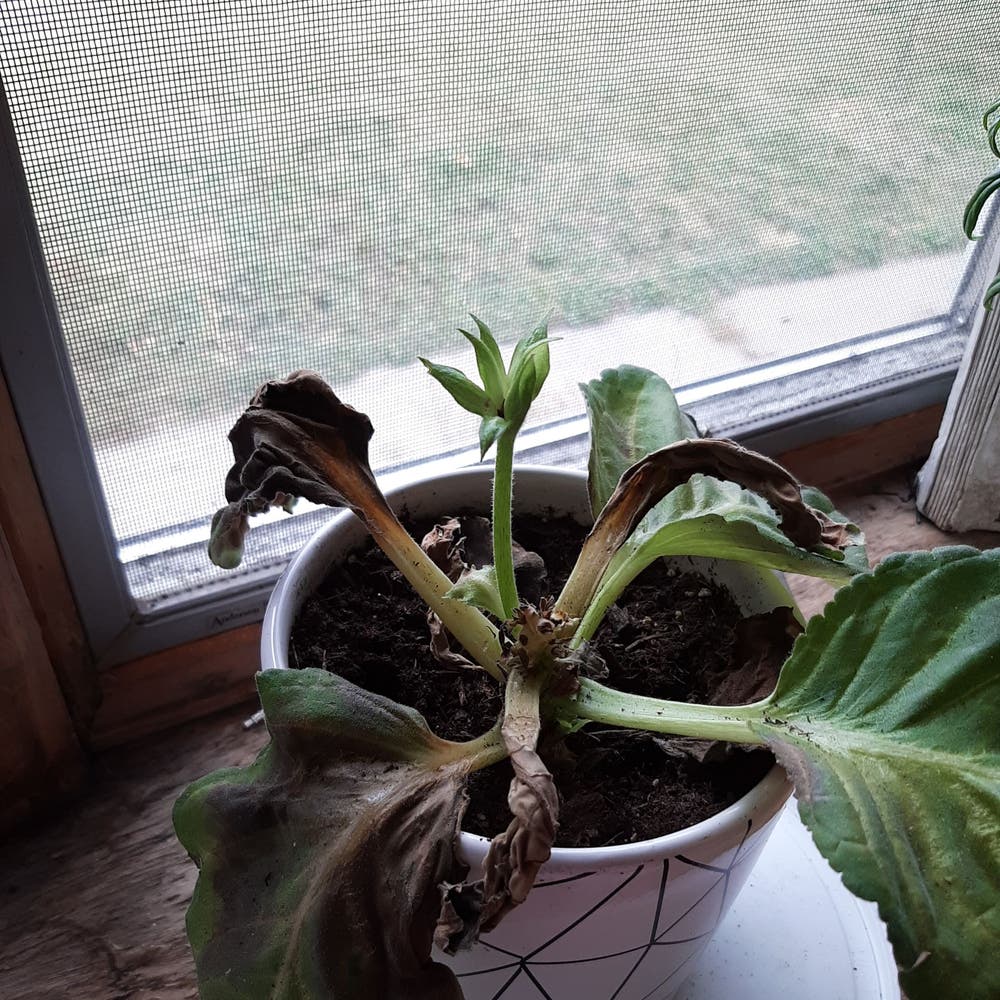
After the initial cut or division, root development is your first high-five from nature. For stem cuttings, the appearance of white, firm roots is like a secret nod from the underground. If you're using a clear container, a visible root network is your cue to start planning the transplant party. With seeds, the unfurling of the first true leaves is your green light to celebrate.
🌱 First Shoots
When new shoots emerge, it's like your plants are stretching their arms after a long nap. This growth is a clear sign they're ready to rock their new world. Keep the champagne on ice, though; it's not quite time to transplant just yet.
Ongoing Care: Beyond the Rooting Stage
🌿 Transitioning to Regular Care
Once your Brazilian Edelweiss has passed the rooting rites of passage, it's time to shift gears. Transplanting is like moving day—exciting but critical. Start with a pot that has good drainage and a soil mix that's like a cozy bed for your plant's roots. Keep the soil moist but not soggy; think of it as the Goldilocks zone for watering.
🌱 Tips for the Next Phase
After transplanting, it's all about the slow and steady race to maturity. Monitor your plants like a hawk, adjusting light and water as if you're tuning a guitar—too tight and the strings will snap, too loose and the music falls flat. Remember, every plant has its own tempo.
Overcoming Propagation Pitfalls
🐛 Common Hiccups: Identifying and Solving Issues
Root rot can turn your propagation dreams into a soggy nightmare. Prevention is your best friend here. Ensure your soil drains like a champ and your watering can isn't flooding the scene. If rot does strike, it's time for surgery—snip above the affected area and start over with drier conditions.
Wilting cuttings are sending you an SOS. They're likely parched or drowning. Aim for that sweet spot where the soil feels like a wrung-out sponge—moist, not a swamp. If they're still drooping, they might need a pep talk or a better light source.
Pest control is like playing whack-a-mole in your mini garden. Keep your eyes peeled for any critters trying to crash the party. A good sterilization routine for your tools and pots is the equivalent of bouncer at the door. If pests do infiltrate, show them the exit with a gentle insecticide or neem oil.
Remember, every hiccup is a chance to flex your green thumb and get wiser. Stay vigilant, adjust as needed, and keep the propagation party going strong.
⚠️ Safety First
This content is for general information and may contain errors, omissions, or outdated details. It is not medical, veterinary advice, or an endorsement of therapeutic claims.
Always consult a qualified healthcare professional before using any plant as food, medicine, or supplement.
Never eat any plant (or feed one to pets) without confirming its identity with at least two trusted sources.
If you suspect poisoning, call Poison Control (800) 222-1222, the Pet Poison Helpline (800) 213-6680, or your local emergency service immediately.
Spotted an error? Please report it here.
Propagate your Brazilian Edelweiss effortlessly 🌱 with Greg's tailored reminders for watering, sunlight, and community support to overcome every propagation challenge.