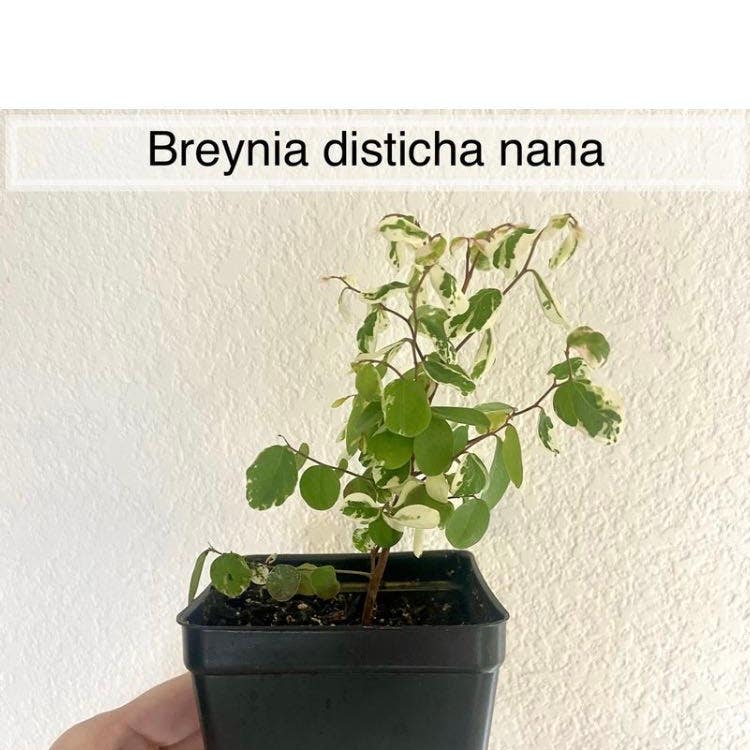
❄️ Ultimate Guide to Propagating Mini Snow Bush
Breynia disticha 'Nivosa'
By the Greg Editorial Team
Oct 16, 2024•6 min read
This article was created with the help of AI so we can cover more plants for you. May contain errors. See one? Report it here.
Transform your garden with thriving Mini Snow Bush propagation techniques 🌱 for vibrant new growth and endless beauty!
- 🌱 Select healthy 4-6 inch stems with two nodes for successful Mini Snow Bush propagation.
- 💧 Maintain consistent moisture and humidity for optimal root development and seed germination.
- 🕒 Spring and early summer are the best times for propagating Mini Snow Bush effectively.
Asexual Propagation Techniques
🌱 How to Propagate from Cuttings
To start propagating your Mini Snow Bush, selecting healthy stems is crucial. Look for stems that are 4-6 inches long and have at least two nodes for the best chance of success.
Next,root developmentttings by trimming the cut end at a 45-degreindirect sunlighthnique increases the surface area, allowing for better water absorption.
Applying rooting hormone is optional but can significantly enhance root developmroot If you choose to use it, dip the cut end into the hormone before planting.
When planting, insert the cuttings into a well-draisoil potting mix. This ensures that excess water can escape, preventing rot.
Watering is essential; keep the soil coright soil moist but avoid sogginess. Overwatering can lead to root rot, which is a common issue.
To maintain humidity, cover the cuttings with a plastic bag or a humidity dome. This creates a mini greenhouse effect, promoting faster root growth.
Finally, be patient! Expect roots to develop in about 2-4 weeks. During this time, check for moisture and adjust as needed.
🌼 How to Propagate from Seeds
Seed propagation is a bit more challenging but rewarroot. Start by collecting seeds from mature flower heads once they turn brown.
Prepare your soil using a sterile seed-starting mix. This helps prevent disMini Snow Bush hinder germination.
When sowing seeds, scatter them on the surface and lightly press them into the soil. This ensures good contact with the soil for germination.
Watering is crucial; mist the soil to avoid displacing the seeds. Gentle moisture helps them settle in without being washed away.
For optimal germination, maintain warmth between 70-75°F and high humidity. These conditions are essential for successful seed sprouting.
Typically, germintemperatures within 2-3 weeks. Keep an eye on your seeds and adjust conditions as necessary.
💧 How to Propagate in Water
Water propagation is the easiest method for beginners.temperatureelecting cuttings using the same technique as for soil propagation.
Place your cuttings in a clear glaHumidityr filled with water. This allows you to monitor root development easily.
Position the container in bright, indirect sunlight. Too much direct sunlight can heat the water and harm the cuttings.
Change the water every few days to prevent stagnation. Fresh water promotes healthy root growth and prevents bacteria.
Roots should appear within 2-3 weeks. Once they are a few inches long, you can transfer them to soil if desired.
🌍 How to Propagate in Soil
Soil propagation is another effective method. Begin by choosing the right soil; a well-draining potting mix is ideal.
Plant your cuttings by following the same steps as for cutting propagation. Ensure they are securely placed in twatering
Water the cuttings, keeping the soil moist but not waterlogged. This balance is crucial for healthy root development.
Cover the cuttings with a humidity dome to maintain moisture levels. This helps create a stable environment for roolight
Monitor your cuttings regularly, checking for root development in about 2-4 weeks. Adjust watering Pestsumidity as needed to ensure success.
With these techniques, you can successfully propagate your Mini Snow Bush and enjoy its beauty in multiple locations. Next, let’s explore the best timing and conditions for propagation to maximize your success.
Timing and Conditions for Propagation
Best Time of Year for Propagation 🌱
Spring and early summer are the prime seasons for propagating your Mini Snow Bush. During these months, the plant is actively growing, making it more receptive to new cuttings or seeds.
Avoid attempting propagation during extreme temperatures or when the plant is in dormancy. This can lead to lower success rates and wasted effort.
Ideal Temperature and Humidity Levels 🌡️
For optimal growth, maintain a temperature range of 70-80°F (21-27°C). ThPruning Shearsurages healthy root development and overall plant vigor.
Humidity is equally important; aim for levels between 60-80%. High humidity creatContainerscive environment for successful propagation, helping cuttings retain moisture and thrive.
drainageg attention to these timing and envHumidity Domectors, you set the stage for a flourishing propagation experience. Next, let’s explore common challenges you might face and how to tackle them effectively.
Common Challenges and Solutions
Low Success Rates and Troubleshooting 🌱
Propagation can be tricky, and low success rates are oSoil Typeurce of frustration. Common issues include rotting cuttings, inadequate humidity, and poor light conditions.
To tackle these problems, start by adjusting your watering practices. Ensure the soil is moist but not soggy, as overwatering can lead to rot.
Increasing humidity is also crucial; consider using a humidity dome or misting the cuttings regularly. Lastly, ensure your cuttings receive adequate light—briMini Snow Bushsunlight is ideal for healthy growth.
Pests and Diseases During Propagation 🐛
Pests can be a real headache during propagation. Aphids and spider mites are common culprits, often leaving behind yellowing leaves and webbing as telltale signs.
To prevent infestations, conduct regular inspections of your plants. If you spot any pests, using insecticidal soap can be an effective solution. Keeping your propagation area clean and well-ventilated will also help deter unwanted visitors.
By addressing these challenges proactively, you can significantly improve your propagation success rates. Now that you're equipped with troubleshooting tips, let’s explore the best timing and conditions for propagation.
Tools and Materials Needed
Essential Tools for Propagation 🌱
To get started with propagating your Mini Snow Bush, you'll need a few essential tools.
Pruning Shears: These are crucial for making clean cuts on your cuttings. A sharp pair ensures minimal damage to the plant, promoting better rooting.
Containers: Small pots or trays are ideal for planting your cuttings or seeds. Choose containers with drainage holes to prevent waterlogging.
Humidity Dome: This tool helps maintain moisture levels during the rooting process. It creates a mini greenhouse effect, which is vital for successful propagation.
Recommended Soil and Containers 🪴
Choosing the right soil and containers can make all the difference in your propagation success.
Soil Type: Opt for a well-draining potting mix or a sterile seed-starting mix. This ensures that your cuttings or seeds have the best environment to thrive.
Container Size: For cuttings, small pots (4-6 inches) work well. If you're starting from seeds, seed trays are a great choice to maximize space and efficiency.
With the right tools and materials in hand, you're well on your way to successfully propagating your Mini Snow Bush. Next, let’s explore the best timing and conditions for propagation to ensure optimal growth.
⚠️ Safety First
This content is for general information and may contain errors, omissions, or outdated details. It is not medical, veterinary advice, or an endorsement of therapeutic claims.
Always consult a qualified healthcare professional before using any plant as food, medicine, or supplement.
Never eat any plant (or feed one to pets) without confirming its identity with at least two trusted sources.
If you suspect poisoning, call Poison Control (800) 222-1222, the Pet Poison Helpline (800) 213-6680, or your local emergency service immediately.
Spotted an error? Please report it here.
Propagating your Mini Snow Bush is easy and rewarding 🌿 with Greg's tailored tips and reminders to help your cuttings thrive every step of the way!