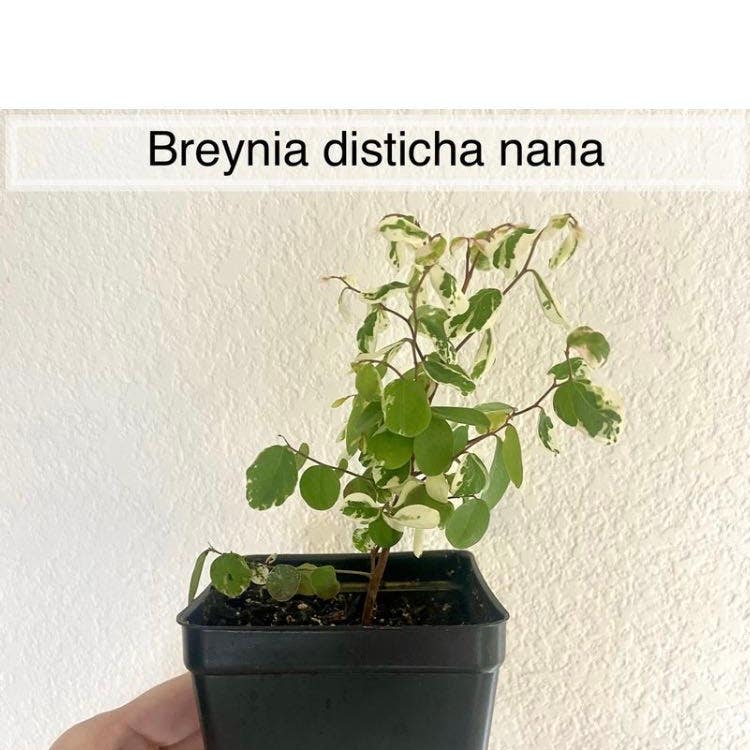
❄️ Step-by-Step Guide to Repotting Your Mini Snow Bush
Breynia disticha 'Nivosa'
By the Greg Editorial Team
Oct 16, 2024•8 min read
This article was created with the help of AI so we can cover more plants for you. May contain errors. See one? Report it here.
Unlock your Mini Snow Bush's full potential by spotting the signs it needs repotting! 🌱✨
- 🌱 Signs of root bound include roots out of drainage holes or circling the pot.
- 🌼 Wilting or yellowing leaves indicate your Mini Snow Bush may need repotting.
- 🏺 Repot in early spring with a pot 1-2 inches larger for optimal growth.
Signs That Your Mini Snow Bush Needs Repotting
🌱 Root Bound Indicators
One of the first signs that your Mini Snow Bush needs repotting is when you notice roots growing out of the drainage holes. This indicates that the plant has outgrown its current pot and is seeking more space.
Another clear indicator is when roots start circling the pot. This behavior shows that the plant is becoming root-bound, which limits its ability to absorb nutrients and water effectively.
🚫 Growth Stagnation
If your Mini Snow Bush is experiencing a lack of new growth or appears wilting despite proper care, it may be time to repot. Yellowing leaves or leaf drop are also red flags that suggest your plant is struggling.
These symptoms often indicate that the plant is not getting the nutrients it needs due to restricted root space.
🪴 Soil Degradation
Soil quality is crucial for your plant's health. If you find that the soil is compacted and not retaining moisture, it’s a sign that it’s time for a change.
Additionally, the presence of mold or algae on the soil surface can indicate poor drainage or overwatering. Both conditions can harm your Mini Snow Bush and warrant immediate repotting.
Recognizing these signs early can help ensure your Mini Snow Bush thrives in its new environment. Next, let’s explore the best time of year to repot your plant for optimal growth.
Best Time of Year to Repot
🌱 Seasonal Considerations
The best time to repot your Mini Snow Bush is early spring, just before the growing season kicks into high gear. Avoid repotting during dormancy, which typically spans late fall to winter, as this can stress the plant.
🌡️ Environmental Factors
Temperature plays a crucial role in successful repotting. Ensure that temperatures are consistently above 60°F (15°C) to promote healthy growth.
Light conditions are equally important. Aim to repot during a period of bright, indirect light to minimize stress on your plant. This helps your Mini Snow Bush adjust more easily to its new environment.
By timing your repotting right, you set the stage for vibrant growth and a thriving plant. Next, let’s dive into the step-by-step process of repotting your Mini Snow Bush.
Step-by-Step Repotting Process
🌱 Preparing the New Pot
Choosing the right pot is crucial for your Mini Snow Bush. Opt for a pot that is 1-2 inches larger in diameter than the current one to give the roots room to grow.
Ensure the new pot has adequate drainage holes. This prevents water from pooling, which can lead to root rot.
Before planting, clean the pot with a mild bleach solution. This simple step helps prevent disease transmission and keeps your plant healthy.
🪴 Removing the Plant from the Old Pot
To start, gently squeeze the sides of the old pot. This loosens the soil and makes it easier to remove the plant.
Next, tilt the pot and carefully slide the plant out, supporting the base. This method minimizes stress on the roots and helps maintain their integrity.
🔍 Inspecting and Trimming the Root System
Once out, examine the root system for any signs of rot or damage. Healthy roots should be firm and white; any mushy or dark roots need attention.
Trim away any dead or mushy roots using sterilized scissors. If the plant is root-bound, gently tease apart the roots to encourage new growth.
🌼 Placing the Plant in the New Pot
Start by adding a layer of fresh potting mix to the bottom of the new pot. This provides a stable base for your Mini Snow Bush.
Position the plant in the center, ensuring the top of the root ball is level with the pot rim. Fill in around the roots with potting mix, gently pressing down to eliminate air pockets.
💧 Watering and Settling the Soil
Water the plant thoroughly until excess drains from the bottom. This helps settle the soil and ensures the roots are well-hydrated.
Allow the soil to settle and check if any additional soil is needed. If necessary, water lightly again to maintain moisture without overdoing it.
With your Mini Snow Bush repotted, you're one step closer to a thriving plant. Next, let's explore the best practices for post-repotting care to ensure a smooth transition.
Pot Material Options
Pros and Cons of Each Material 🌱
When choosing a pot for your Mini Snow Bush, consider the material carefully.
Ceramic
- Pros: Ceramic pots are visually appealing and retain moisture well, making them a stylish choice for your plant.
- Cons: However, they can be heavy and may crack in freezing temperatures, which can be a concern in colder climates.
Plastic
- Pros: Lightweight and easy to move, plastic pots offer convenience, especially for larger plants.
- Cons: They often lack breathability, increasing the risk of root rot if not monitored closely.
Terracotta
- Pros: Terracotta pots excel in drainage and allow for air exchange, promoting healthy root growth.
- Cons: They can dry out quickly, meaning you'll need to water more frequently to keep your Mini Snow Bush happy.
Recommended Pot Materials for Optimal Growth 🌟
For the best results, terracotta is your top choice due to its excellent drainage capabilities.
If you opt for ceramic pots, just ensure they have drainage holes to prevent water from pooling at the bottom.
Choosing the right pot material is crucial for your plant's health, so weigh your options carefully. This decision sets the stage for successful growth and vibrant foliage.
Next, let’s explore the ideal soil requirements for your Mini Snow Bush to thrive.
Soil Requirements
🌱 Ideal Potting Mix
For your Mini Snow Bush, a well-draining potting soil is essential. A recommended mix includes potting soil with added perlite or sand to enhance drainage.
💧 Importance of Drainage in Soil Selection
Good drainage is crucial to prevent root rot and support healthy growth. If you notice water pooling on the surface or slow absorption, your soil may not be draining properly.
🛠️ How to Create a Custom Soil Mix
Creating your own soil mix is straightforward.
- Combine equal parts potting soil, perlite, and coarse sand.
- Adjust the ratios based on your plant's drainage needs and pot size.
This custom blend will help ensure your Mini Snow Bush thrives in its new home.
With the right soil in place, you're well on your way to a successful repotting. Next, let’s explore the best time of year to repot your plant for optimal results.
Post-Repotting Care
💧 Watering Schedule
After repotting your Mini Snow Bush, start with an initial thorough watering. This helps settle the soil around the roots.
For follow-up care, water only when the top inch of soil feels dry, which is typically every 1-2 weeks. This prevents overwatering and encourages healthy root development.
☀️ Light Requirements
Position your plant in bright, indirect light to support its recovery. This light condition helps the plant acclimate without the stress of direct sun exposure.
For the first few weeks, avoid placing it in direct sunlight. This precaution helps prevent shock and allows the plant to adjust to its new environment.
👀 Monitoring for Transplant Shock
Keep an eye out for signs of transplant shock, such as wilting, yellowing leaves, or slowed growth. These symptoms indicate that your Mini Snow Bush may be struggling to adapt.
To mitigate shock, maintain stable conditions and avoid overwatering. Consistency in care will help your plant thrive in its new home.
With proper post-repotting care, your Mini Snow Bush will bounce back and flourish. Next, let’s explore common repotting mistakes to avoid for future success.
Common Repotting Mistakes
🌱 Overpotting vs. Underpotting
Choosing the right pot size is crucial for your Mini Snow Bush's health. Overpotting, or selecting a pot that's too large, can lead to excess moisture retention, which may cause root rot.
Conversely, underpotting restricts root growth and nutrient uptake. A pot that's too small can stunt your plant's development, leaving it struggling to thrive.
🧐 Ignoring Root Health
Inspecting and trimming the roots is essential for promoting healthy growth. Neglecting this step can lead to issues like root rot or stunted growth, which can be detrimental to your plant's overall health.
Healthy roots are the foundation of a thriving Mini Snow Bush. Regular checks can help you catch problems early and keep your plant flourishing.
🚿 Not Allowing for Drainage
Proper drainage is non-negotiable when repotting. Ensure all pots have drainage holes and use suitable soil mixes to prevent water from pooling.
Poor drainage can lead to root rot and plant decline, turning your care efforts into a struggle. Prioritize drainage to keep your Mini Snow Bush happy and healthy.
By avoiding these common mistakes, you set your Mini Snow Bush up for success. Next, let’s explore how to troubleshoot any issues that may arise after repotting.
Troubleshooting
What to Do If Signs of Stress Appear 🌱
If your Mini Snow Bush shows signs of stress, the first step is to check the soil moisture. Adjust your watering schedule accordingly to ensure the plant isn't sitting in overly wet soil.
Consider moving the plant to a shadier location temporarily. This can help reduce stress from excessive light exposure, allowing it to recover.
Identifying and Solving Common Issues 🕵️♀️
One common issue is root rot, which can occur if the plant has been overwatered. If you notice mushy roots, remove the affected parts and repot the plant in fresh, dry soil.
Wilting is another sign that something's off. Check for overwatering, as this can lead to root issues. Adjust your care routine to promote healthier growth and recovery.
⚠️ Safety First
This content is for general information and may contain errors, omissions, or outdated details. It is not medical, veterinary advice, or an endorsement of therapeutic claims.
Always consult a qualified healthcare professional before using any plant as food, medicine, or supplement.
Never eat any plant (or feed one to pets) without confirming its identity with at least two trusted sources.
If you suspect poisoning, call Poison Control (800) 222-1222, the Pet Poison Helpline (800) 213-6680, or your local emergency service immediately.
Spotted an error? Please report it here.
Repotting your Mini Snow Bush is easy as pie 🥧 when you follow these steps, and with Greg's tailored watering reminders and soil tips, you'll ensure your plant flourishes in its new pot!