🌸 How Do I Propagate My Paphiopedilum 'Maudiae Femma'?
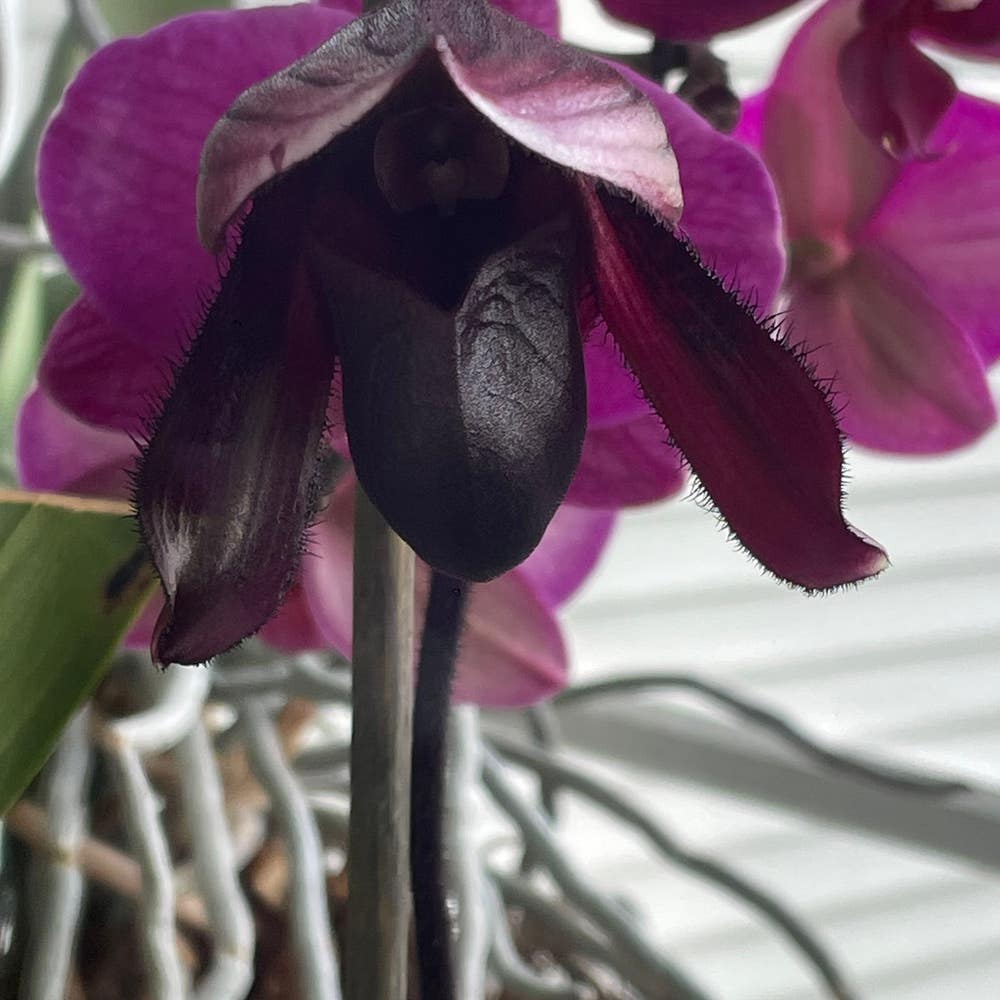
Paphiopedilum 'Maudiae Femma'
By the Greg Editorial Team
Mar 06, 2024•5 min read
This article was created with the help of AI so we can cover more plants for you. May contain errors. See one? Report it here.
- 🌱 Timing is key: Propagate post-bloom for less stress on orchids.
- 🧼 Sanitize tools, avoid infection: Cleanliness ensures healthy divisions.
- 🌞💧 Optimal conditions are crucial: Light, moisture, and environment matter for success.
Step-by-Step Guide to Division
🕰️ When to Divide Your Orchid
Timing is crucial for successful orchid division. Aim for the post-blooming phase when the plant is less stressed. This is when your Paphiopedilum 'Maudiae Femma' is most receptive to propagation.
🛠️ The Division Process
Preparing to Divide
Sanitize your tools. A sharp knife or pruning shears disinfected with rubbing alcohol will minimize infection risks.
Executing the Division
Gently unpot the orchid, shaking off old potting media. Look for natural segments in the root structure. Each new section should have both roots and at least one growth point, such as a shoot or pseudobulb.
🏺 Planting the Divisions
Choose pots with ample drainage and fill them with fresh potting mix. Plant each division at the same depth it was growing before.
🌱 Post-Division Care
Maintain consistent soil moisture but avoid waterlogging. Bright, indirect light is ideal for your new orchids. Hold off on fertilizing until they've established. Vigilance for pests or disease is key; treat issues early with insecticidal soap or neem oil. Look for new leaf growth as a sign your orchid is acclimating to its new pot.
Cultivating New Life: Offsets and Keikis
🌱 Spotting and Encouraging Keiki Growth
Keikis, or orchid babies, are a sign your Paphiopedilum 'Maudiae Femma' is ready to multiply. These mini-me's sprout from the mother plant, complete with roots and leaves. Spotting them is like finding a hidden gem; look for tiny versions of the parent, often along the stem or base.
To nudge your orchid into keiki production, you can apply a hormone paste to the nodes. It's not a magic potion, but with some luck, you'll see growth instead of blooms. Remember, patience is key; it can take weeks before you see the first signs of keiki leaves unfurling.
🪓 The Separation Ceremony
When your keiki has roots about 1-3 inches long, it's time for independence. Sterilize your cutting tools with rubbing alcohol—think surgery cleanliness. Snip the keiki free, ensuring you don't damage its roots or the mother plant.
Plant your new orchid in a special potting mix designed for young plants. These little guys need a bit more TLC, so consider a humidity boost and a tad less light than their parents. Care for them as you would the original, but with the gentleness of handling a fine silk scarf.
Remember, you don't have to separate keikis. If you're not ready to play plant surgeon, they can stay attached, forming an orchid family tree. But if you do take the plunge, you'll have a clone of your beloved 'Maudiae Femma' to nurture or share.
The Science of Propagation: Tissue Culture
🧫 Tissue Culture Explained
Tissue culture is the high-tech endgame of plant propagation, a method that feels like science fiction but is grounded in meticulous science. It's the process of creating new plants from just a few cells in a controlled, sterile environment. Sterility is the name of the game here; think of it as performing surgery on plants where every instrument and surface must be pristine.
Getting Technical
Starting tissue culture at home isn't for the faint-hearted, but it's a rewarding challenge for those with a DIY spirit and a clean work area. You'll need a scalpel for precision cuts, petri dishes as your micro-garden beds, and a nutrient-rich culture medium where your plant cells will multiply. The explant, or tissue sample, is the hero in this story. Choose young, vigorous plant parts for the best shot at success. Remember, the younger the tissue, the better it will respond to the culture conditions and the less likely it is to bring along unwanted microbial hitchhikers.
Ensuring Propagation Success
🌱 Optimal Conditions for New Orchids
Creating the perfect environment for your propagated orchids is non-negotiable. They're not just plants; they're your green babies, and they demand VIP treatment.
Light and Temperature
Bright indirect light is the sweet spot. Like Goldilocks, your orchids want conditions that are just right—not too hot, not too cold. A consistent temperature without drafts keeps your orchids from throwing a fit.
Humidity and Air Circulation
Humidity is your orchid's bestie, but don't let it turn into a steamy mess. Good air circulation is your invisible shield against fungal doom. Make sure your propagation area isn't as lifeless as a moon landscape.
Watering Wisdom
Watering is a delicate dance. Underwatering leaves your orchids gasping for a drink, while overwatering drowns their dreams. Aim for moist, but not soggy, soil. Your watering schedule should be as consistent as your favorite morning routine.
🛠 Troubleshooting Common Setbacks
When things go south, don't just stand there like a deer in headlights. Act fast. Yellowing leaves or stunted growth are your orchid's SOS signals.
The Hydration Equation
If your orchid's leaves look more wrinkled than a linen shirt in a suitcase, it's time to up the hydration ante. Conversely, if the roots are rotting, it's time to dial it back and ensure your potting mix would impress even the pickiest of drain experts.
Pest Patrol
Keep an eye out for uninvited guests. Pests and diseases can crash your propagation party faster than a bull in a china shop. Treat promptly with insecticidal soap or neem oil, because when it comes to bugs, it's no more Mr. Nice Plant Parent.
Cleanliness is Key
Sterilize your tools like a surgeon prepping for operation. A clean workspace is the stage for your orchid's propagation performance. Remember, cleanliness is next to orchidliness.
Monitoring and Adjustment
Stay vigilant. Monitor your orchids like a hawk and be ready to tweak your care routine. They're not static decorations; they're living, breathing entities that respond to your every move. Keep an eye out for new growth—it's the first sign you're on the right track.
⚠️ Safety First
This content is for general information and may contain errors, omissions, or outdated details. It is not medical, veterinary advice, or an endorsement of therapeutic claims.
Always consult a qualified healthcare professional before using any plant as food, medicine, or supplement.
Never eat any plant (or feed one to pets) without confirming its identity with at least two trusted sources.
If you suspect poisoning, call Poison Control (800) 222-1222, the Pet Poison Helpline (800) 213-6680, or your local emergency service immediately.
Spotted an error? Please report it here.
Cultivate new Paphiopedilum 'Maudiae Femma' orchids 🌸 effortlessly with Greg's environmental monitoring and care reminders, ensuring your propagation success from these expert tips!