Ultimate Guide to Propagating Acalypha reptans
Acalypha chamaedrifolia
By the Greg Editorial Team
Jul 23, 2024•5 min read
This article was created with the help of AI so we can cover more plants for you. May contain errors. See one? Report it here.
Transform your space into a green sanctuary by mastering Acalypha reptans propagation. 🌿✨
- 🌱 Choose healthy stems with leaf nodes for better propagation success.
- 🌞💦 Provide warm, bright, moist conditions for rooting cuttings and germinating seeds.
- 🌿 Divide in spring or when crowded, ensuring balanced roots and shoots.
Stem Cutting Propagation
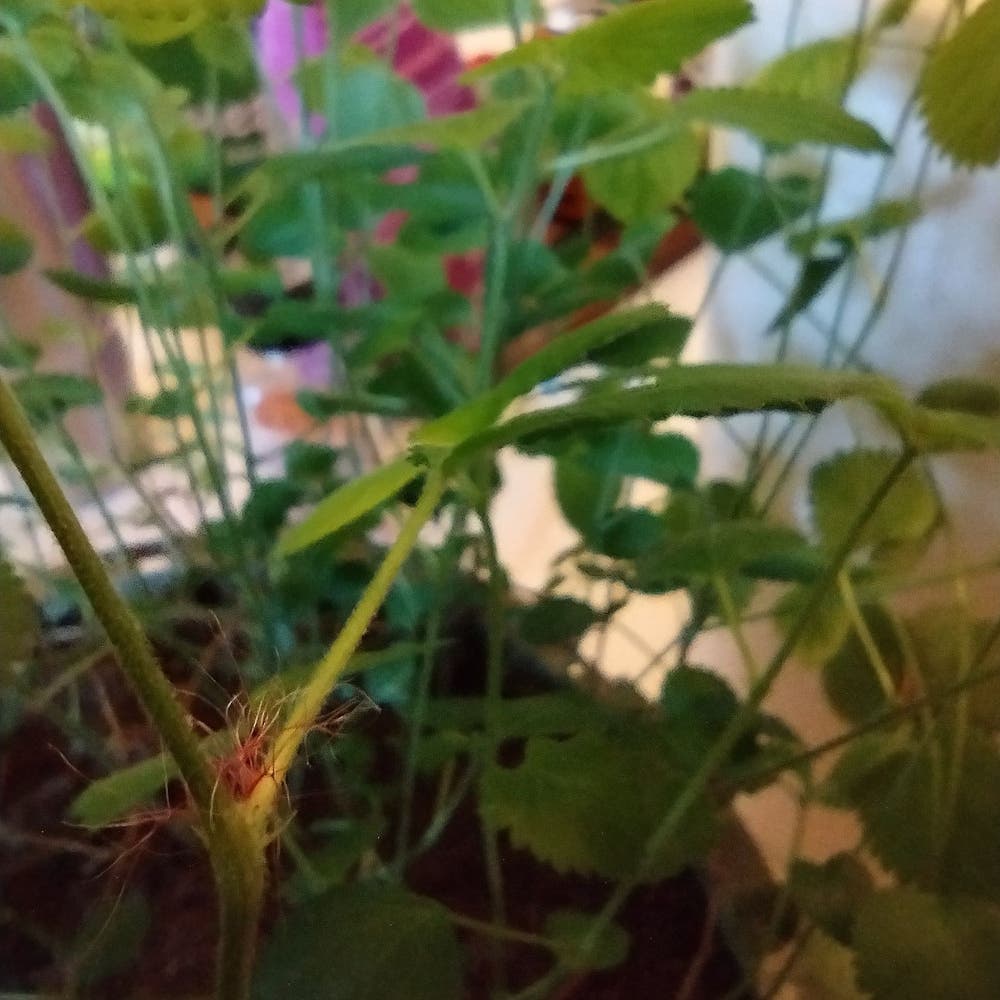
🌱 Selecting Stems
Choosing the right stem is the first step in successful Acalypha reptans propagation. Here's what to look for:
- Vibrancy: Select stems that appear robust and vigorous.
- Health: Ensure there are no signs of disease or pest infestation.
- Nodes: Opt for stems with several leaf nodes, which are the potential root growth points.
🛠 Preparing Cuttings
Once you've selected the perfect stem, it's time to prepare your cuttings:
- Sterilize your tools: Use shears or a knife that's been cleaned to prevent infection.
- Make the cut: Snip below a leaf node, ideally at a 45-degree angle, to increase the area for root growth.
- Remove lower leaves: This reduces moisture loss and prevents rot.
- Rooting hormone: Dip the cut end into a rooting hormone to enhance root development.
🌱 Rooting and Planting
Now, let's get those cuttings rooted:
- Soil medium: Plant the cutting in well-draining soil, about an inch deep, with at least one node buried.
- Moisture balance: Keep the soil moist but not waterlogged to encourage rooting without causing rot.
- Environment: Choose a warm, bright spot without direct sunlight to provide the ideal conditions for root growth.
Division Propagation
🌱 When to Divide
Early spring is the prime time to divide Acalypha reptans, as the plant is entering a period of active growth. However, division can be done successfully throughout the year if necessary. Look for signs that your plant is ready, such as overcrowding or a decline in the center of the plant.
🌿 Separating Roots
Gently remove the plant from its pot to expose the root ball. Look for natural separations where the plant can be divided with minimal stress. Use your hands or a sterile knife for stubborn roots, ensuring each section has a balance of roots and shoots.
- Gather tools: gloves, a sharp knife, and fresh potting mix.
- Work in a space prepared for some mess.
🌱 Transplanting Divisions
Immediately pot each division into its own container with fresh, well-draining soil. Plant at the same depth as the original to avoid stress. Water thoroughly to settle the soil around the new roots and maintain consistent moisture without overwatering.
- Choose pots with ample drainage.
- Mimic the original growing conditions to ease the transition.
Air Layering Technique
🌱 Choosing a Stem
Selecting the right stem is the first crucial step in air layering Acalypha reptans. Look for a stem that is:
- Healthy and vigorous, indicating it can sustain new growth.
- Stout enough to support itself once it becomes an independent plant.
🌿 Creating Rooting Environment
Creating a conducive rooting environment involves a few key steps:
- Make two parallel cuts around the stem and remove the bark between them to encourage root growth.
- Apply rooting hormone to the exposed inner tissue to stimulate root development.
- Wrap the area with moist sphagnum moss, securing it with clear plastic wrap to create a mini greenhouse effect.
🌱 Detaching and Planting
Patience is vital in this final stage of air layering. Here's what to do:
- Monitor the wrapped stem until you see firm, white roots through the plastic.
- Once sufficient roots have formed, cut the stem below the new roots to detach the new plant.
- Transplant the new Acalypha reptans into a pot with well-draining soil, keeping it shaded and moist until it's well established.
Seed Propagation
🌱 Collecting Seeds
Collecting seeds from Acalypha reptans is a straightforward process, but timing is crucial. Wait for the seed pods to dry out on the plant; they're ready when they turn brown and crack open easily. Here's how to do it:
- Choose a dry, sunny day to avoid moisture, which can lead to mold.
- Gently remove the seed pods from the plant and place them in a paper bag.
- Shake the bag or open the pods to release the seeds.
- Store the seeds in a cool, dry place until you're ready to sow them.
🌿 Sowing Seeds
Sowing Acalypha reptans seeds requires some prep to increase the chances of successful germination. Follow these steps:
- Use a well-draining seed starting mix to fill your trays or pots.
- Sow the seeds on the surface, as they need light to germinate. Press them gently into the soil without covering them.
- Mist the soil lightly to keep it moist but not waterlogged.
- Cover the trays or pots with a clear plastic lid or wrap to maintain humidity.
🌱 Germination Care
Creating the right conditions for Acalypha reptans seeds to germinate is like setting up a mini greenhouse. Keep these tips in mind:
- Place the seed trays in a warm area with temperatures around 70-75°F (21-24°C).
- Ensure indirect light; direct sunlight can be too intense for the delicate seedlings.
- Check daily to maintain soil moisture and watch for mold or pests.
- Once seedlings emerge, remove the plastic cover and continue to keep the soil moist.
- When seedlings have a couple of true leaves, they can be gently transplanted into individual pots.
Troubleshooting Common Issues
🌱 Rooting Challenges
Rooting can be tricky, but don't let that discourage you. Here's how to tackle common root development issues:
- Ensure cuttings are healthy and the medium is sterile to prevent root rot.
- Balance moisture levels; too much invites fungi, too little hinders growth.
- If roots are shy, consider a rooting hormone and verify node placement.
🦠 Disease Prevention
Fungal infections can be a real buzzkill for your propagation efforts. Keep them at bay with these tips:
- Maintain good airflow around your plants and opt for a fungicide if necessary.
- Sterilize your tools and containers to prevent the spread of pathogens.
- Watch for early signs of disease, like discolored leaves or stems, and act swiftly.
🌱 Propagation Failures
Sometimes, despite our best efforts, propagation doesn't go as planned. Here's how to increase your chances of success:
- Start with the right conditions: well-draining soil, adequate light, and proper humidity.
- Avoid overwatering; soggy soil is a playground for pests and diseases.
- Be patient and adjust one variable at a time if growth is slow or stalled.
⚠️ Safety First
This content is for general information and may contain errors, omissions, or outdated details. It is not medical, veterinary advice, or an endorsement of therapeutic claims.
Always consult a qualified healthcare professional before using any plant as food, medicine, or supplement.
Never eat any plant (or feed one to pets) without confirming its identity with at least two trusted sources.
If you suspect poisoning, call Poison Control (800) 222-1222, the Pet Poison Helpline (800) 213-6680, or your local emergency service immediately.
Spotted an error? Please report it here.
Ensure your Acalypha reptans cuttings thrive 🌿 with Greg's custom reminders for optimal moisture and light, making propagation a breeze.