How Do I Cure Bromeliad Medusa Root Rot?
Neoregelia 'Medusa'
By the Greg Editorial Team
Jun 18, 2024•4 min read
This article was created with the help of AI so we can cover more plants for you. May contain errors. See one? Report it here.
Rescue your Bromeliad Medusa from root rot's clutches 🌿 and ensure its vibrant future with these proven tips.
- Yellow leaves and mushy roots signal Bromeliad Medusa root rot.
- Repot with well-draining soil after removing damaged roots.
- Adjust watering and environment to prevent future root rot.
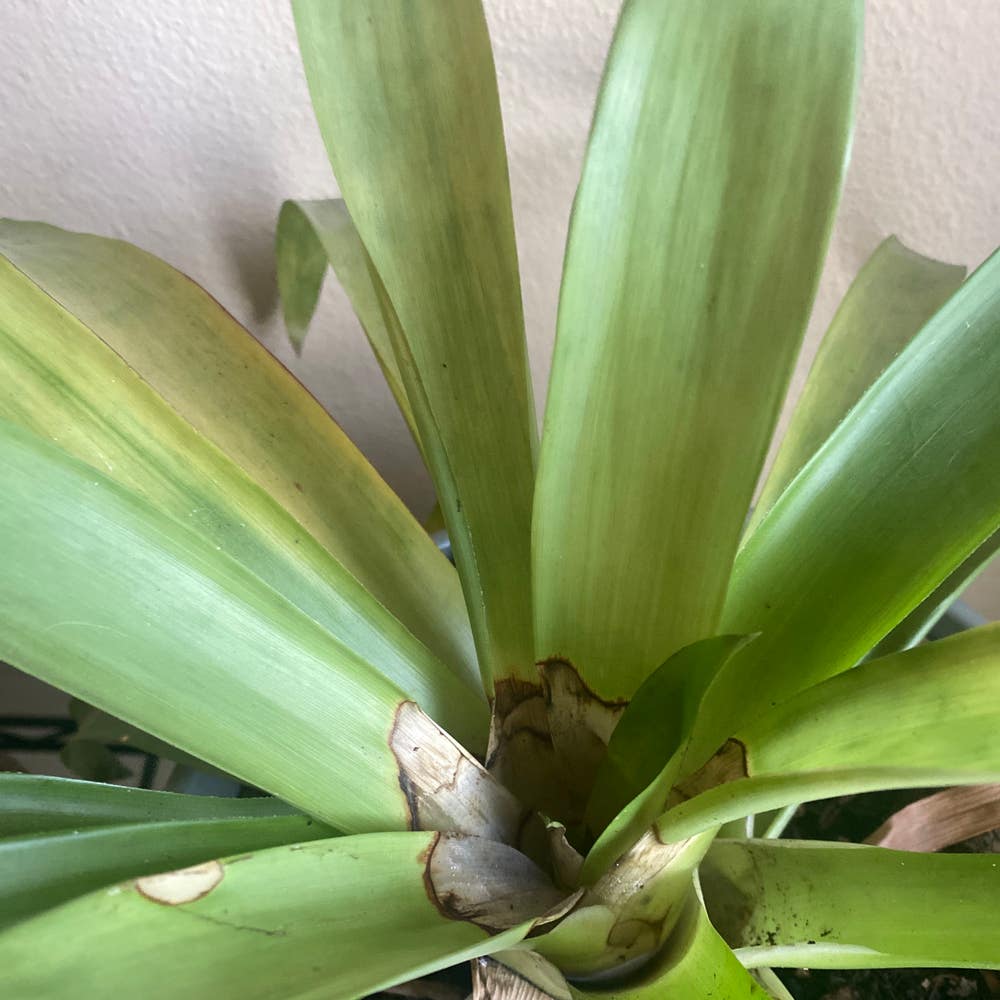
Spotting the Red Flags: Identifying Root Rot in Bromeliad Medusa
🚨 Visual Symptoms and What They Mean
Yellowing leaves on your Bromeliad Medusa are like a check engine light; they're warning you. When the leaves droop and lose their vibrant color, it's time to pay attention. Mushy roots are a definitive sign that your plant's health is compromised.
🕵️ The Inspection Process
To confirm root rot, think of yourself as a plant detective. Gently remove your Bromeliad Medusa from its pot and examine the roots. Healthy roots are firm and white, while rotten ones are mushy and brown. A foul odor? That's the smoking gun, indicating decay. If you spot mold, that's another red flag waving at you to take action.

The Rescue Operation: Treating Root Rot in Bromeliad Medusa
🌱 Root Triage and Soil Assessment
Gently unearth your Bromeliad Medusa, shaking off the old soil to expose the root system. Healthy roots should be firm and white, while rotting ones are typically soft, brown, and possibly smelly. Snip the compromised roots with sterilized shears, leaving only the strong survivors.
🌿 The Repotting Procedure
Select a pot with drainage holes and fill it with a well-draining soil mix, tailored for bromeliads. Repot your plant, ensuring it's not buried too deep to prevent moisture accumulation around the base. Water sparingly, granting your Bromeliad Medusa a chance to thrive anew.

Water Wisely: Adjusting Irrigation to Prevent Root Rot
💧 Fine-Tuning Watering Habits
Determining the optimal watering schedule for your Bromeliad Medusa can be like solving a puzzle. Each piece, from soil moisture to seasonal changes, must fit perfectly. Start with a weekly watering routine, adjusting based on your plant's response.
The Importance of Soil Dryness
Letting the soil dry out between waterings is not just a suggestion; it's a commandment. Overwatering is a silent killer, and soggy soil is its weapon of choice. Ensure the top inch of soil feels dry before giving your plant another drink.
Monitoring Moisture Levels
Invest in a moisture meter or use the trusty finger test to gauge soil wetness. Remember, the goal is to quench your plant's thirst, not flood it. Adjust your watering frequency with the changing seasons—less in the dormant winter, more during active growth.
Watering Techniques
For potted plants, confirm your pot has drainage holes. This isn't a luxury; it's a necessity. When watering, do so evenly, allowing excess water to escape, ensuring no part of the soil is left thirsty—or drowning.
Seasonal Adjustments
As the seasons shift, so should your watering habits. In winter, your Bromeliad Medusa isn't as thirsty, so ease up on the hydration. When the sun's out and growth is in full swing, it's time to up the ante—just don't go overboard.
Water at the Base
Always water at the base of the plant to avoid wetting the leaves, which can invite unwanted fungal guests. Use room-temperature water to prevent shocking the roots, because no one likes a cold shower, especially not your Bromeliad.
Consistency is Key
Establish a routine that allows the soil to dry slightly between waterings. This isn't about being rigid but about providing a stable environment for your plant to thrive. Be consistent, but be smart—always check the soil before reaching for the watering can.

Shielding Your Bromeliad: Prevention Strategies
🌬️ Cultivating the Ideal Environment
Airflow is king when it comes to keeping your Bromeliad Medusa's roots in tip-top shape. Crank up that ceiling fan or pop a window to simulate a tropical breeze. Just dodge those drafty vents—they're more fickle than a cat in a yarn store.
Humidity—your plant craves it like a moth to a flame. If your leaves are curling like a bodybuilder's bicep, it's time to mist or get a humidifier in the game. But remember, too much of a good thing is a recipe for disaster; mold and bacteria love a humid rave.
🌞 Selecting the Right Spot and Soil
Location, location, location—it's not just for real estate. Bright, indirect light will keep your bromeliad beaming without the sunburn. Think of it as the perfect sun-kissed glow.
Potting mix—this isn't a one-size-fits-all hat. Go for well-draining soil that's as loose as a goose. It's like giving your plant's roots a VIP pass to the best drainage party in town.
Remember, folks, prevention isn't just a strategy; it's a lifestyle for your bromeliad. Keep these tips in your back pocket, and you'll be the plant whisperer of your neighborhood.
⚠️ Safety First
This content is for general information and may contain errors, omissions, or outdated details. It is not medical, veterinary advice, or an endorsement of therapeutic claims.
Always consult a qualified healthcare professional before using any plant as food, medicine, or supplement.
Never eat any plant (or feed one to pets) without confirming its identity with at least two trusted sources.
If you suspect poisoning, call Poison Control (800) 222-1222, the Pet Poison Helpline (800) 213-6680, or your local emergency service immediately.
Spotted an error? Please report it here.
Revive your Bromeliad Medusa from root rot and keep it thriving with Greg's moisture monitoring 🌱, ensuring your watering is always on point.