How Do I Propagate My Sedum clavatum?
Sedum clavatum
By the Greg Editorial Team
Jun 18, 2024•6 min read
This article was created with the help of AI so we can cover more plants for you. May contain errors. See one? Report it here.
Propagate your Sedum clavatum like a pro 🌵 and watch your succulent garden flourish effortlessly!
- Choose healthy leaves and stems for successful Sedum clavatum propagation.
- Let cuttings callous before planting in well-draining soil.
- Address issues promptly to prevent propagation pitfalls like root rot.
Propagating with Leaf Cuttings
🍃 Selecting the Best Leaves: What to Look For
Plump and healthy are your keywords when leaf-hunting for propagation. Inspect for a vibrant, unblemished appearance, and give a hard pass to any leaves that look like they've seen better days. Pests and diseases are party crashers you don't want.
🌱 Prepping Your Leaves: Getting Ready to Root
After playing bouncer to the unfit leaves, twist off the champions or make a clean snip with a sterile tool. Let them develop a callous for a day or two; think of it as their tiny shield against the underworld of rot.
🌿 Planting Your Leaf Cuttings: Soil and Placement Tips
Roots first, party later. Nestle your prepped leaves into well-draining soil, ensuring they don't dive too deep. A light watering settles them in—think of it as their welcome drink. Keep the soil moist but not a swamp; nobody likes soggy feet.

Growing New Plants from Stem Cuttings
🌱 Choosing the Right Stems: A Quick Guide
When eyeing your Sedum clavatum for potential stem cuttings, think like a talent scout. Healthy stems are your A-listers; they're robust, free of damage, and show no signs of disease. Look for stems with a few leaves and, if possible, a couple of nodes. Nodes are the stem's knuckles—where the magic (aka roots) will sprout.
🌿 Preparing Your Stem Cuttings: Steps for Success
Once you've selected your stem, it's showtime. Snip the stem just below a node using a clean, sharp blade—think of it as a precision haircut. Strip the leaves from the lower part of the cutting to avoid a soggy mess in the soil. If you're feeling fancy, a dip in rooting hormone can give your cuttings a leg-up, but it's not a deal-breaker.
🌱 Planting and Caring for Stem Cuttings: Ensuring Growth
Now, nestle your cuttings into a well-draining soil mix like they're tucking into bed. Keep the soil moist, but not waterlogged—think of it as a moist towelette, not a swamp. Place your potted cuttings in a spot that's warm and bright, but out of direct sunlight to avoid a crispy fate. Patience is key; roots don't grow overnight. Give them time, and soon, you'll have new Sedum clavatum plants to gush over.

Multiplying Through Offsets and Division
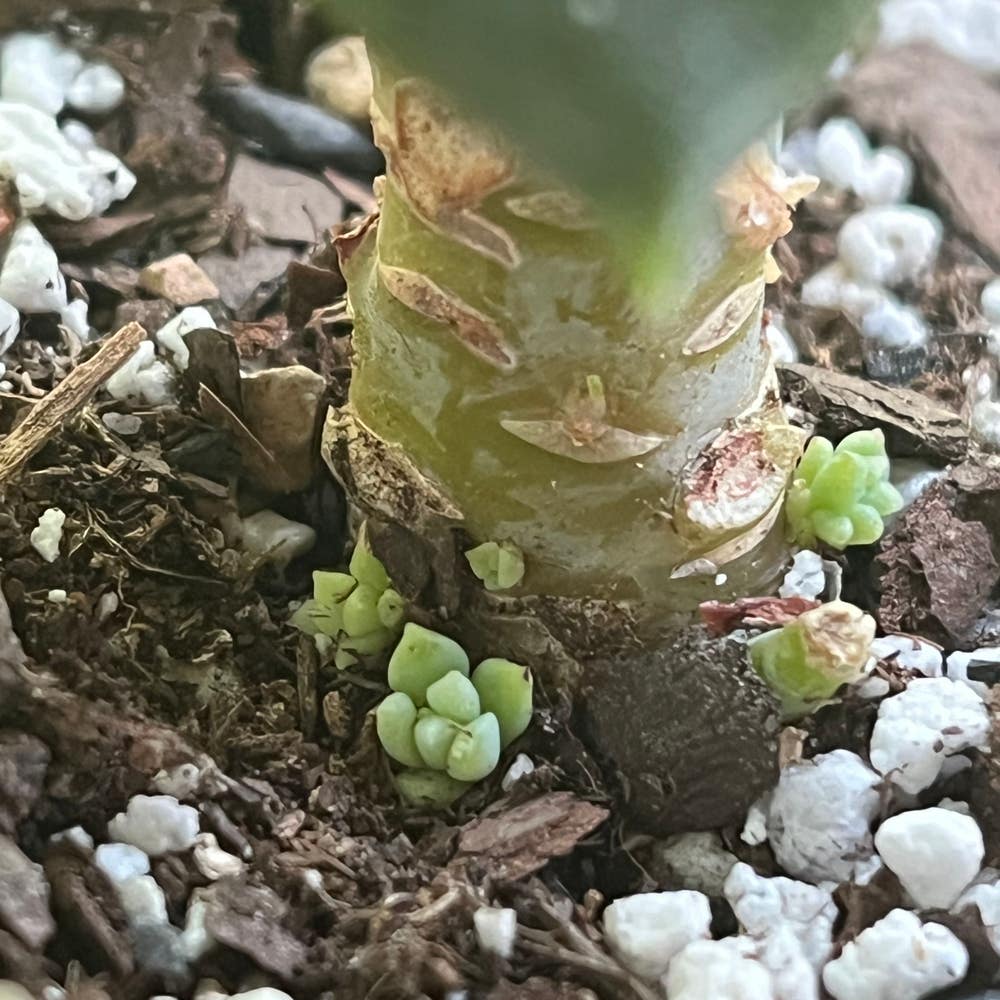
🌱 Identifying Ready-to-Separate Offsets: When to Make Your Move
Offsets are your Sedum clavatum's little clones, popping up snugly around the mother plant. Timing is key; wait for these offsets to grow a bit. They're easier to handle and more likely to survive when they're not too tiny.
🌿 Separating Offsets: Techniques for a Clean Break
To separate, gently wiggle the offset from the mother plant, maintaining any roots attached. A sterilized knife can help if they're stubborn. After detachment, let the offset callous over for a day or two before planting—this helps prevent rot.
🌱 Planting and Nurturing Offsets: The First Few Weeks
Plant the offsets in a well-draining mix, barely covering the base. Water sparingly; these succulents dread soggy soil. Place them in bright, indirect light with some afternoon shade to dodge sunburn. In a few weeks, you'll see signs of independent growth—a true propagation triumph.

Starting from Scratch: Seed Propagation
🌱 Sowing Sedum clavatum Seeds: Timing and Techniques
Timing is crucial when sowing Sedum clavatum seeds. Begin the process indoors 6-8 weeks before the last frost date to give your seedlings a head start. Use small containers filled with a sterile starter mix, which should be pre-moistened to create an ideal environment for your seeds.
Sedum clavatum seeds are tiny, so handle them with care. Press them gently into the soil without covering them, as they need light to germinate. Keep the soil moist, but be wary of overwatering, which can spell disaster for these delicate beginnings.
🌱 From Seed to Seedling: Care Tips for Germination
Once your seeds are sown, they'll need a warm and bright location, but not direct sunlight, which can be too intense. A consistent temperature of 65-72°F (18-22°C) is ideal for germination.
Humidity is your seed's friend at this stage, so consider covering your containers with a plastic wrap or a dome to keep the moisture in. However, as soon as you see sprouts, reduce humidity gradually to harden off the seedlings.
When it comes to watering, the top inch of soil should stay moist. Use a spray bottle to mist the soil, preventing it from becoming soggy. As your seedlings grow, gradually introduce them to more light to encourage strong, healthy development. Remember, patience is key; germination can take several weeks, so don't rush the process.
Overcoming Propagation Pitfalls
🚨 Spotting Trouble: Common Propagation Problems
Yellowing leaves or stunted growth can signal the onset of issues in your Sedum clavatum propagation efforts. Vigilance is key; these early warnings are your cue to act before minor issues escalate into a full-blown plant crisis.
Root rot often stems from overwatering. It's a classic blunder, and your Sedum's roots turning to mush is a telltale sign. Remember, your watering can is not a fire hose; aim for moist, not marshy soil.
🛠 Quick Fixes: Addressing Issues Before They Escalate
If you've been heavy-handed with hydration, ease up on the water. Ensure your pot has a drainage hole to serve as an escape route for excess moisture. It's a simple fix but often overlooked.
When leaves start looking spotty, it might be a humidity hiccup. Boost the moisture in the air with a pebble tray or a humidifier to keep your Sedum clavatum happy.
Pests and diseases are like uninvited guests at a party; they show up when you least expect them. Keep your tools clean and inspect new additions to your plant family carefully to prevent these party crashers.
If your cuttings are wilting, consider the temperature. Too cold, and they'll droop; too warm, and they might wither. Find that Goldilocks zone where your Sedum clavatum feels just right.
Lastly, if you're facing a propagation puzzle, don't throw in the trowel. Adjust one variable at a time and observe. Propagation isn't an exact science; it's a learning curve with every new leaf.
⚠️ Safety First
This content is for general information and may contain errors, omissions, or outdated details. It is not medical, veterinary advice, or an endorsement of therapeutic claims.
Always consult a qualified healthcare professional before using any plant as food, medicine, or supplement.
Never eat any plant (or feed one to pets) without confirming its identity with at least two trusted sources.
If you suspect poisoning, call Poison Control (800) 222-1222, the Pet Poison Helpline (800) 213-6680, or your local emergency service immediately.
Spotted an error? Please report it here.
Turn Sedum clavatum propagation into a success story 🌟 with Greg's precise watering schedules and expert community tips to watch your cuttings grow!