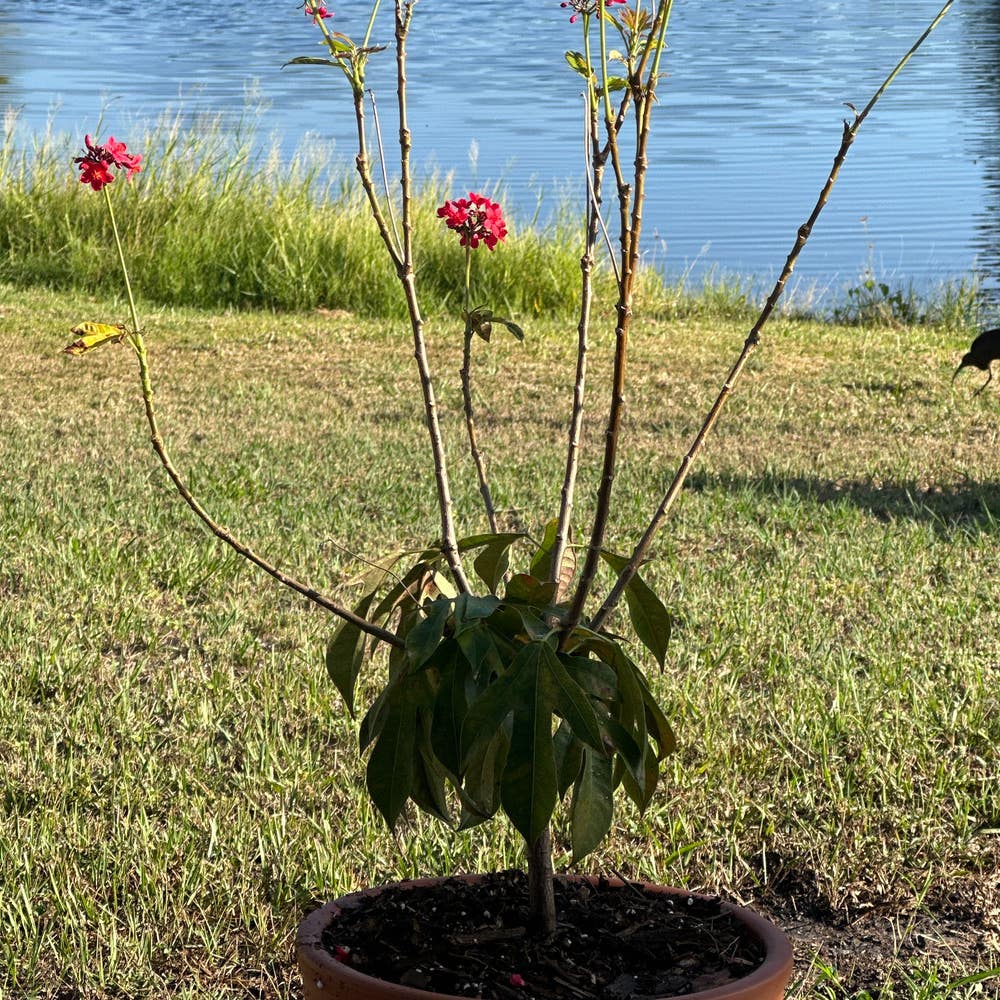
Should I Repot My Peregrina And If So, How?
Jatropha integerrima
By the Greg Editorial Team
Jan 17, 2024•6 min read
This article was created with the help of AI so we can cover more plants for you. May contain errors. See one? Report it here.
Transform your Peregrina's life with the art of timely repotting—thriving roots, thriving shoots! 🌱🔄
- Roots peeking out? Time to repot your Peregrina.
- 🌱 Choose terracotta, ceramic, or plastic pots with good drainage.
- Repot in spring, water thoroughly, and monitor post-move adjustment.
Spotting the Telltale Signs It's Time for a Change
🌱 Roots on the Run: Identifying a Root-Bound Peregrina
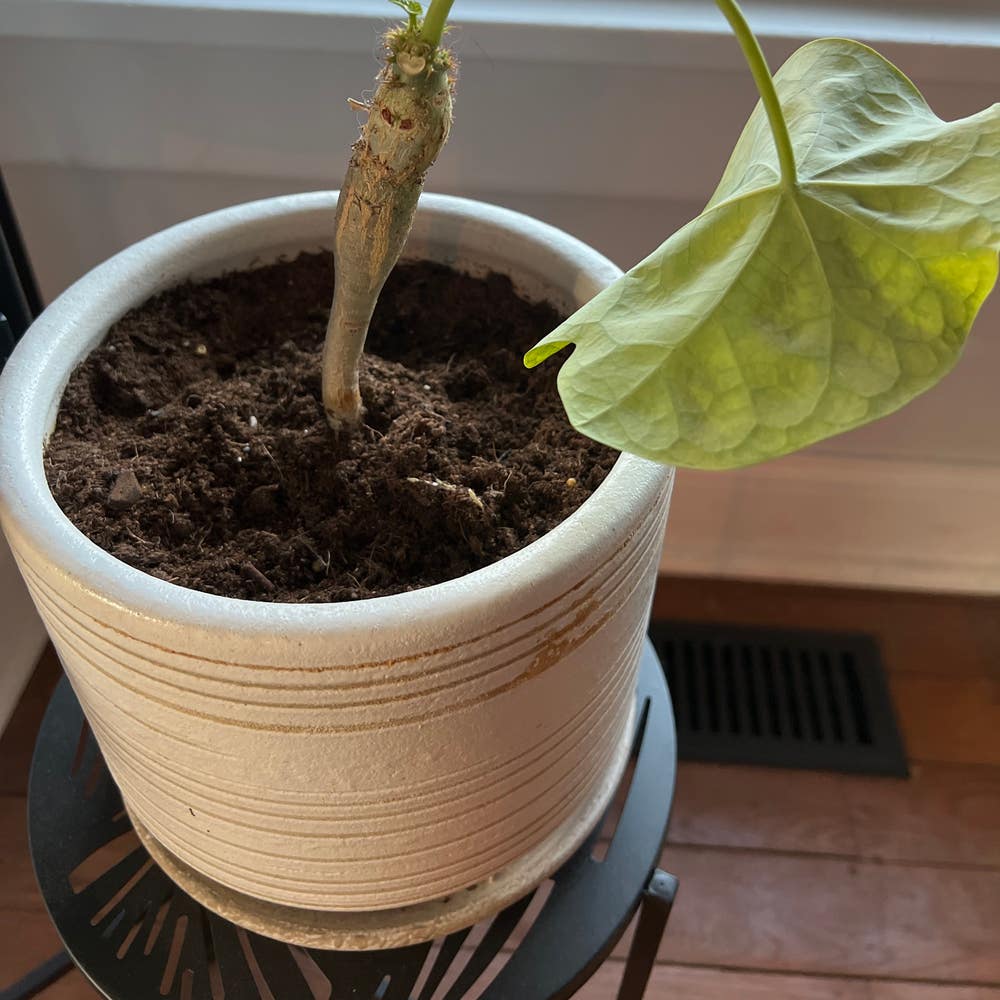
Roots peeking out of the drainage holes are like a plant's version of a white flag. Root-bound Peregrina is a cry for help, signaling it's time to upgrade their living space. If the roots are circling the pot's interior like a miniature racetrack, it's definitely time for a change.
💧 Thirsty Much? Recognizing When Water Just Won't Stick Around
When your Peregrina's soil dries out faster than you can say "hydration," it's not just being dramatic. Overly thirsty soil can indicate that the roots have taken over, leaving little room for water retention. If watering your plant feels like pouring liquid into a sieve, consider it a nudge for repotting.
🌱 Sluggish Growth: When Your Peregrina is Feeling Cramped
If your Peregrina's growth has slowed down to a pace that would lose to a lethargic snail, it's not just being lazy. Stunted growth can be a sign that your plant is too snug in its current pot and yearning for more space to stretch its roots.
Choosing the Right Pot: Material Matters
🏺 Terracotta vs. Peregrina: A Breathable Friendship
Terracotta pots are the old souls of plant containers, offering a breathable environment that's just right for your Peregrina. Their porous nature allows air to circulate, preventing root rot and overwatering mishaps. Keep in mind, though, that terracotta's thirst for water means you'll be grabbing that watering can more often.
🌵 Handling the Quick-Dry Nature of Terracotta
To manage terracotta's quick-dry tendencies, monitor your Peregrina's soil moisture closely. It's a delicate dance between too wet and too dry, but with a watchful eye, your plant will thrive. If you're forgetful, consider a self-watering insert to keep the hydration levels just right.
🍶 Ceramic Pots: Style Meets Function
Ceramic pots are the fashionistas of the plant world, blending style with functionality. They retain moisture better than their terracotta cousins, giving you a bit more leeway between waterings. Plus, their variety in designs can complement your home's aesthetic beautifully.
🚰 Balancing Beauty with Proper Drainage
With ceramic pots, it's crucial to ensure they have adequate drainage holes. No matter how pretty, a pot that holds too much water is a death sentence for your Peregrina. If needed, add extra holes or a layer of gravel at the bottom to keep those roots happy and healthy.
🥤 Going Plastic: Lightweight and Budget-Friendly
Plastic pots might not win any beauty contests, but they're practical, lightweight, and kind to your wallet. They're a solid choice if you're prone to moving your plants around or if you're just starting your plant parent journey.
🚰 Ensuring Good Aeration and Avoiding Soggy Situations
To avoid the dreaded soggy soil scenario in plastic pots, opt for ones with plenty of drainage holes. Consider mixing in some perlite or coarse sand to the soil to boost aeration. This way, your Peregrina gets the right amount of water without the risk of root rot.
The Perfect Time and Prep for Repotting Peregrina
🌱 Syncing with Seasons: Timing your repotting right.
Spring is showtime for repotting your Peregrina. It's when your plant is ready to grow and can bounce back from the shock of moving house. Just like you wouldn't want to move during a blizzard, don't repot when your plant is dormant in winter. Aim for that sweet spot when the last frost has said its goodbyes and the growth spurt is knocking at the door.
🛠 Gathering the Gear: What you'll need for a smooth transition.
Before you dive in, make sure you're armed and ready. You'll need a new pot that's a size up from the old one, fresh potting mix that's like a five-star bed for roots, and a trowel or your hands (if you don't mind getting dirty). Cover those drainage holes with something breathable like gauze to keep the soil from escaping. And don't forget the watering can – hydration is key after the big move. Remember, this isn't a hobby to cure boredom; it's a strategic move for your plant's well-being.
The Repotting Rundown: A Step-by-Step Guide
🌱 Out with the Old: Safely Removing Peregrina from Its Current Pot
Gently tip the pot sideways and coax your Peregrina out. If it plays hard to get, tap the pot's sides or use a chopstick through the drainage holes. Worst case scenario—break the pot. It's a small price for your plant's freedom.
🏡 In with the New: Placing Your Plant in Its New Abode
Start by shielding the drainage holes with gauze or plastic netting to keep the soil from escaping. Add a base layer of fresh potting mix to the new pot. Position your Peregrina in the center, ensuring it's at the same depth as before. Fill the sides with more mix, and tap the pot to settle things down without compacting the soil too much.
💧 The First Watering: Setting the Stage for Success
After tucking your plant in, give it a thorough watering to moisten the roots and help the soil settle. Watch for any soil level drops and top up if necessary. Remember, this is like a spa day for your Peregrina—keep it hydrated but not drenched.
After the Big Move: Post-Repotting Care
🌱 The Adjustment Phase: What to Expect After Repotting
Your Peregrina has just been through the plant equivalent of moving house. It's normal for it to sulk a bit. Leaves might droop or show signs of distress as it gets used to its new digs. This is the plant's way of saying, "Give me a minute here."
🕵️ Monitoring and Maintenance: Keeping an Eye on Soil and Moisture
Watering is your first checkpoint after the repot. Give your Peregrina a good drink to help it settle, then let the top inch of soil dry out before the next watering. Overzealous watering is a common faux pas, so aim for moist, not marshy.
Lighting is next on your watch list. Keep your Peregrina in a spot with indirect light to avoid the harsh sunburn of direct rays. It's not trying to tan; it's trying to recover.
Temperature matters, too. Your Peregrina isn't looking to acclimate to a new season, just a new pot. Keep the conditions consistent with what it's used to.
Trimming can help. If you see any leaves that look more tragic than dramatic, snip them off. This lets your plant focus on the fresh, healthy growth.
Fertilizing? Just hold your horses. Wait until you see signs of new growth before you start with the plant food. That's your cue that the roots have settled and are ready for a nutrient boost.
Remember, after repotting, your Peregrina isn't just being dramatic—it's undergoing a major transition. Keep a close eye on it, adjust care as needed, and soon enough, it'll be back to its show-stopping self.
⚠️ Safety First
This content is for general information and may contain errors, omissions, or outdated details. It is not medical, veterinary advice, or an endorsement of therapeutic claims.
Always consult a qualified healthcare professional before using any plant as food, medicine, or supplement.
Never eat any plant (or feed one to pets) without confirming its identity with at least two trusted sources.
If you suspect poisoning, call Poison Control (800) 222-1222, the Pet Poison Helpline (800) 213-6680, or your local emergency service immediately.
Spotted an error? Please report it here.
Ensure your peregrina thrives in its new pot by using Greg to track growth 🌿 and get the perfect repotting reminders from this guide.