🌱 Best Tips for Propagating Dorstenia
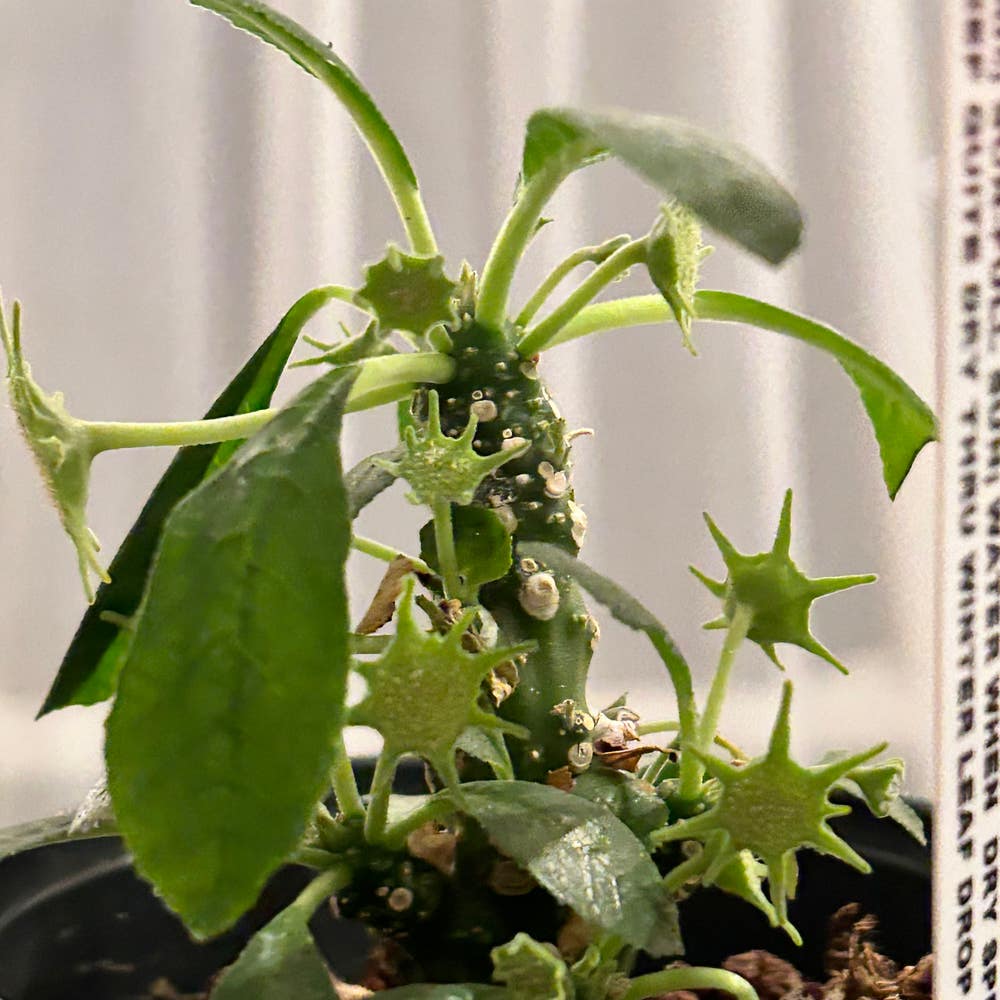
Dorstenia psilurus
By the Greg Editorial Team
Nov 07, 2024•6 min read
This article was created with the help of AI so we can cover more plants for you. May contain errors. See one? Report it here.
- 🌱 Choose healthy 4-6 inch stems and cut below a node for best results.
- 🌡️ Maintain 70°F to 80°F and 60-80% humidity for successful rooting.
- 🌞 Provide bright, indirect light to promote growth without scorching cuttings.
Propagating from Cuttings
🪴 Step-by-step Guide for Taking Cuttings
Taking cuttinDorsteniaour Dorstenia is a straightforward process that can yield great results. Start by selecting healthy stems that are at least 4-6 inches long and free from any pests or diseases.
Next, make the cut using a clean, sharp knife or scissors, cutting just below a node. This is crucial for encouraging root growth. After cutting, remove the lower leaves to prevent rot when you plant them. Finally, allow the cuttings to callous by letting them sit in a dry, shadedwell-draining soil mixis step is essential for preventing rot and promoting successful rooting.
🌱 Ideal Conditions for Rooting Cuttings
Creating the right environment for your cuttings is key to successful propagation. Aim to maintain a warm temperature between 70°F to 80°F (21°C to 27°C) to encourage root development.
Humidity plays a significant role as well; keeping levels between 60-80% is ideal. Consider using a humidity dome to help maintain these conditions. Additionally, provide bright, indirect light to promote healthy growth without risking scorching the cuttings.
⏳ Timeframe for Rooting and Growth
Patience is vital when propagating from cuttings. Typically, it takes about 2-4 weeks for roots to develop.
Once rooted, you should start to see new growth within 4-6 weeks. This is an exciting time as it indicates that your cuttings are thriving and ready for the next stage of their journey.
With these steps, you’re well on your way to successfully propagating Dorstenia from cuttings. Next, we’ll explore how to propagate this fascinating plant from seeds.
Propagating from Seeds
How to Collect and Prepare Seeds 🌱
Collecting seeds from Dorstenia is a straightforward process. Wait until the seed pods turn brown and dry, then harvest them for the best results.
Once harvested, soiln the seeds by removing any pulp. Allow them to dry for a few days to ensure they are ready for planting.
Germination Process and Condiwell-drainingckstart germination, soak the seeds in water for 24 hours. This simple step helps enhance their germination rate significantly.
Next, sow the seeds on the surface of a well-draining soil mix. Lightly press them in to ensure good Dorsteniaith the soil.
After planting, cover the seeds with a thin layer of soil or vermiculite. This helps retain moisture while allowing light to penetrate.
Transplanting Seedlings 🌿
Timing is crucial when it comes to transplanting seedlings. Wait until they have at leapestso sets of true leaves before moving them to new containers.
When transplanting, space the seedlings 2-4 inches apart. This spacing allows for healthy growth without overcrowding.
As you transition seedlings outdoors, gradually acclimate them to their new environment. This step is essential for ensuring they thrive in their new home.
With these steps, ypests well on your way to successfully propagating Dorstenia from seeds! Nneem oilll explore how to propagate using aerial roots.
Aerial environmentgation
🌱 Identifying Suitable AeriaHumidityWhen propagating Dorstenia, start by selecting healthy aerial roots. Look for roots that are thick and at least 3-4 inches long, ensuring they are firm and free from any discoloration or rot.
🌿 Techniques for Enctemperaturest Growth
To promote robust root growth, keep the aerial roots moist by misting them regularly. Additionally, use a small stake or support to ensure the aerial roots remain in contact with the soil, which aids in their establishment.
🌍 Best Practices for Planting Rooted Aerial Roots
When planting rooted aerial roots, bury them in well-draining soil, making sure the root is covered while keeping the stem above soil level. After planting, water thoroughly and maintain consistent moisture to encourage healthy growth.
With these techniques, you can successfully propagate Dorstenia through itsoilrial roots. Next, let’s explore common challenges you might face during propadrainagend how to overcome them.
Common Challenges in Propagation
🐛 Pests and Diseases
Propagation can be a rewarding journey, but it’s not without its hurdles. Common pests like mealybugs, aphids, and spider mites can wreak havoc on your plants.
Identifying Common Pests Affecting drainageion
Look out for sticky residue, webbing, or visible insects on your plants. These signs indicate an infestation perliteeds immediate attention.
Preventative Measures and Treatments
Regularly inspect your plants for any signs of pests. If you spot any troublemakers, consider using insecticidal soap or neem oil to regain control.
🌍 Environmental Factors
The right environment is crucial for successful propagation. Humidity and temperature play significant roles in the health of your cuttings and seedlings.
Importance of Humidity and Temperature
Aim to maintain humidity levels around 60-80% for optimal rooting. Additionally, keep temperatures between 70°F to 80°F (21°C to 27°C) to create a nurturing atmosphere for growth.
Light Requirements During Propagation
Light exposure is equally important. Provide bright, indirect light to prevent scorching while promoting healthy growth in your plants.
By addressing these common challenges, you can enhance your propagation success and enjoy the process even more. Next, let’s explore the tools and materials that will set you up for a thriving propagation experience.
Tools and Materials for Successful Propagation
Recommended Soil Mixes 🌱
For successful propagation, the right soil mix is crucial. A blend of potting soil, perlite, and sand offers excellent drainage, which is vital for healthy root development.
Best Soil Types for Propagation 🌿
Aim for a slightly acidic to neutral pH level, ideally between 6.0 and 7.0. This range supports optimal nutrient availability for your Dorstenia plants.
Importance of Drainage and Aeration 🚰
Proper drainage is essential to prevent root rot, a common issue in propagation.
Aeration 🌬️
Incorporating materials like perlite not only enhances drainage but also improves soil aeration, allowing roots to breathe and grow effectively.
Propagation Containers 🪴
Choosing the right container can make a significant difference in your propagation success.
Types of Containers Suitable for Propagation 🧺
Consider using small pots, propagation trays, or seedling flats.
Size Considerations 📏
Ensure that all containers have drainage holes to prevent water accumulation, which can lead to root issues.
Benefits of Using Propagation Trays vs. Pots ⚖️
Propagation trays are fantastic for managing multiple cuttings or seeds in a compact space.
Pots 🍶
On the other hand, pots provide individual space for larger plants or when you're ready to transplant seedlings, giving them room to thrive.
With the right tools and materials, you're well on your way to successful Dorstenia propagation. Next, let's explore common challenges you might face during this process.
⚠️ Safety First
This content is for general information and may contain errors, omissions, or outdated details. It is not medical, veterinary advice, or an endorsement of therapeutic claims.
Always consult a qualified healthcare professional before using any plant as food, medicine, or supplement.
Never eat any plant (or feed one to pets) without confirming its identity with at least two trusted sources.
If you suspect poisoning, call Poison Control (800) 222-1222, the Pet Poison Helpline (800) 213-6680, or your local emergency service immediately.
Spotted an error? Please report it here.
Transform your Dorstenia cuttings into thriving plants 🌿 with Greg's personalized care tips and reminders that ensure your propagation success!