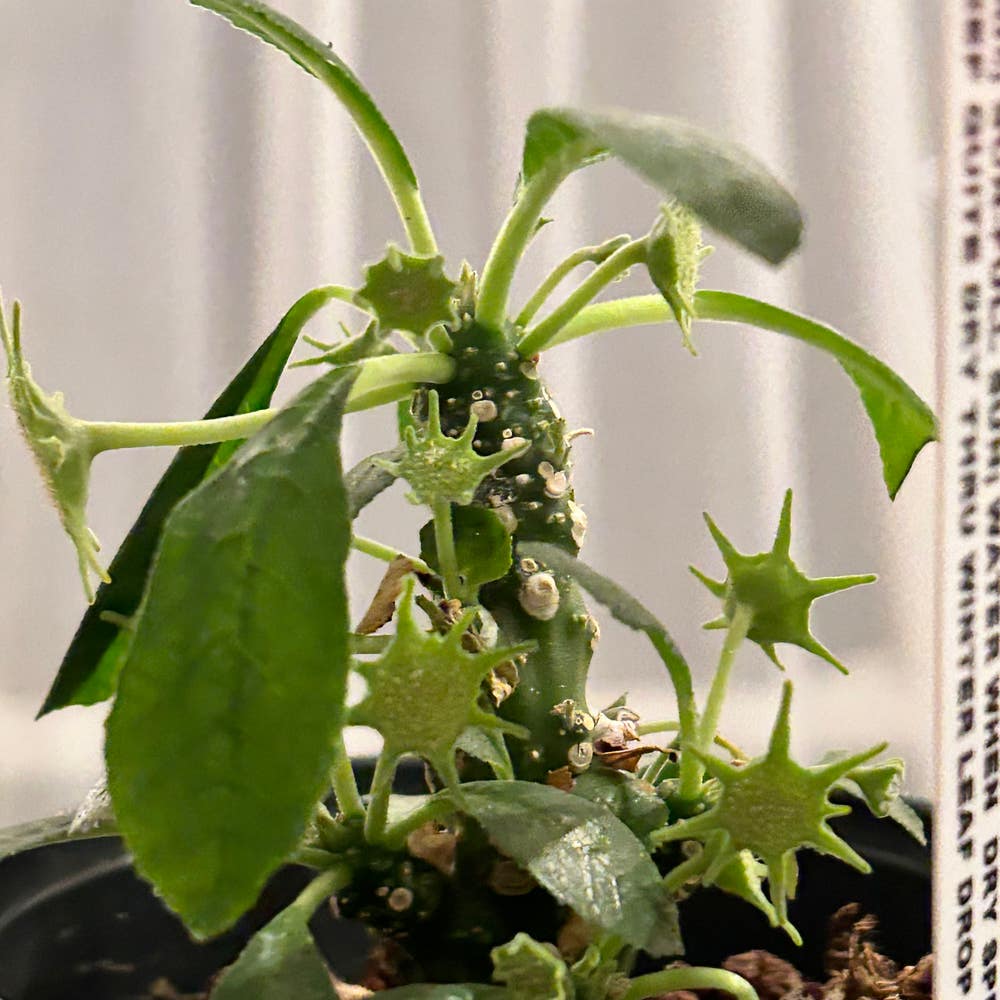
When and How to Repot Dorstenia 🪴
Dorstenia psilurus
By the Greg Editorial Team
Nov 07, 2024•6 min read
This article was created with the help of AI so we can cover more plants for you. May contain errors. See one? Report it here.
- 🌱 Signs to repot Dorstenia include stunted growth and roots out of drainage holes.
- 🕒 Best time to repot is spring or early summer during active growth.
- 🧰 Gather materials like a new pot and well-draining soil before starting.
Signs That Dorstenia Needs Repotting
🌱 Indicators of a Root-Bound Dorstenia
Recognizing when your Dorstenia needs repotting is crucial for its health. Here are some key signs to watch for:
- Stunted growth: If your plant isn't producing new leaves or showing growth despite optimal care, it may be root-bound.
- Roots emerging from drainage holes: Visible roots pushing out of the bottom of the pot indicate that the plant has outgrown its current home.
- Soil drying out too quickly: An increased need for watering can signal that the roots are filling the pot, leaving little room for soil to retain moisture.
- Yellowing leaves: This often points to stress from inadequate root space, making it essential to address the issue promptly.
🕰️ Best Time of Year to Repot Dorstenia
Timing is everything when it comes to repotting. The best seasons for this task are:
- Spring or early summer: These periods align with the plant's active growth phase, allowing it to recover quickly from the transition.
- Avoid dormancy: Repotting during late fall or winter can stress your Dorstenia, as it’s not in a growth phase and may struggle to adapt.
By keeping an eye on these signs and timing your repotting correctly, you can ensure your Dorstenia thrives in its new environment. Next, let’s dive into the step-by-step guide for repotting your plant effectively.
Step-by-Step Guide to Repotting Dorstenia
Repotting your Dorstenia can be a rewarding experience, ensuring your plant thrives in a healthy environment. Follow these steps for a successful repotting process.
1. Gather Necessary Materials 🛠️
Start by collecting the essentials:
- A new pot that’s the right size and material.
- A well-draining soil mix.
- Tools such as a trowel, gloves, and scissors for trimming roots if needed.
2. Prepare the New Pot 🪴
Before you begin, make sure your new pot is ready:
- Check that it has drainage holes to prevent waterlogging.
- Add a layer of gravel or small stones at the bottom for extra drainage.
3. Remove the Dorstenia from Its Current Pot 🚪
Now it’s time to take your plant out:
- Gently squeeze the sides of the pot to loosen the soil.
- Carefully slide the plant out, supporting the base to avoid damage.
4. Inspect the Roots 🔍
Once out, give the roots a good look:
- Check for any signs of rot or damage.
- Trim away any unhealthy roots using clean scissors to promote healthy growth.
5. Place the Dorstenia in the New Pot 🌱
Position your plant in its new home:
- Set it at the same depth as it was in the previous pot.
- Fill in with soil, ensuring there are no air pockets left behind.
6. Water Thoroughly 💧
Finish up by giving your plant a good drink:
- Water until it drains from the bottom, making sure the soil is evenly moist.
Repotting can seem daunting, but with these steps, you’ll help your Dorstenia flourish. Next, let’s explore the best pot materials to use for your plant’s new home.
Pot Material Options for Dorstenia
Choosing the right pot material for your Dorstenia is crucial for its health and growth. Each material has its unique benefits and drawbacks, so let's break them down.
🎨 Ceramic
Ceramic pots are often favored for their aesthetic appeal. They are heavy, providing stability, and offer good insulation for the roots.
However, they can retain moisture, which may lead to root rot if the pot isn't well-drained. Always check for drainage holes before opting for ceramic.
🥤 Plastic
Plastic pots are lightweight and budget-friendly, making them a popular choice. They retain moisture well, which can be beneficial in dry conditions.
On the downside, plastic is less breathable than other materials. This can lead to overheating, especially in direct sunlight, so keep an eye on your plant's environment.
🍂 Terracotta
Terracotta pots are known for their breathability and excellent drainage. They help prevent overwatering, which is a common issue for many houseplants.
The trade-off is that terracotta can dry out quickly, requiring more frequent watering. If you choose this option, be prepared to monitor soil moisture closely.
📏 Recommended Pot Sizes for Dorstenia
When selecting a pot size, aim for one that is 1-2 inches larger in diameter than the current pot. This allows room for growth without overwhelming the plant.
Also, consider the species of Dorstenia you have. Larger varieties may need bigger pots to accommodate their growth, ensuring they thrive in their new home.
With the right pot material and size, your Dorstenia will have the best chance to flourish. Next, let’s explore the ideal soil requirements for these unique plants.
Soil Requirements for Dorstenia
🌱 Ideal Soil Mix for Dorstenia
Creating the right soil mix is crucial for your Dorstenia's health. Aim for a blend of 50% cactus mix, 25% perlite, and 25% coarse sand.
This combination ensures excellent drainage, which is vital for preventing root rot and promoting robust growth. A well-draining soil allows excess moisture to escape, keeping your plant's roots happy and healthy.
🧪 How to Create a Custom Soil Mix for Dorstenia
Making your own soil mix is straightforward and rewarding. Start by combining equal parts of cactus mix, perlite, and coarse sand in a large container.
Mix thoroughly to ensure all materials are evenly distributed. This step is essential for achieving consistent drainage and aeration throughout the soil.
Finally, test the drainage by watering the mix. If the water drains quickly, you’ve got a winning formula for your Dorstenia. If not, adjust the ratios until you achieve the desired drainage.
With the right soil mix in place, your Dorstenia will thrive, setting the stage for a successful repotting experience. Next, let’s explore common mistakes to avoid during this process to ensure your plant remains healthy and vibrant.
Common Repotting Mistakes to Avoid
❌ Mistakes to Avoid When Repotting Dorstenia
Repotting can be a delicate process, and avoiding common mistakes is crucial for your Dorstenia's health. One major pitfall is choosing a pot that is too large; this can lead to overwatering issues, as excess soil retains moisture longer than necessary.
Another mistake is neglecting to check drainage. Always ensure your new pot has adequate drainage holes to prevent water from pooling at the bottom, which can cause root rot.
🛠️ How to Prevent Root Damage During Repotting
When repotting, handle your Dorstenia with care. Support the base of the plant to avoid unnecessary stress on the roots.
If you need to trim any roots, use clean, sharp scissors. This minimizes trauma and helps your plant recover more quickly.
🌱 Importance of Acclimatization After Repotting
After repotting, it's essential to acclimatize your Dorstenia gradually. Start by reintroducing it to its normal light conditions slowly to avoid shocking the plant.
Keep an eye out for signs of stress, such as drooping leaves or discoloration. Adjust your care routine as needed to help your plant settle into its new home.
With these tips, you can ensure a smooth transition for your Dorstenia, setting it up for healthy growth in its new pot.
⚠️ Safety First
This content is for general information and may contain errors, omissions, or outdated details. It is not medical, veterinary advice, or an endorsement of therapeutic claims.
Always consult a qualified healthcare professional before using any plant as food, medicine, or supplement.
Never eat any plant (or feed one to pets) without confirming its identity with at least two trusted sources.
If you suspect poisoning, call Poison Control (800) 222-1222, the Pet Poison Helpline (800) 213-6680, or your local emergency service immediately.
Spotted an error? Please report it here.
Transform your Dorstenia's home with expert repotting tips 🌿 from Greg, ensuring it thrives in its new pot with tailored reminders for optimal care!