Propagating Cyanotis: Step-by-Step Guide
Cyanotis spp.
By the Greg Editorial Team
Jan 07, 2025•5 min read
This article was created with the help of AI so we can cover more plants for you. May contain errors. See one? Report it here.
Master plant propagation from cuttings 🌱 and watch your garden flourish with vibrant new growth!
- 🌱 Choose healthy stems and cuttings for successful Cyanotis propagation.
- 🌿 Provide warm, humid conditions with indirect light to encourage growth.
- 🧪 Use rooting hormone and well-draining soil for optimal root development.
Propagating from Cuttings
Step-by-Step Instructions 🌱
Selecting healthy stems: Start by choosing stems that are firm and free from any signs of disease. Healthy stems are crucial for successful propagation.
Cutting length: Aim for cuttings that are 4-6 inches long. This length is optimal for rooting and growth.
Preparing cuttings: Remove the lower leaves from the cuttings to prevent rot. This step is essential for ensuring the cutting can focus its energy on root development.
Rooting hormone usage: For better success, apply rooting hormone to the cut end of each cutting. This can significantly enhance root growth.
Planting cuttings: Place the cuttings in well-draining soil, ensuring that at least one node is buried. This node is where the roots will emerge.
Watering: After planting, lightly water the soil. This helps to settle the cutting and provides the moisture it needs to start rooting.
Ideal Cutting Size and Conditions 🌿
Optimal cutting size: The best size for cuttings is 4-6 inches. This length strikes a balance between manageability and the ability to develop roots.
Ideal conditions: Provide a warm, humid environment with indirect light. These conditions are vital for encouraging healthy growth and rooting.
By following these steps, you can successfully propagate Cyanotis from cuttings. Next, let’s explore leaf propagation techniques to expand your propagation skills.
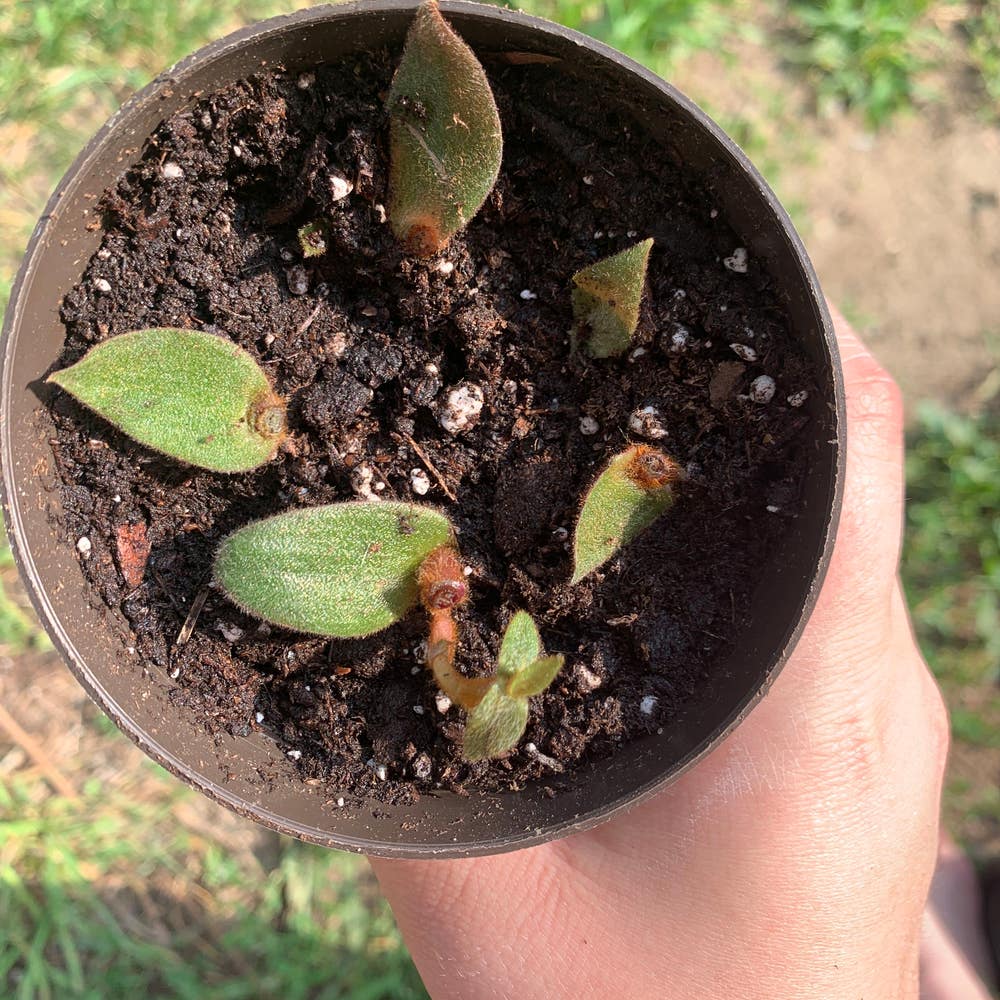
Leaf Propagation Techniques
🌿 Selecting the Right Leaves
Choosing the right leaves is crucial for successful propagation. Opt for healthy, mature leaves that are free from blemishes and damage.
Robust, green leaves from the parent plant are ideal. These leaves have the best chance of developing roots and thriving in their new environment.
✂️ Preparing Leaves for Propagation
To prepare leaves for propagation, start by cutting them into sections. Each section should include a vein, as this is where roots will emerge.
If you want to boost your success rate, consider dipping the cut ends in rooting hormone. This can enhance root development and give your cuttings a head start.
💧 Water vs. Soil Propagation
When it comes to propagation methods, you have two main options: water or soil.
Water Propagation: Place your leaf sections in water and wait for roots to develop, which typically takes 2-4 weeks. This method allows you to monitor root growth easily.
Soil Propagation: Alternatively, you can plant leaf sections directly into soil. Just be sure to keep the soil moist but not soggy to encourage healthy growth.
Both methods have their merits, so choose the one that fits your style and setup best. Each approach can lead to successful propagation if done correctly.
As you explore these techniques, remember that patience is key. With the right care, your leaf cuttings will flourish and grow into beautiful new plants.
Offsets and Division
Identifying Offsets 🌱
Offsets are small plants that emerge at the base of the parent plant. These little guys are ready for separation when they have developed their own roots and leaves.
Step-by-Step Division Process 🛠️
- Start by removing the parent plant from its pot.
- Gently separate the offsets from the main root system.
- Trim any damaged roots to promote healthy growth.
- Replant the offsets in individual pots filled with suitable soil.
Best Practices for Replanting Offsets 🌿
For optimal growth, use a well-draining soil mix that allows roots to breathe. After planting, water lightly to help settle the soil around the new offsets.
By following these steps, you’ll ensure your offsets thrive in their new homes. Next, let’s explore the environmental conditions that can enhance your propagation success.
Environmental Conditions for Propagation
🌱 Ideal Soil Mix for Propagation
Creating the right soil mix is crucial for successful propagation. Aim for a blend of 50% potting mix, 30% perlite, and 20% peat moss.
This combination ensures excellent drainage, which is vital for healthy root development and preventing rot. A well-draining soil mix allows excess water to escape, reducing the risk of overwatering.
☀️ Light Requirements During Propagation
Light plays a significant role in the propagation process. Provide bright, indirect sunlight for 12-16 hours daily to encourage growth.
Avoid direct sunlight, as it can scorch the leaves and hinder healthy development. Proper light exposure promotes robust rooting and vibrant foliage.
🌡️ Temperature and Humidity Considerations
Temperature and humidity are key factors in creating an ideal environment for propagation. Maintain an optimal temperature range of 20°C to 25°C (68°F to 77°F) for best results.
Additionally, keep humidity levels high, ideally between 60-80%. This moisture helps facilitate successful rooting and overall plant health.
With the right environmental conditions in place, your propagation efforts will be more likely to succeed. Next, let’s explore common challenges you might face during this process and how to troubleshoot them effectively.
Common Challenges in Propagation
🐛 Troubleshooting Poor Rooting
When your cuttings show signs of poor rooting, such as wilting, yellowing leaves, or no root development, it can be frustrating. First, check the soil moisture; it should be damp but not soggy, as overwatering can hinder root growth.
Adjusting light exposure is also crucial. Ensure your cuttings receive bright, indirect light, and maintain a consistent temperature to encourage healthy rooting.
🚫 Preventing Rot in Cuttings
Rot is a common issue that arises from overwatering and poor drainage. To prevent this, always use clean tools when taking cuttings and allow them to callous over for a few hours before planting.
Monitoring moisture levels is essential. Keep the soil lightly moist, but avoid letting it become waterlogged to ensure your cuttings thrive.
🐜 Addressing Pests During Propagation
Pests can be a real headache during propagation. Common culprits like aphids, mealybugs, and spider mites can quickly damage your plants if not addressed.
To control these pests, consider using insecticidal soap or neem oil. Regularly inspecting your plants can help catch any infestations early, ensuring your propagation efforts remain on track.
As you navigate these challenges, remember that patience and observation are key. With the right care, your propagation journey can lead to thriving new plants.
⚠️ Safety First
This content is for general information and may contain errors, omissions, or outdated details. It is not medical, veterinary advice, or an endorsement of therapeutic claims.
Always consult a qualified healthcare professional before using any plant as food, medicine, or supplement.
Never eat any plant (or feed one to pets) without confirming its identity with at least two trusted sources.
If you suspect poisoning, call Poison Control (800) 222-1222, the Pet Poison Helpline (800) 213-6680, or your local emergency service immediately.
Spotted an error? Please report it here.
Propagating Cyanotis can be thrilling 🌱 when you use Greg's tailored reminders and care tips to ensure your cuttings flourish into vibrant plants!