🔍 Understanding Black Spots on Your Arum Leaves
Arum spp.
By the Greg Editorial Team
Oct 18, 2024•6 min read
This article was created with the help of AI so we can cover more plants for you. May contain errors. See one? Report it here.
- 🌱 Black spots on Arum leaves stem from fungal and bacterial infections; act quickly!
- 💧 Overwatering and poor drainage lead to black spots; monitor watering habits closely.
- 🌿 Regular inspections for pests and discoloration help maintain Arum plant health.
Causes of Black Spots
🦠 Fungal Infections
Fungal infections are a primary culprit behind black spots on Arum leaves. Leaf spot fungi create dark, irregular spots that can spread quickly if not addressed.
These fungi thrive in conditions of high humidity and poor air circulation. Keeping your plants in well-ventilated areas can help mitigate this risk.
🦠 Bacterial Infections
Bacterial leaf blight is another significant issue, presenting as black spots accompanied by yellowing leaves. This condition often arises from overwatering and poor drainage, creating a perfect environment for bacteria to flourish.
🌪️ Environmental Stress Factors
Overwatering is a common mistake that leads to root rot, which in turn causes leaf discoloration. It's essential to monitor your watering habits closely to avoid this problem.
Poor drainage exacerbates the situation by creating waterlogged soil, further stressing the plant. Additionally, temperature fluctuations can manifest as black spots, as extreme heat or cold puts stress on your Arum.
Understanding these causes is crucial for effective treatment and prevention. Next, we’ll explore how to identify the symptoms of black spots on your Arum leaves.
Identifying Symptoms
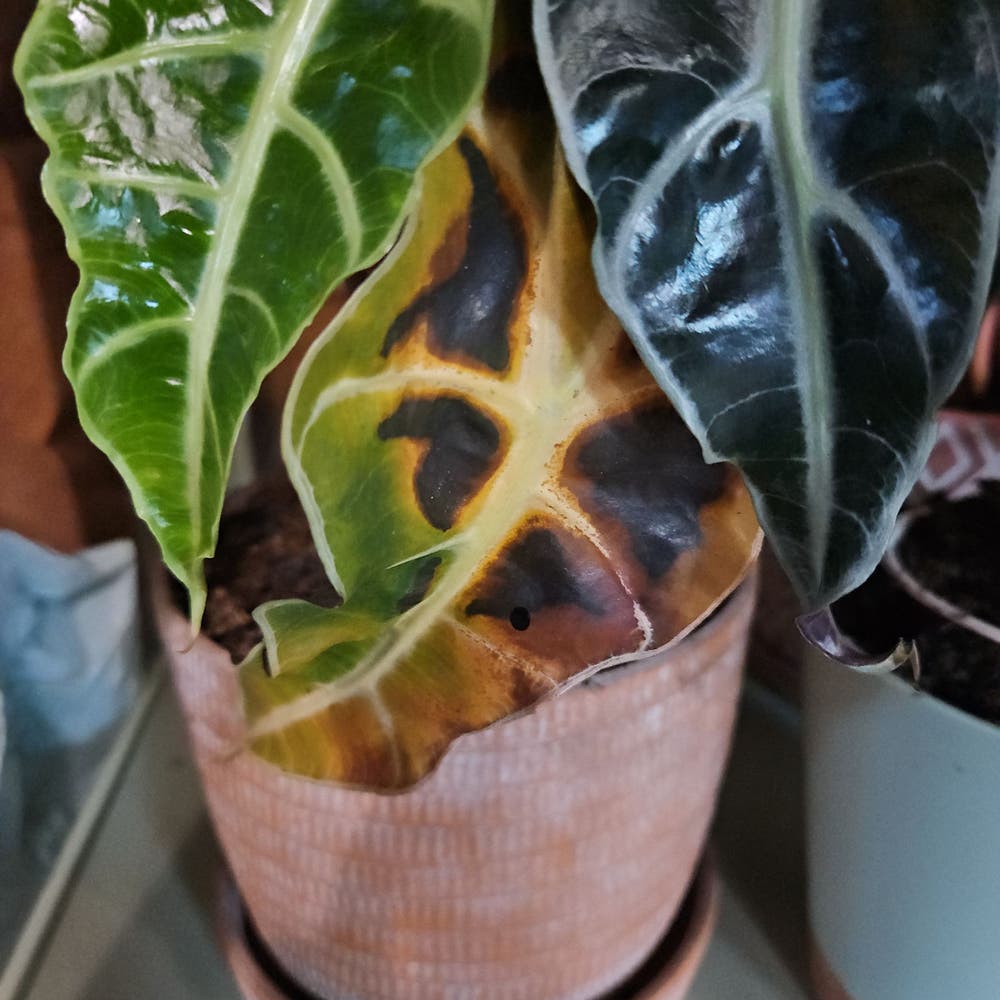
🌑 Appearance of Black Spots
Black spots on Arum leaves can vary in size and shape, often appearing as dark, irregular patches. These spots may start small but can grow larger and more numerous over time, signaling a potential problem that needs attention.
As the condition progresses, you might notice these spots spreading across the leaves, changing from a deep black to a more faded hue. This transformation can indicate that the issue is worsening, and prompt action is essential to prevent further damage.
⚠️ Other Related Symptoms
In addition to black spots, yellowing leaves can be a telltale sign of nutrient deficiencies or stress in your Arum. This yellowing often suggests that the plant is struggling to absorb essential nutrients, which can lead to further complications.
Wilting is another critical symptom to watch for, frequently linked to overwatering or root issues. If your Arum appears droopy, it may be time to reassess your watering habits and check for any underlying problems.
By keeping an eye on these symptoms, you can catch issues early and take steps to restore your plant's health. Next, we'll explore how to diagnose the problem effectively.
Diagnosing the Problem
Assessing Environmental Conditions 🌍
Understanding the environment your Arum thrives in is crucial for diagnosing black spots. Let's break down the key factors: light exposure, humidity levels, and soil conditions.
Light Exposure
Arum plants prefer partial shade to full shade. If you notice your Arum stretching or developing pale leaves, it might be a sign of inadequate light.
Humidity Levels
Optimal humidity for Arum is between 50-70%. Low humidity can lead to leaf curling and the appearance of black spots, signaling stress.
Soil Conditions
Well-draining soil is essential to prevent waterlogging. Aim to keep the soil consistently moist but not soggy, as this balance is vital for your plant's health.
Inspecting for Pests 🐛
Pests can also contribute to the issues you're seeing on your Arum. Identifying common pests and their signs is key to effective diagnosis.
Common Pests Affecting Arum
Aphids are notorious for leaving sticky residue and curling leaves. Spider mites, on the other hand, can be spotted by fine webbing and stippled leaves.
Signs of Pest Infestation
Look for visible insects on your leaves. Damage patterns such as yellowing, wilting, or black spots can indicate a pest problem that needs immediate attention.
By carefully assessing these environmental conditions and inspecting for pests, you can pinpoint the root cause of those pesky black spots. This understanding will guide you toward effective treatment options, ensuring your Arum remains healthy and vibrant.
Treatment Options
🧪 Chemical Treatments
Fungicides for Arum
Fungicides are essential for combating fungal infections on your Arum plants. Look for products with active ingredients like chlorothalonil or copper sulfate, which are effective against common leaf spot fungi.
When applying fungicides, timing is crucial. Aim for early morning or late afternoon to avoid the heat, and follow the manufacturer's instructions for the best results.
Bactericides for Bacterial Infections
For bacterial infections, specific bactericides can help restore your Arum's health. Products containing copper or streptomycin are often recommended.
Application frequency varies, but generally, every 7 to 14 days is effective. Always ensure you’re following the guidelines for the best outcomes.
🌱 Organic Treatment Methods
Neem Oil Application
Neem oil is a fantastic organic option for treating both pests and fungal issues. To apply, mix 1-2 tablespoons of neem oil with a quart of water and a few drops of dish soap.
Use this solution every 7-14 days for optimal results. Neem oil not only deters pests but also has antifungal properties, making it a versatile choice for your garden.
Homemade Remedies
Creating homemade remedies can be both fun and effective. A simple baking soda solution involves mixing 1 tablespoon of baking soda with a quart of water, which can help combat fungal diseases.
Another option is garlic spray, made by blending a few cloves of garlic with water and straining the mixture. Apply these remedies every week or after rain for the best protection.
With these treatment options, you can effectively manage black spots on your Arum leaves. Next, let’s explore preventive measures to keep your plants healthy and thriving.
Preventive Measures
🌱 Best Practices for Arum Care
Proper Watering Techniques
Keeping your Arum's soil consistently moist is crucial for its health. Aim to water when the top inch of soil feels dry, but be cautious—overwatering can lead to yellowing leaves and root rot.
Soil Selection and Drainage
Choose a soil mix that promotes optimal drainage. A blend of potting soil, perlite, and compost works wonders, and always use pots with drainage holes to prevent waterlogging.
🌦️ Seasonal Care Tips
Adjusting Care During Different Seasons
In summer, your Arum will thrive with increased watering and humidity. Conversely, during winter, reduce watering and protect your plant from frost to ensure it stays healthy.
Monitoring for Early Signs of Disease
Regular inspections are key to catching issues early. Look for discoloration and pests, as early intervention can save your plant from more serious problems down the line.
By following these preventive measures, you can keep your Arum thriving and vibrant. Next, we’ll explore how to diagnose any issues that may arise, ensuring your plant remains in top shape.
⚠️ Safety First
This content is for general information and may contain errors, omissions, or outdated details. It is not medical, veterinary advice, or an endorsement of therapeutic claims.
Always consult a qualified healthcare professional before using any plant as food, medicine, or supplement.
Never eat any plant (or feed one to pets) without confirming its identity with at least two trusted sources.
If you suspect poisoning, call Poison Control (800) 222-1222, the Pet Poison Helpline (800) 213-6680, or your local emergency service immediately.
Spotted an error? Please report it here.
Keep your Arum leaves spotless 🌿 by using Greg's tailored watering reminders and pest control tips to ensure your plants thrive in optimal conditions!