Diagnosing Mini Phalaenopsis Orchid Root Rot
Phalaenopsis amabilis 'Miniature'
By the Greg Editorial Team
Jun 18, 2024•6 min read
This article was created with the help of AI so we can cover more plants for you. May contain errors. See one? Report it here.
- Yellow leaves and mushy roots signal early root rot.
- 🌡️💧 Adjust watering and ensure drainage to prevent rot.
- Regular checks and maintenance keep root rot at bay.
Spotting the Red Flags: Early Symptoms of Root Rot
🚩 Visual Symptoms
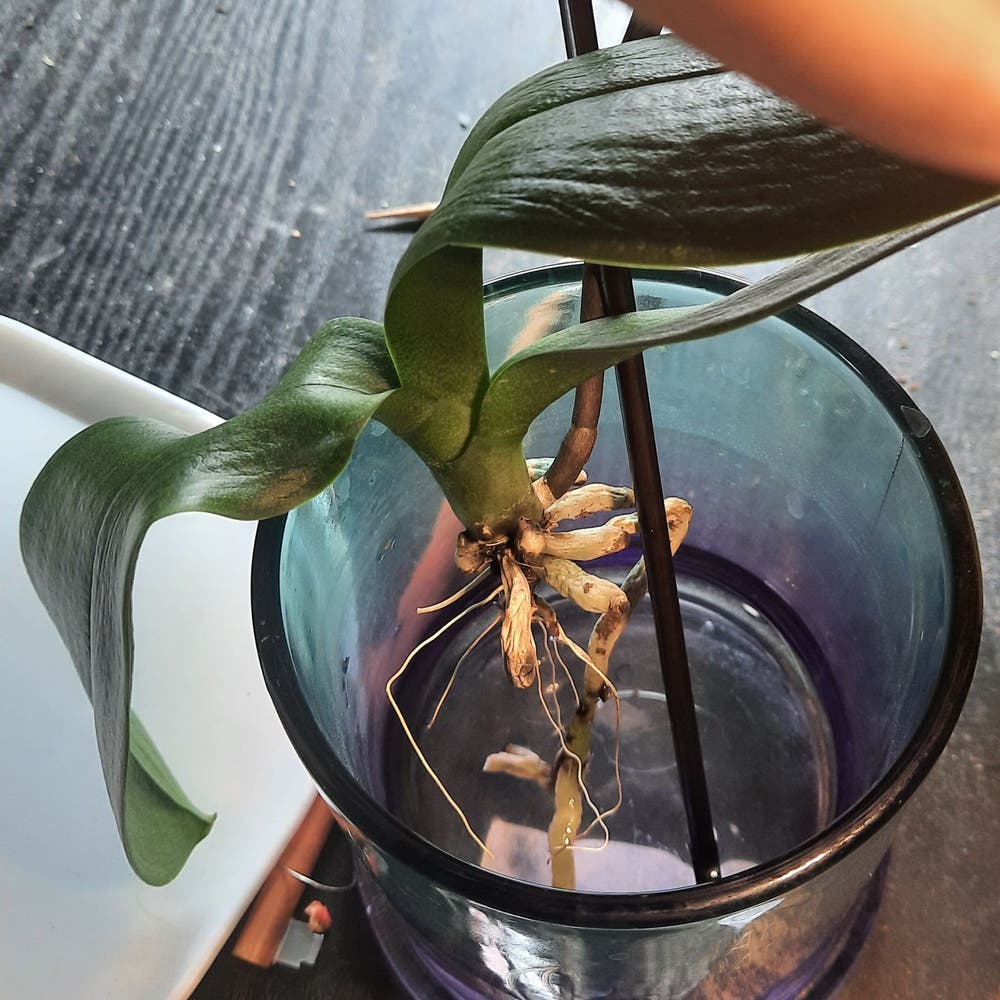
Yellowing leaves and mushy roots are the orchid's version of an SOS. A foul odor? That's the plant's equivalent of a smoke alarm for root health.
Tactile and Visual Inspection
Gently poke around the roots. If they feel like yesterday's overcooked pasta, it's action time. Discoloration and softness are the traitors you're looking to weed out.
Spotting signs of fungal or bacterial growth? That's the plant's way of waving a red flag at you. If the roots look like they've been through a horror movie—dark, mushy, and possibly smelly—it's time to play plant doctor.

First Response: Immediate Actions to Combat Root Rot
🌱 Trimming and Sterilizing
Root rot waits for no one. Act fast. Begin by removing your mini phalaenopsis orchid from its pot. Gently wash away the old potting medium to reveal the root system.
Snip the rot. Using sterilized scissors, cut away all rotted roots. They're usually brown, mushy, and have a foul odor. Healthy roots are firm and green or white.
Sterilize your tools before and after use. This isn't just a good practice; it's a non-negotiable step to prevent spreading the infection.
🛡️ Choosing and Applying Treatments
Fungicides are your next line of defense. Copper-based fungicides are a go-to, but options like mancozeb or chlorothalonil can also be effective.
Apply treatments immediately after trimming. Follow label instructions religiously—overdoing it can harm your plant more than help it.
Remember, the goal is to create conditions where root rot can't thrive. So, after you've waged this initial battle, focus on prevention for the long haul.

Repotting Your Mini Phalaenopsis: A Fresh Start
🌱 Selecting the Right Potting Medium
Choosing the right potting medium is like picking a good wine—it can make or break your Mini Phalaenopsis orchid's future. Go for a well-draining orchid mix that's airy enough to let the roots breathe but holds just enough moisture to prevent dehydration. Ingredients like bark, perlite, and charcoal are your best friends here.
The potting medium isn't just a bed for your orchid's roots; it's a lifeline. A good mix wards off the dreaded root rot by providing excellent drainage and preventing water from getting too cozy around the roots.
🌿 Repotting Step-by-Step
Alright, let's dive into the nitty-gritty of repotting. First, gather your tools: a pot that's snug but not a straitjacket, a clear one if you're into root voyeurism, and your trusty, sterilized cutting implements.
- Gently tease out the roots from the old medium. If they're clinging on like last night's regrets, a stream of water can help loosen things up.
- Trim the drama—snip away any roots that look like they've seen better days (think mushy, dark, or just plain dead).
- Layer up the new pot with a cozy blanket of fresh potting mix, but don't go overboard—a few inches will do.
- Settle in the roots, tucking them in with more mix, and give the pot a few taps to eliminate any air pockets. Leave a little headspace for watering; think of it as the orchid's breathing room.
- Water the plant like it's just returned from a desert trek—submerge the pot in room temperature water for a spa-like soak, then let it drain away any excess baggage.
Remember, after the repot, it's a no-fertilizer zone for a couple of months. The orchid's adjusting, and you don't want to overwhelm it with nutrients. Keep the leaves clean, because even orchids appreciate good hygiene. And if you've timed it right, repotting in spring might just reward you with blooms when winter rolls around.

Watering Wisely: Preventing Root Rot Through Proper Hydration
💧 Fine-Tuning Watering Frequency
Root rot in Mini Phalaenopsis Orchids often starts with watering missteps. The key is to adjust watering based on environmental cues, not dates on the calendar. Light levels, room temperature, and humidity all play their part. In winter, your orchid's thirst wanes, so reduce the watering frequency. Conversely, in the summer, it might crave more frequent drinks.
Use your fingers or a moisture meter to check the potting medium's moisture. If the top inch feels dry, it's time to water. Remember, your orchid prefers a sip over a soak—overwatering is the fast track to root rot city.
🚰 Importance of Drainage
Drainage holes are the unsung heroes in the fight against root rot. They're as necessary as the air your orchid breathes. If you're using a decorative pot without holes, think again. It's like wearing a raincoat in a sauna—uncomfortably soggy. Instead, nestle your orchid in a nursery pot with holes, then place it inside the fancy one. This way, excess water can bid a hasty retreat, and your orchid's roots stay high and dry.
To ensure drainage isn't just a concept, elevate your pot with feet or a stand. This prevents water from getting cozy at the bottom. And if you're feeling extra, consider a potting mix with bark or perlite—it's like giving your orchid roots a pair of breathable sneakers for that marathon we call life.
Keeping Root Rot at Bay: Long-Term Prevention Strategies
💨 Environmental Control
Adequate air circulation is non-negotiable for orchid health. It's like an invisible shield against mold and fungal parties. A fan set on low can promote this airflow, but remember, we're not trying to recreate the last scene of 'Twister.'
Humidity levels need to be just right—Goldilocks-style. Too much moisture, and you're asking for trouble. A dehumidifier or air conditioner can keep things dry without turning your grow space into the Sahara.
Temperature and light are the yin and yang of orchid care. Keep your mini phalaenopsis in a spot that's cozy but not sweltering, with light that's bright but not scorching. Room temperature is the sweet spot, and indirect sunlight is their jam.
🕵️♂️ Regular Monitoring and Maintenance
Routine checks are the dental cleanings of the plant world—necessary and preventative. Get up close and personal with your orchid's roots. Early signs of root rot are like whispers; ignore them, and they'll turn into screams.
Adapt care practices as needed. Orchids aren't static; they're living barometers of their environment. If the seasons change or your central heating kicks in, tweak your watering schedule and care routine accordingly. Be proactive, not reactive.
Remember, cleanliness is next to orchid-godliness. Sanitize your tools like a surgeon, and keep your plant's living space cleaner than a minimalist's dream home. This isn't just about aesthetics; it's about survival.
⚠️ Safety First
This content is for general information and may contain errors, omissions, or outdated details. It is not medical, veterinary advice, or an endorsement of therapeutic claims.
Always consult a qualified healthcare professional before using any plant as food, medicine, or supplement.
Never eat any plant (or feed one to pets) without confirming its identity with at least two trusted sources.
If you suspect poisoning, call Poison Control (800) 222-1222, the Pet Poison Helpline (800) 213-6680, or your local emergency service immediately.
Spotted an error? Please report it here.
Prevent root rot 🚫 in your mini phalaenopsis orchids with Greg's custom reminders for the perfect watering schedule and potting mix, keeping your blooms healthy and thriving.