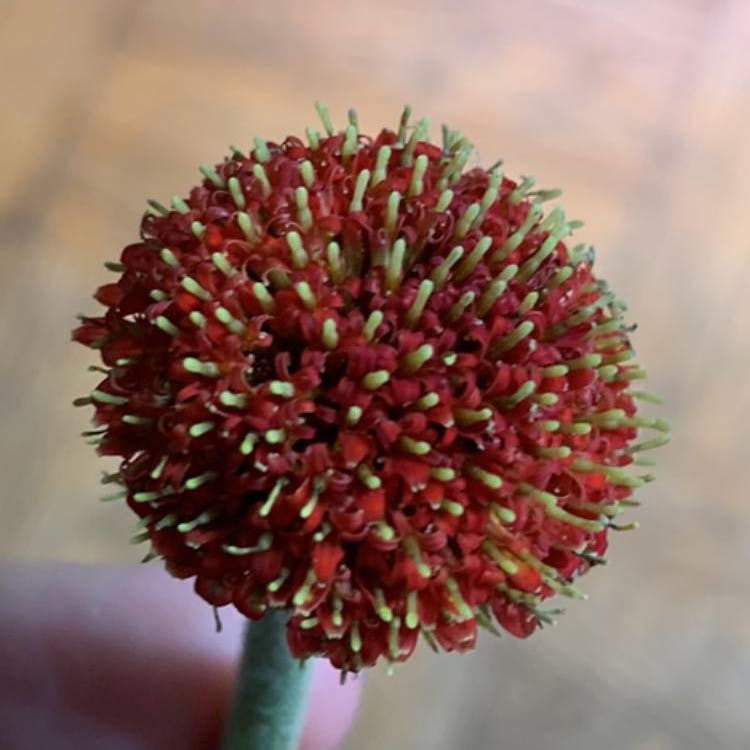
🌼 How to Fix Dropping Leaves on Your Transvaal Daisy
Gerbera L.
By the Greg Editorial Team
Nov 06, 2024•7 min read
This article was created with the help of AI so we can cover more plants for you. May contain errors. See one? Report it here.
- 💧 Overwatering and underwatering both cause leaf drop; balance is crucial for health.
- 🌞 Transvaal Daisies need 6-8 hours of sunlight daily to thrive and prevent leaf loss.
- 🐛 Regular pest inspections are essential to maintain plant vitality and prevent leaf drop.
Causes of Leaf Drop
💧 Overwatering and Its Effects
Overwatering is a common issue that can lead to serious problems for your Transvaal Daisy. Symptoms include leaf yellowing and wilting, soft and mushy roots, and a foul odor emanating from the soil.
The impact on plant health can be severe. Root rot may develop, which reduces oxygen availability to the roots, ultimately harming the plant. To prevent water accumulation, it’s crucial to use well-draining soil.
🚰 Underwatering and Its Symptoms
On the flip side, underwatering can also cause distress. Symptoms include leaf curling and browning at the tips, dry and crispy leaves, and stunted growth.
Prolonged underwatering stresses the plant, leading to leaf drop and making recovery difficult if not addressed promptly. Keeping a close eye on watering habits can help avoid these issues.
🐛 Pest Infestations
Pests are another culprit behind leaf drop in Transvaal Daisies. Common pests include aphids, which leave a sticky residue and cause curled leaves, and spider mites, identifiable by fine webbing and stippled leaves.
These pests can deplete nutrients, weakening the plant and increasing its susceptibility to diseases. Regular inspections can help catch infestations early.
🍄 Fungal Infections
Fungal infections can wreak havoc on your plant's health. Root rot is a significant concern, with symptoms like wilting and yellowing leaves, even when watering is adequate. Leaf spot diseases, characterized by brown or black spots, are also common.
To prevent these issues, ensure proper soil drainage and avoid waterlogged conditions. Healthy soil practices are essential for keeping your Transvaal Daisy thriving.
🌡️ Environmental Stress
Environmental factors play a crucial role in leaf health. Temperature stress can occur if the plant is kept outside its ideal range of 20°C to 25°C (68°F to 77°F). Symptoms include leaf drop and discoloration.
Humidity levels are equally important. Transvaal Daisies prefer moderate humidity; low humidity can lead to leaf drop. Monitoring these conditions can help maintain a healthy plant.
Understanding these causes of leaf drop is the first step in ensuring your Transvaal Daisy remains vibrant and healthy. Next, we’ll explore how to diagnose these issues effectively.
Diagnosing Leaf Drop Issues
🌊 Identifying Signs of Overwatering
To diagnose overwatering, start by checking the soil moisture levels. A moisture meter or a simple finger test can help you determine if the soil is too wet.
Next, inspect the roots by gently removing the plant from its pot. Look for soft, mushy roots, which indicate that the plant is suffering from root rot.
💧 Recognizing Signs of Underwatering
Underwatering can be identified by examining the leaf texture. If the leaves are dry and brittle, it's a clear sign that your plant needs more water.
Additionally, check the soil condition. Dry, hard soil that pulls away from the pot edges suggests that the plant is not getting enough moisture.
🐛 Checking for Pests and Diseases
Pests can also contribute to leaf drop, so it's crucial to inspect your plant regularly. Examine the undersides of leaves and stems for any signs of pests.
Look for discoloration or spots, which may indicate fungal infections. Catching these issues early can save your plant from further damage.
🌡️ Assessing Environmental Conditions
Environmental factors play a significant role in plant health. Ensure your Transvaal Daisy receives full sun for 6-8 hours daily, as inadequate light can lead to stretching stems and pale leaves.
Temperature is another critical factor. Keep your plant within the ideal range of 20°C to 25°C (68°F to 77°F) to prevent stress that could cause leaf drop.
By carefully diagnosing these issues, you can take the necessary steps to restore your Transvaal Daisy to its vibrant self. Next, let’s explore how to prevent leaf drop in the first place.
Preventing Leaf Drop
💧 Proper Watering Techniques
Watering your Transvaal Daisy correctly is crucial for preventing leaf drop. Allow the top inch of soil to dry out before watering again, ensuring the roots get the right amount of moisture without becoming waterlogged.
To promote healthy root growth, water deeply but infrequently. This method encourages the roots to reach deeper into the soil, making your plant more resilient.
🌱 Ideal Soil Conditions and Drainage
Choosing the right soil type is essential for your plant's health. A well-draining potting mix, ideally containing perlite or sand, helps prevent excess moisture retention.
Additionally, ensure your pots have drainage holes. This simple step prevents water accumulation, which can lead to root rot and other issues.
☀️ Optimal Light Exposure
Light exposure plays a significant role in your Transvaal Daisy's vitality. Position your plant in a south-facing window or another bright location to provide the 6-8 hours of sunlight it craves.
As seasons change, remember to rotate your plant. This ensures even light exposure, preventing stretching and maintaining a balanced shape.
🌫️ Maintaining Appropriate Humidity Levels
Humidity is another factor to consider for your Transvaal Daisy. Aim for a humidity level of 40-60%; using a humidifier can help achieve this ideal environment.
You can also create a microclimate by grouping your plants together. This not only boosts humidity but also fosters a thriving plant community.
By implementing these preventive measures, you can significantly reduce the risk of leaf drop in your Transvaal Daisy. Next, let’s explore how to diagnose leaf drop issues effectively.
Treating Leaf Drop Problems
🚰 Steps to Take for Overwatered Plants
If you suspect overwatering, start by removing the plant from its pot to inspect the roots. Look for any soft, mushy roots that indicate rot.
Next, trim away the rotten roots using sterilized scissors to prevent further infection.
Repot the plant in fresh, dry soil and ensure it drains thoroughly to avoid water accumulation.
Finally, adjust your watering schedule to allow the top inch of soil to dry out before watering again.
💧 Solutions for Underwatered Plants
For underwatered plants, the first step is to soak the plant in water for about 30 minutes. This helps rehydrate the roots effectively.
After soaking, gradually increase your watering frequency based on the soil moisture levels. This will help the plant recover without overwhelming it.
🐛 Pest Control Methods
Pests can also contribute to leaf drop, so it's essential to address any infestations promptly. Consider using organic options like neem oil spray to tackle aphids and spider mites effectively.
In addition, insecticidal soap can be a powerful ally in managing pest populations. Regularly inspect your plants and maintain cleanliness to prevent future outbreaks.
🍄 Treatment for Fungal Infections
Fungal infections, such as root rot, require immediate attention. Start by removing the affected plants from the soil to assess the damage.
Trim away any rotten roots and repot the plant in fresh soil to give it a fighting chance. If necessary, apply a fungicide to combat any lingering fungal issues.
By following these treatment steps, you can help your Transvaal Daisy bounce back from leaf drop and thrive once again.
As you work through these solutions, remember to monitor your plant's recovery closely. Adjust your care routine based on its response to ensure long-term health and vitality.
Post-Treatment Care
Monitoring Recovery Signs 🌱
After addressing the leaf drop issues, keep an eye out for new leaf growth and improved color. These signs indicate that your Transvaal Daisy is on the mend and regaining its vitality.
Adjusting Care Routine Based on Plant Response 🔄
As your plant starts to recover, be prepared to modify your care routine. Adjust watering and light exposure according to how well your plant responds, ensuring it gets the right conditions to thrive.
Long-Term Care Strategies to Prevent Recurrence 🛡️
To prevent future leaf drop, regularly check soil moisture and adjust your watering schedule as needed. Maintaining optimal light and humidity levels is crucial for supporting your plant's health.
Implementing a seasonal care routine can also help your Transvaal Daisy adapt to changing conditions throughout the year. This proactive approach will keep your plant flourishing and vibrant.
⚠️ Safety First
This content is for general information and may contain errors, omissions, or outdated details. It is not medical, veterinary advice, or an endorsement of therapeutic claims.
Always consult a qualified healthcare professional before using any plant as food, medicine, or supplement.
Never eat any plant (or feed one to pets) without confirming its identity with at least two trusted sources.
If you suspect poisoning, call Poison Control (800) 222-1222, the Pet Poison Helpline (800) 213-6680, or your local emergency service immediately.
Spotted an error? Please report it here.
Keep your Transvaal Daisy vibrant and leaf-drop-free 🌼 by using Greg's tailored care reminders to master watering, pest control, and environmental conditions!