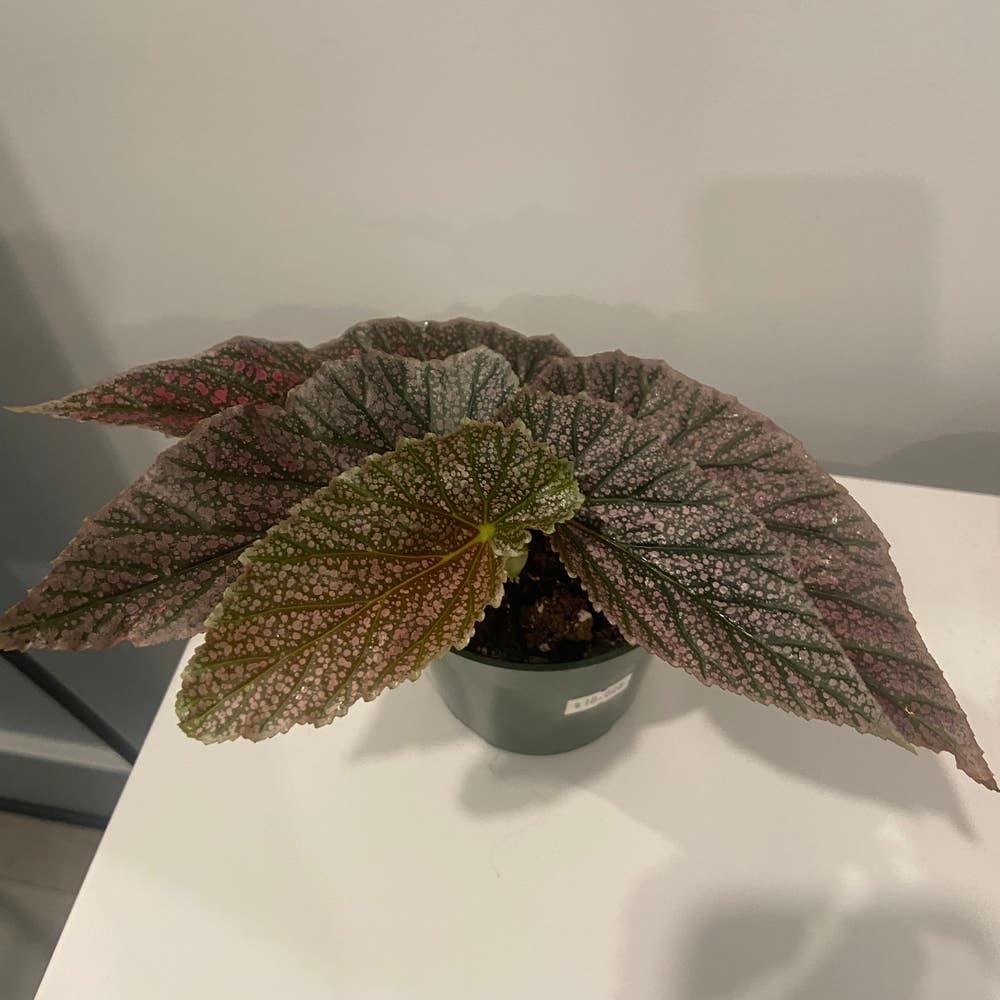
Propagating Eyelash Begonia: Step-by-Step Guide
Begonia bowerae
By the Greg Editorial Team
Feb 12, 2024•6 min read
This article was created with the help of AI so we can cover more plants for you. May contain errors. See one? Report it here.
- Choose healthy leaves or stems; let leaf callous before planting, cut stem at 45° angle.
- Create ideal conditions: well-draining soil, bright light, 25°C, and humidity with airflow.
- Be patient and troubleshoot: expect roots in weeks, transplant at half-inch, address issues promptly.
Choosing Your Propagation Adventure
🌱 Leaf Cuttings
Selecting the right leaf is a cornerstone of successful propagation. Look for leaves that are plump and vibrant, showing no signs of distress. Snip it close to the stem with a clean, sharp tool to ensure a smooth detachment.
🌿 Preparing and Planting Your Leaf Cutting
After the cut, let the leaf sit out for a day or two until the end forms a protective callous. This step is like first aid for plants, warding off rot and setting the stage for roots. Place the callused end on top of a well-draining soil mix, and resist the urge to bury it deep. Lightly moist soil is key, akin to a well-wrung sponge.
🌱 Stem Cuttings
Identifying a healthy stem is like picking a winner at the races. Aim for stems that are robust, green, and free from any blemishes or signs of disease.
🌱 Rooting Your Stem Cutting: The Do's and Don'ts
Cut below the node at a 45-degree angle to increase the area from which roots can grow. If you spot aerial roots, you're in luck—these stems are primed for rooting. Plant your stem in a light, airy soil mix that drains faster than your patience while waiting for growth. Water sparingly; overwatering is the fast track to a soggy disaster. Remember, a clean cut and a clean start are non-negotiables for propagation success.
Creating the Perfect Propagation Environment
💧 Soil and Potting Mix Magic
Well-draining soil is non-negotiable for Eyelash Begonia cuttings. Mix a peat-based potting soil with perlite for aeration. This concoction ensures roots have the right balance of moisture and breathing space.
Choosing the right container is like picking a home that's just the right size—not too big, not too small. Small pots encourage a cozy fit for your cuttings, promoting healthy root development without wasting space.
🌞 Light, Temperature, and Humidity Harmony
Light is like the lifeblood for propagation—too much, and you'll have a sunburnt disaster; too little, and you're left with a growth stunt show. Aim for bright, indirect light to hit the sweet spot.
Temperature-wise, think of a warm spring day—around 25°C (77°F) is ideal. It's warm enough to encourage growth without turning your propagation station into a sauna.
Humidity is the secret sauce for Eyelash Begonia propagation. You want that tropical vibe—moist, but not a rainforest. Creating a mini hothouse with a plastic cover can help maintain this balance, just ensure there's airflow to prevent mold.
Remember, your cuttings are like Goldilocks—not too wet, not too dry, not too hot, not too cold. It's all about finding that 'just right' environment.
The Waiting Game: Eyelash Begonia Propagation Timeline
⏳ Early Days
In the initial weeks of propagating your Eyelash Begonia, don't expect a botanical fireworks show. Patience is your best friend here. With temperatures hovering between 20 to 25 °C, you're playing the long game. Six weeks might pass before you witness the magic of the first roots. Keep the soil moist and your cuttings under wraps, literally. A covered pot or mini greenhouse can prevent your future green babies from drying out.
Rooting Success
Roots are the underground fanfare of propagation success. When you feel a subtle resistance upon a gentle tug, it's time to break out the non-alcoholic champagne. This is a clear sign that your cuttings are no longer just cuttings—they're on their way to becoming full-fledged plants. Don't rush to transplant; let those roots get half an inch long in their cozy, humid haven before you even think about moving day. Keep an eye out for new leaf growth, a surefire indicator that your Eyelash Begonia is putting down roots and taking names.
Troubleshooting Propagation Pitfalls
🚨 Common Issues
Spotting Trouble Early
Yellow leaves or growth that's more bonsai than beanstalk? These are distress signals from your cuttings. Act swiftly to prevent these early warnings from escalating into a full-scale plant meltdown.
🍄 Root Rot: The Silent Killer
Mushy, brown roots are a cry for help, often due to overwatering. Remember, your cuttings need hydration, not a bath. Adjust your watering habits to keep root rot at bay.
🌬️ The Fungus Among Us
If you spot mold, it's time to reassess your moisture levels. Keep air circulating around your cuttings with a fan, and if you're living in a tropical climate indoors, a dehumidifier might just be your new best friend.
🌞 Light and Temperature: The Goldilocks Zone
Cuttings not rooting? They might be craving more warmth or light. Find that sweet spot with indirect sunlight and a cozy temperature. Too much direct light can be just as harmful as none.
🧼 Cleanliness is Next to Propagation Success
Dirty tools are a no-go. Sterilize your scissors or shears before cutting to avoid introducing any unwanted guests to your cuttings. Think of it as a mini surgery for your plants.
🕰 When to Start Over
Recognizing a Lost Cause
Sometimes, despite your best efforts, a cutting just won't take. If you've adjusted water, light, and temperature and still see no improvement, it's time to start fresh with a new cutting.
🌱 The Node Know-How
For cuttings that won't root, check your node game. Nodes are the hotspot for root growth, so make sure your cuttings include one. No nodes, no new roots—it's that simple.
⏳ The Patience Principle
Propagation isn't instant—sometimes it's more about waiting than doing. If you've been patient and there's still no progress, consider it a learning experience and try again.
Transition Time: Potting Your New Eyelash Begonias
🌱 The Big Move
Once your Eyelash Begonia cuttings boast half-inch roots, it's potting time. This critical step often aligns with the vigorous growth phase in early spring. Grab a pot one size up from your cutting's current home, armed with a well-draining potting mix.
🌿 Acclimation Tips
Slow and steady wins the race when acclimating your Begonias to their new digs. Start by placing them in a semi-shaded area to avoid shock from a sudden change in conditions. Over a week, gradually introduce them to the light levels of their permanent location. Remember, these are your plant babies; handle with care and watch for signs of distress. If they throw a tantrum (read: wilting, leaf drop), dial back the intensity and try again.
⚠️ Safety First
This content is for general information and may contain errors, omissions, or outdated details. It is not medical, veterinary advice, or an endorsement of therapeutic claims.
Always consult a qualified healthcare professional before using any plant as food, medicine, or supplement.
Never eat any plant (or feed one to pets) without confirming its identity with at least two trusted sources.
If you suspect poisoning, call Poison Control (800) 222-1222, the Pet Poison Helpline (800) 213-6680, or your local emergency service immediately.
Spotted an error? Please report it here.
Turn your Eyelash Begonia propagation into a success story 🌟 with Greg's tailored reminders for watering, light, and temperature, ensuring your cuttings grow roots as efficiently as your gardening skills.