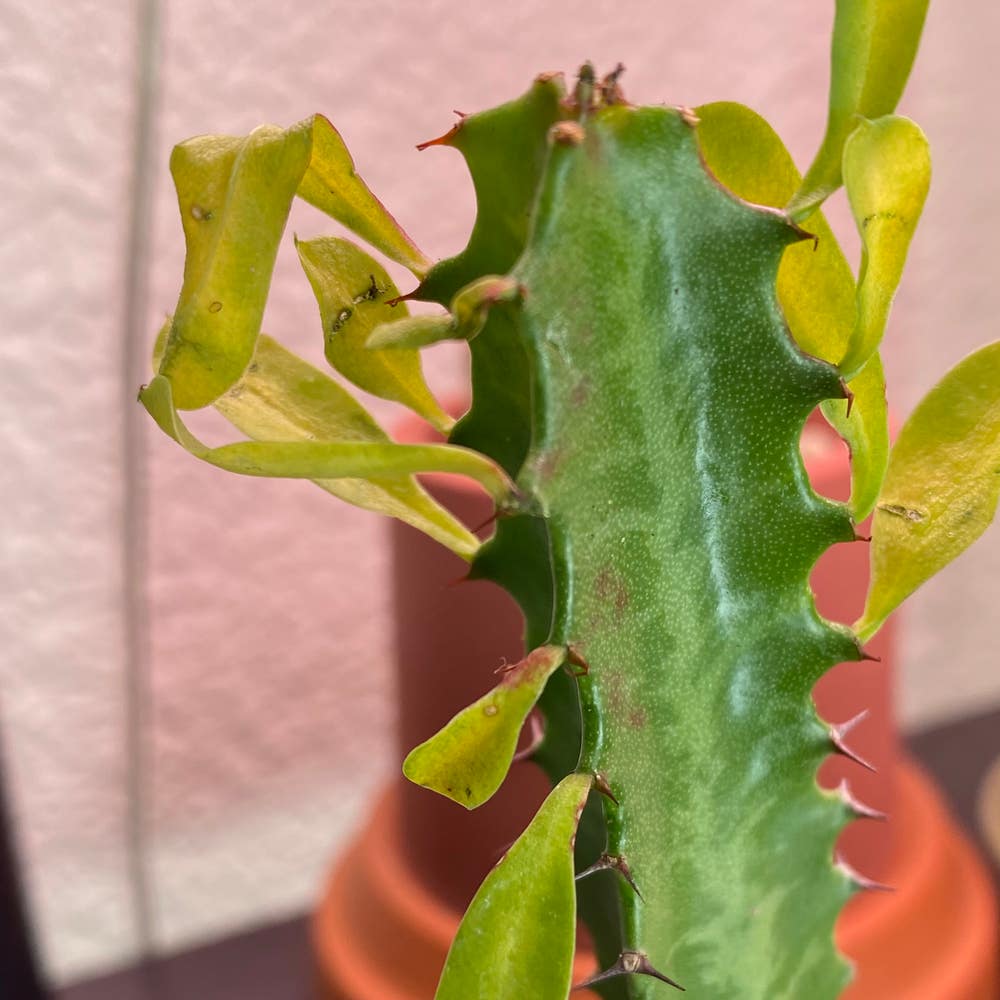
7 Tips for How to Plant Euphorbia stellata
Euphorbia stellata
By the Greg Editorial Team
Nov 25, 2024•6 min read
This article was created with the help of AI so we can cover more plants for you. May contain errors. See one? Report it here.
Transform your garden by mastering the secrets of planting vs. transplanting Euphorbia stellata! 🌱
- 🌱 Euphorbia stellata is perfect for beginners due to its adaptability and low cost.
- 🌞 Plant in spring or early summer for optimal growth and minimal transplant shock.
- 🏺 Use well-draining soil and space plants 12-18 inches apart for healthy development.
Planting vs. Transplanting Euphorbia stellata
🌱 Benefits of Planting New Plants
Planting new Euphorbia stellata is often cost-effective, requiring a lower initial investment compared to established plants. Additionally, these young plants tend to adapt more easily to their new environments, making them a great choice for novice gardeners.
⚠️ Drawbacks of Planting New Plants
However, patience is key when planting new specimens, as they take longer to reach full size and flowering potential. They also require more attention during their establishment phase, which can be a challenge for busy gardeners.
🌳 Benefits of Transplanting Established Plants
On the flip side, transplanting established Euphorbia stellata can provide immediate visual impact in your garden. These larger plants come with established root systems, offering better resilience to environmental stressors.
😬 Drawbacks of Transplanting Established Plants
Yet, there are challenges to consider. Transplant shock is a real risk, as relocating these plants can cause stress. Moreover, the process is more labor-intensive, requiring careful handling and preparation to ensure success.
Understanding these pros and cons will help you make an informed decision on whether to plant new or transplant established Euphorbia stellata. Next, let’s dive into the key steps for planting new Euphorbia stellata effectively.
Key Steps for Planting New Euphorbia stellata
🌱 Optimal Timing for Planting
Spring or early summer is the best time to plant Euphorbia stellata. During these seasons, temperatures are consistently warm, which helps the plant establish itself.
Consider your local climate when planning your planting. Aligning with the growth cycle and regional weather patterns can significantly enhance your plant's success.
🏺 Selecting the Appropriate Soil Mix
Euphorbia stellata thrives in well-draining soil, ideally sandy or gravelly substrates. A recommended mix is 50% potting soil, 25% sand, and 25% perlite to ensure optimal drainage.
This combination allows for healthy root development while preventing waterlogging, which can be detrimental to the plant.
🪴 Container Options
If you're opting for container gardening, choose pots with drainage holes. The container should be at least 6-8 inches deep to accommodate root growth effectively.
For outdoor planting, ensure that the soil conditions match the plant's preferences for the best results.
📏 Proper Depth and Spacing for Planting
When planting, dig a hole that is 2-3 inches deep, ensuring the crown of the plant remains above soil level. This positioning helps prevent rot and encourages healthy growth.
Space your plants 12-18 inches apart to allow for adequate airflow and growth. This spacing is crucial for preventing overcrowding and promoting healthy development.
☀️ Maintaining Ideal Growing Conditions
Euphorbia stellata requires full sun exposure, ideally 6-8 hours daily, for optimal growth. This sunlight is essential for the plant to thrive and produce vibrant foliage.
Watering is also critical; allow the soil to dry out between waterings. Once established, the plant needs minimal water, making it relatively low-maintenance.
🌳 Hardening Off Process
The hardening off process is vital for acclimating your Euphorbia stellata to outdoor conditions. Start by keeping the plants indoors for 1-2 weeks, gradually exposing them to outdoor conditions for a few hours each day.
Increase the exposure time gradually until the plants are fully acclimated. This step helps reduce transplant shock and ensures a smoother transition to their new environment.
By following these key steps, you'll set your Euphorbia stellata up for success in your garden. Next, let's explore the essential steps for transplanting established Euphorbia stellata.
Key Steps for Transplanting Established Euphorbia stellata
🌱 Optimal Timing for Transplanting
Transplanting Euphorbia stellata is best done in early spring or fall. These seasons offer milder temperatures, making it easier for the plant to adjust.
Consider the plant's growth cycle when planning your transplant. Aim to move it during dormancy or its active growth phase for optimal results.
📝 Step-by-Step Instructions for Transplanting
- Prepare the new planting site: Clear the area of weeds and debris to create a welcoming environment.
- Water the established plant: Moist soil helps reduce stress during the removal process.
- Carefully dig around the root zone: Target a 12-inch radius around the plant to preserve as many roots as possible.
- Lift the plant gently: Take care to minimize root disturbance during this step.
- Place in the new site: Ensure the plant is set at the same depth as it was previously planted.
🏡 Preparing the New Planting Site
Soil preparation is crucial for a successful transplant. Amend the soil with compost or a well-draining mix to promote healthy growth.
Maintain a spacing of 12-18 inches between plants. This allows for adequate airflow and reduces competition for nutrients.
📏 Ensuring Proper Placement and Spacing
Position the plant to receive full sun exposure. Euphorbia stellata thrives in bright conditions, so this step is essential for its health.
After planting, check for stability. Ensure the plant stands upright and secure in its new location to prevent any future issues.
💧 Tips for Watering and Mulching
After transplanting, water the plant thoroughly. This initial watering helps settle the soil around the roots, but allow it to dry out afterward.
Consider applying a thin layer of mulch. This helps retain moisture and suppress weeds, creating a better environment for your plant.
🛠️ Providing Support for Newly Transplanted Plants
For taller Euphorbia stellata, use stakes as support structures if necessary. This can help prevent any toppling during windy conditions.
Monitor the plant's stability regularly. Adjust the support as needed during the establishment phase to ensure it thrives in its new home.
Transplanting can be a rewarding experience, leading to a flourishing garden. With the right timing and care, your Euphorbia stellata will thrive in its new location. Next, let’s explore troubleshooting common issues that may arise during the establishment process.
Troubleshooting Common Issues
Understanding Transplant Shock 🌱
Transplant shock can be a real bummer for your Euphorbia stellata. Look out for symptoms like wilting, yellowing leaves, and stunted growth, which indicate your plant is struggling to adjust.
To prevent this, focus on minimizing root disturbance during the transplant process. Ensuring proper watering before and after the move can also help your plant settle in more comfortably.
Addressing Establishment Problems 🛠️
If your Euphorbia stellata is showing signs of poor establishment, such as slow growth, leaf drop, or discoloration, it’s time to take action. These issues often stem from inadequate care during the early stages.
Start by checking the soil moisture. Adjust your watering schedule to ensure the plant gets enough hydration without becoming waterlogged. Also, make sure your plant is receiving adequate sunlight, as this is crucial for its recovery and growth.
Common Pests and Diseases 🐛
Keep an eye out for common pests like aphids, mealybugs, and spider mites, which can wreak havoc on your Euphorbia stellata. Regularly inspecting your plants can help catch these nuisances early.
Diseases such as root rot often result from overwatering. To prevent this, ensure your plant has proper drainage and avoid letting it sit in soggy soil. With a little vigilance, you can keep your Euphorbia healthy and thriving.
By addressing these common issues promptly, you can ensure your Euphorbia stellata flourishes in its new home. Next, let’s explore how to provide the best care for your plants as they grow.
⚠️ Safety First
This content is for general information and may contain errors, omissions, or outdated details. It is not medical, veterinary advice, or an endorsement of therapeutic claims.
Always consult a qualified healthcare professional before using any plant as food, medicine, or supplement.
Never eat any plant (or feed one to pets) without confirming its identity with at least two trusted sources.
If you suspect poisoning, call Poison Control (800) 222-1222, the Pet Poison Helpline (800) 213-6680, or your local emergency service immediately.
Spotted an error? Please report it here.
Transform your gardening skills with Euphorbia stellata 🌱 by using Greg's tailored care tips and watering reminders to ensure your plants thrive beautifully!