How to Plant an Aloe Vera
Plant Aloe vera in a terra cotta pot with drainage holes using a fast-draining cactus and succulent mix. Bury the base of the rosette just at the soil surface, never deeper. Set the pot in the brightest spot you have, ideally a south or west window with several hours of direct sun. Water only after the mix has dried out completely, usually every two to three weeks indoors. Expect the first new central leaf within four to six weeks.
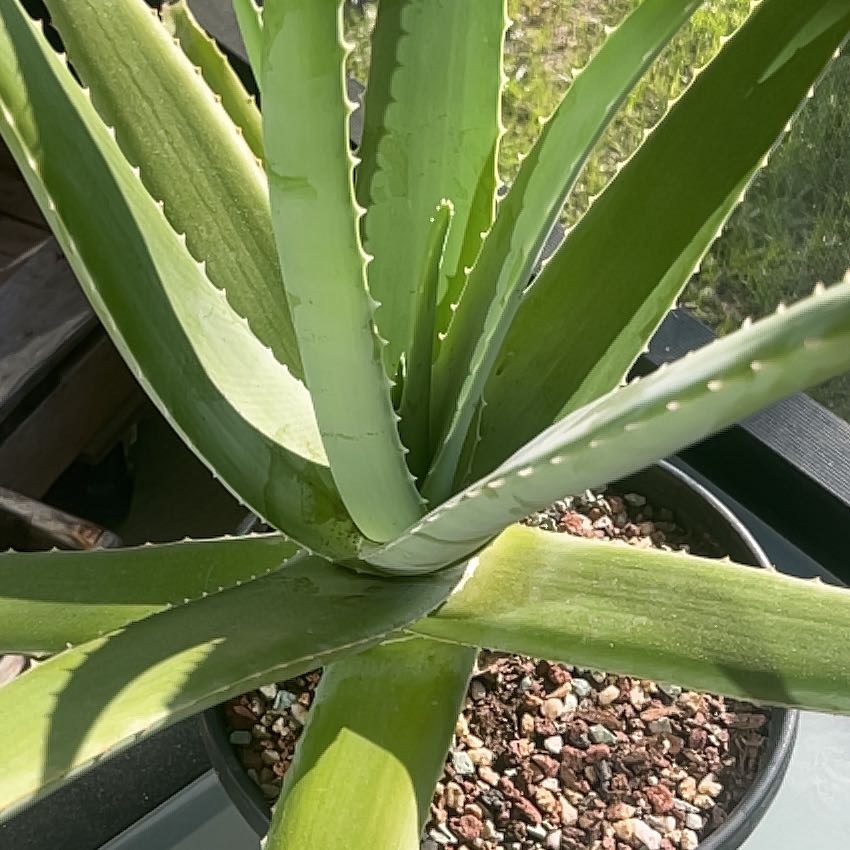
Where to put it
Aloe vera lives in bright direct sun and tolerates almost nothing else well. Indoors, a south or west window with four or more hours of direct sun keeps the plant stocky and tight. East light works for survival but the plant stretches and leans toward the window. North windows are not enough light, and the plant grows pale and floppy within a month.
Keep the temperature between 55 and 80°F. Aloe vera is hardy outdoors only in zones 9 through 11, so almost everywhere in the US the plant lives indoors year-round or moves outside for the warm months and comes back in before nights drop below 50°F. Avoid drafts from heat and AC vents, which dry the leaves out unevenly.
Humidity is not a concern. Dry indoor air is exactly what Aloe vera prefers, and misting or pebble trays will cause more problems than they solve. If you only have one bright spot in the home, that spot is the right one even if the air around it feels dry.
Planting from a nursery transplant
The single most important rule for Aloe vera is drainage. Roots that sit in wet mix rot within a few weeks, and a rotted base usually cannot be saved. The pot must have drainage holes, the mix must be fast-draining, and the watering must be sparing from day one.
Give your new Aloe vera two to three weeks in its nursery pot before repotting. Moving it the day it comes home stacks transplant shock on top of the change from greenhouse to your home, and Aloe vera handles dry stress far better than wet stress.
-
1Pick a terra cotta pot with drainage holes Choose an unglazed terra cotta pot one to two inches wider than the current nursery pot, with at least one drainage hole at the base. Terra cotta is porous and pulls excess moisture out of the mix between waterings, which is exactly the buffer Aloe vera needs against root rot. A pot much larger than the root ball holds too much wet mix and slows the dry-down the plant relies on.
-
2Use a fast-draining cactus and succulent mix Buy a bagged cactus and succulent mix, or make your own by adding one part perlite or coarse sand to two parts standard potting mix. The mix should feel gritty and fall apart in your hand, not clump like garden soil. Heavy water-retentive mixes are the most common cause of slow death in indoor Aloe vera.
-
3Add a base layer, set the plant in, and backfill Pour an inch or two of dry mix into the bottom of the new pot, then slide the plant out of its nursery container and set the root ball on top. Adjust the base layer so the bottom of the rosette, where the leaves emerge, sits about half an inch below the rim. Backfill around the sides with more dry mix and tamp lightly with your fingers. Keep the rosette base at or just above the finished soil line, never buried.
-
4Wait a few days before the first watering Set the pot in its bright spot and leave it dry for five to seven days. Any root damage from the move needs time to callus over, and watering a fresh transplant immediately is a fast path to rot. After the wait, water deeply once until liquid runs out the drainage hole, then do not water again until the mix is completely dry several inches down.
Planting an offset or pup
Aloe vera produces small offsets, often called pups, around the base of the parent plant. These are clones of the parent and root quickly with the right setup. The key with pups is patience at the start. A freshly separated pup has no roots or only a small root nub, and rushing it into wet mix is the single most common reason pups fail.
-
1Separate the pup from the parent Slide the whole parent plant out of the pot and gently work the soil away from the base until you can see where the pup attaches. Pull the pup away with your fingers, or cut it free with a clean knife if it does not separate easily. Keep as many of the pup's own small roots intact as you can, though pups often come away with very few or none and still root fine.
-
2Cure the cut for several days Set the pup on a paper towel in a dry shaded spot for three to five days so the cut at the base can callus over. Planting an open wound directly into mix invites rot pathogens through the cut before the pup can root. The pup will look slightly shriveled by the end of the wait, which is normal and reverses once the plant takes up water again.
-
3Pot into a small container of dry mix Choose a three or four inch pot with a drainage hole and fill it with fast-draining cactus mix. Press a shallow depression into the surface, set the callused pup upright with the base just at the soil line, and firm a little dry mix around it for support. Do not bury the leaves themselves, which rot on contact with damp mix.
-
4Hold off on water until the pup settles Set the pot in bright indirect light, not full direct sun, and leave it completely dry for the first week. After a week, mist the surface lightly or give a teaspoon of water at the base to encourage rooting, but never soak the mix. Once you see signs of new growth at the center of the rosette, usually after three to four weeks, move the pup to its permanent bright spot and switch to a normal Aloe watering rhythm.
The first month and a half
The first weeks for a newly planted Aloe vera are mostly quiet. The plant is healing root damage from the move and slowly settling into the new mix and light. You should not see much visible change on top, and that is normal.
The most common new-grower mistake is reading the lack of visible activity as a sign the plant needs more water or fertilizer. Both push the plant in the wrong direction. Soggy mix causes root rot, the failure mode Aloe vera is most vulnerable to indoors, and fertilizer pushes weak fast growth before the roots can support it. Stick to deep but infrequent watering and skip the fertilizer entirely through the first six weeks.
Healthy first-month signs look like plump firm leaves holding their shape, color staying the same green or green-grey it was at purchase, and no mushy spots at the base. A new central leaf pushing up from the rosette is the clearest sign the plant has fully settled in.
What can go wrong
-
Mushy black or brown base
Root rot from overwatering or a mix that does not drain is the cause, and it is the most common way Aloe vera dies indoors. Unpot the plant and check the roots. If most are still firm and white, trim the soft parts away with a clean knife, let the cut callus for a few days, and repot into fresh dry cactus mix. If the rot has reached up into the rosette base, the plant usually cannot be saved, but healthy pups or upper leaves can sometimes be salvaged for a fresh start. -
Wilting and limp leaves after planting
Some droop is normal in the first week after a move as the plant recovers from root disturbance. Make sure the pot has drainage holes and the mix is the gritty fast-draining kind. Hold off on watering for at least five days after planting, then water deeply once. If the leaves stay limp after a slow dry-down and one watering, check the base for the mushy rot described above. -
Leaves turning orange, red, or pale
Too much intense direct sun, especially during a sudden move from indoors to a bright window or outdoors, is usually the cause. Aloe vera handles strong light but needs to acclimate over a week or two. Move the plant a foot or two back from the brightest glass for a few days, then return it gradually. New growth should return to a normal green once the plant adjusts. -
Tall floppy leaves stretching toward the light
Not enough direct sun is the cause. Aloe vera in a north window or several feet from a south window stretches its leaves out long and thin and leans toward whatever light it can find. Move the plant to a south or west window with at least four hours of direct sun, or supplement with a small grow light. The stretched leaves will not shorten, but new growth at the center will come in tight and stocky. -
Brown crispy leaf tips
Underwatering over a long stretch is the usual cause, especially in a small pot during dry winter heat. The plant survives long dry periods but the older tips eventually crisp once the leaf cannot pull enough moisture. Resume a normal watering rhythm, deep watering once the mix is fully dry, and trim the brown tips off with clean scissors for cosmetic reasons only. New growth should come in clean. -
Pups not rooting in their starter pot
The most common reason is planting an uncured pup into wet mix, which rots the cut before roots can form. Pull the pup, check the base for soft spots, trim any rot away with a clean knife, and let it dry on a paper towel for three to five days. Repot into dry cactus mix and hold off on water for a week before resuming light occasional moisture. -
Water pooling on the surface of the mix
The mix is too dense and water-retentive to drain at the rate Aloe vera needs. Repot into a true cactus and succulent mix, or amend standard potting mix with one part perlite or coarse sand to two parts mix. Standing water at the surface means the roots below are sitting in saturated mix, which is the same setup that causes root rot. -
Thin curled leaves with no plumpness
Long-term underwatering is the cause. The plant pulls moisture from its leaves to survive and the leaves thin out and curl inward over weeks. Soak the pot once until water runs through, let it drain fully, and resume a normal rhythm of deep watering after each full dry-down. Plump shape should return over the next two to three watering cycles.
About This Article
