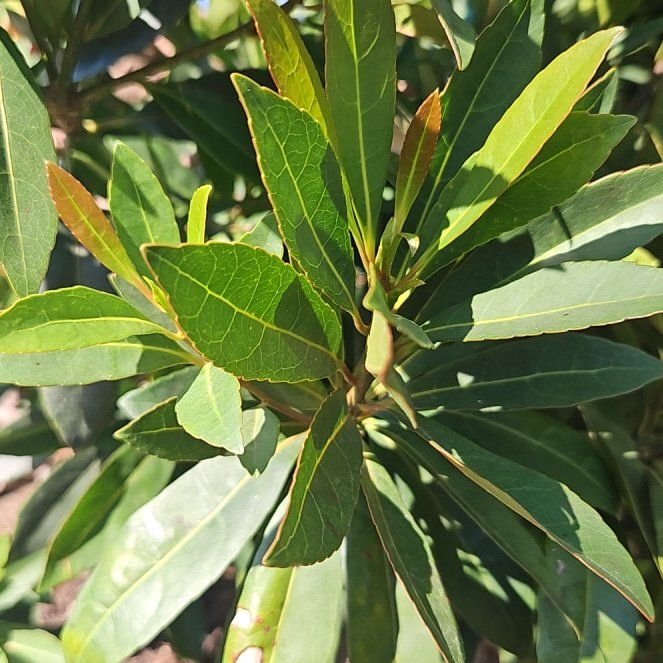
How to Plant a Japanese Blueberry Tree
Plant Japanese Blueberry Tree in spring or fall in full sun with well-drained acidic soil, the root flare sitting at or just above the soil surface. Dig a hole twice as wide as the root ball but no deeper. Space trees 15 feet apart as a screen, 25 feet as a single shade tree. Water deeply once a week through the first year. Expect slow steady growth and a fully settled tree by year three.

When and where to plant
Japanese Blueberry Tree thrives in full sun, six or more hours of direct light each day. In the hottest parts of zones 10 and 11 a little afternoon shade keeps the foliage from scorching, but anywhere else the tree performs best in unobstructed sun, which also yields the densest screening canopy.
The tree is hardy in USDA zones 8 through 11, with a cold floor around 10°F. Plant in spring once the ground has warmed and the last hard frost is past, or in early fall about six weeks before your first freeze. Either window gives the roots time to settle before the next stress season. The site needs well-drained soil on the acidic side, ideally pH 5.5 to 6.5. Heavy clay holds water and causes root rot, so on poorly drained ground, plant on a slight mound.
Space trees 15 feet apart for a screen or formal hedge, or 25 feet apart and 20 feet from structures for a single shade tree at full size.
Planting a container-grown tree
Despite the name, this is not a true blueberry. The small blue-purple fruit is ornamental, not for eating, so the planting decisions here are about a 40 to 60 foot evergreen screen or shade tree, not a fruiting shrub. The single most important rule for any tree like this is the root flare, where the trunk widens into the surface roots, must sit at or just above the finished soil level. Trees buried below the flare slowly suffocate and rarely show signs for two to five years.
-
1Pick a planting day Aim for a cool, overcast day in spring after the last hard frost or in early fall about six weeks before your first freeze. Hot sunny weather pulls moisture from the freshly transplanted evergreen foliage faster than new roots can replace it. If you must plant on a warm day, do it in the early morning and rig temporary shade through the first afternoon.
-
2Dig the hole twice as wide Measure the root ball, then dig a hole twice as wide and the same depth, not deeper. A wide hole loosens soil so the new roots can push out laterally into native ground. Skipping width is the easiest way to slow establishment on compacted or clay-heavy southeastern sites.
-
3Find and set the root flare The root flare is the slight trunk widening where the wood transitions into the major surface roots. Brush soil away from the top of the root ball with your fingers until you can see this flare clearly, then position the tree so the flare sits at or just above your finished soil level. Trees buried below the flare suffocate slowly over two to five years, often without obvious early warning.
-
4Score the roots if they are circling Lift the tree out of the container and look at the sides of the root ball. If you see roots wrapping around in a spiral, use a clean knife to make three or four shallow vertical cuts down the sides, about half an inch deep. Scoring tells the roots to branch out into the surrounding soil instead of continuing the circle, which they sometimes never break out of on their own.
-
5Backfill, water in, and mulch Hold the tree upright as you backfill the hole with the same native soil you removed, firming gently to remove large air pockets. Water the planting hole until the soil settles, then top with two to three inches of mulch, keeping the mulch four inches back from the trunk. Mulch piled against the bark holds moisture against living wood and invites the same rot the root flare rule is meant to prevent.
The first year
The first year for a newly planted Japanese Blueberry Tree is mostly an underground story. The tree is moving energy from new top growth into pushing roots out into the native soil, building the foundation that supports decades of slow steady screening. You should not expect much visible canopy change on top during this period.
The most common new-grower mistake is reading slow above-ground growth as a sign of trouble and overcompensating with extra water or fertilizer. Both can cause real problems. Soggy roots invite the root rot this species is most vulnerable to, and fertilizer pushes leafy growth before the root system can support it. Stick to deep weekly watering and skip the fertilizer for the first full year.
Healthy first-year growth looks like steady deep-green color, some normal seasonal red leaf drop scattered through the canopy, and one short push of bronzy new leaves in late spring.
What can go wrong
-
Browning leaves in the first weeks
Transplant shock from heat or wind drying the foliage faster than the new roots can rehydrate it is the usual culprit. Check that the root ball is staying moist, not soaked. Water deeply at the base and avoid wetting the foliage during the hottest part of the day. If the tree was field-grown and then containerized at the nursery, give it longer to recover, often the full first month. -
Buried root flare (slow decline)
If the flare disappeared into the planting hole or under added mulch, the tree is slowly suffocating. Gently excavate the area around the trunk with your hands until you can see the trunk widening into roots, then pull soil and mulch back from that point. Done within the first year, recovery is usually full. Done after several years, the decline is often too far along to reverse. -
Mushy or rotting roots from waterlogged soil
Heavy clay or a low planting spot collects water and starves roots of oxygen, leading to root rot, which this species has limited tolerance for. Lift the tree if the ground is staying saturated for more than a day after rain, and replant on a 6-inch mound or move to a better-drained site. Going forward, water based on whether the soil feels dry an inch down rather than on a fixed schedule. -
Yellowing leaves with green veins
Iron chlorosis is the most likely cause and shows up when the soil pH drifts above 6.5, locking up iron the tree cannot access. Have your soil pH tested if you have not already, and amend the planting area with elemental sulfur or an acidifying soil amendment to nudge the pH back into the 5.5 to 6.5 window. Recovery shows up in new growth, not in the older yellowed leaves. -
Wind tilt or lean after a storm
Newly planted trees have a small root footprint and can tilt when strong storms pass through the southeast US. Straighten the tree by hand within a day or two of the storm while the roots are still flexible, and stake loosely with two stakes and wide soft ties for six to twelve months. Remove the stakes after the first year so the trunk can develop normal taper and strength. -
Mulch volcano against the trunk
Mulch piled high against the bark traps moisture and invites bark rot and rodent feeding at the base of the trunk. Pull mulch back so it sits four inches clear of the trunk in a flat, donut-shaped ring two to three inches deep. The right pattern looks like a saucer, not a volcano. -
Browning interior leaves in fall
A scattering of red and brown leaves through the interior canopy in fall is normal seasonal leaf drop for this evergreen, not a sign of disease. The tree is shedding older leaves while holding the outer canopy. Concern is warranted only when browning spreads through the outer canopy or affects new growth at the tips, which points to drought or root problems instead. -
Slow visible growth in year one
This is normal for Japanese Blueberry Tree, which puts most of its energy underground during the first full year in the ground. A healthy newly planted tree typically adds only 6 to 12 inches of new tip growth in year one. If color holds and tips are not browning, the tree is doing what it should, and visible growth picks up noticeably in year two.
About This Article
