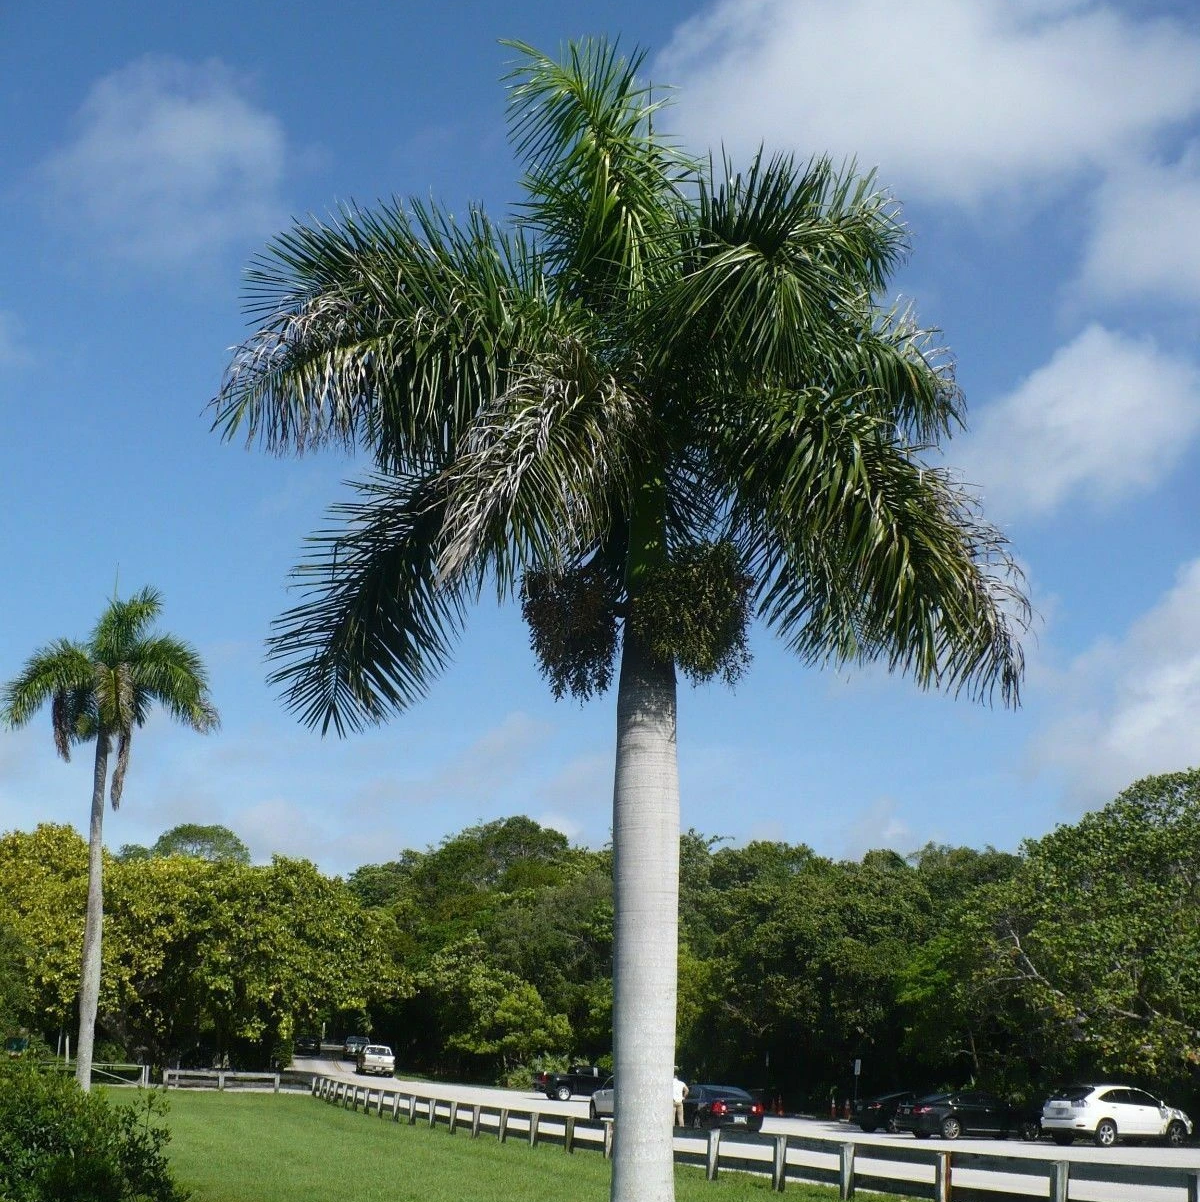
How to Plant a Royal Palm
Plant Royal Palm outdoors in late spring or early summer in zone 10 or 11, full sun, with well-drained sandy soil. Dig a hole the same depth as the root ball and twice as wide, then set the root initiation zone level with the surrounding ground. Never bury the smooth green crownshaft. Water deeply two to three times a week through the first six months and expect one to two new fronds in the first year.

When and where to plant
Royal Palm is hardy in zones 10 and 11 and grows best in full sun, at least six hours of direct light per day. The species is a true tropical native from Cuba, Florida, and the Caribbean basin, so even brief temperatures below 28°F can damage fronds, and a hard freeze can kill an unestablished palm outright. Outside zones 10 and 11, plant in a sheltered microclimate against a south-facing wall or skip the species entirely.
Plant from late spring through early summer once soil temperatures are reliably above 70°F. Warm soil drives the new root flush that anchors the palm before the next hurricane season. Pick a site with deep, sandy, well-drained soil. Royal Palm tolerates a wide pH from 6.0 to 7.8 but rots quickly in standing water, so avoid low spots and heavy clay unless you can plant on a raised mound.
Give the palm room for its mature size. A grown Royal Palm reaches 50 to 100 feet tall with a frond spread of 20 to 25 feet across, so allow at least 20 feet from buildings, walls, and other large trees, and 25 to 30 feet between palms in an avenue planting.
Planting a container-grown palm
The single most important rule for any palm is depth at the root initiation zone, the thickened band just above where the original soil met the trunk. Set that band level with the surrounding ground and never let soil touch the smooth green crownshaft above it. Burying the crownshaft seals living tissue against constant moisture, and the palm declines over the following months with no easy way to reverse it.
-
1Pick a warm, calm planting day Aim for a morning in late spring or early summer when the forecast is warm but not blazing, with no storms or strong wind for the next 48 hours. Wind whips freshly transplanted fronds and loosens the root ball before the new roots have a chance to grip. If you only have hot afternoons available, plan to rig shade cloth over the crown for the first week.
-
2Dig the hole twice as wide Measure the root ball and dig a hole the same depth and twice as wide. The wide hole loosens compacted ground so the new roots can push outward into native soil instead of circling the planting hole. Resist the urge to dig deeper, since a hole that settles even an inch can sink the root initiation zone below grade and start the suffocation cycle.
-
3Find the root initiation zone and set the depth Slide the palm out of the container and look for the thickened band of stubby root nubs just above the soil line of the pot. That band is the root initiation zone, where all new anchoring roots emerge. Set the palm in the hole so this zone sits level with the surrounding ground and the smooth green crownshaft above it stays completely above grade.
-
4Backfill, water in, and brace if needed Hold the palm upright as you backfill with the same sandy soil you removed, firming gently to remove large air pockets without compacting hard. Build a shallow basin of soil around the planting hole and water slowly until the soil settles, then top up any low spots. For palms over six feet tall, brace with three angled 2x4 boards padded against the trunk to hold the palm steady for the first six months while anchoring roots form.
-
5Mulch and shade the crown Spread two to three inches of bark or wood-chip mulch in a ring around the palm, keeping the mulch a full six inches back from the trunk. Mulch piled against the trunk traps moisture and invites the rot the depth rule is meant to prevent. Tie the upper fronds loosely together for the first two to four weeks to reduce water loss and protect the central spear from sun and wind.
Planting a balled-and-burlapped palm
Larger Royal Palms over about eight feet of trunk are usually sold field-dug with the root ball wrapped in burlap and wire. These palms have lost most of their original root system in the dig, so the planting job is mostly about holding the palm steady and humid until new roots form. The same depth rule applies, with the root initiation zone level with grade and the crownshaft well clear of any soil contact.
-
1Hire a crew for the lift A balled palm taller than eight feet weighs hundreds of pounds and cannot be planted safely by hand. Schedule a landscape crew with a small crane or boom truck, and have the hole dug and ready before the palm arrives so the root ball never dries out on the surface. Dropping the palm or letting the root ball crack at the burlap is the most common way the planting fails before it even starts.
-
2Dig the hole and set the depth first Dig a hole twice as wide as the root ball and the exact same depth. Test fit the palm by lowering it in and checking that the root initiation zone sits level with the surrounding ground and the crownshaft is fully above grade. If the palm sits too low, lift it back out and add firmed soil to the bottom of the hole rather than trying to push it down.
-
3Cut the burlap and wire at the top Once the palm is at the right depth, fold back or cut away the top third of the burlap and any wire basket within reach so roots can push out freely. Leave the bottom and sides of the wrap in place to keep the root ball intact. Synthetic burlap does not rot in the ground, so check the labeling and cut away anything plastic before backfilling.
-
4Backfill, water deeply, and brace Backfill with native sandy soil and water slowly until the hole fills completely, then top up any settling. A freshly planted balled palm needs aggressive bracing with three or four padded 2x4 boards strapped to the trunk and staked into the ground, holding the palm motionless for six to nine months. Movement at this stage shears off the new roots as they try to form.
-
5Tie the fronds and protect the spear Gather the upper fronds together with biodegradable twine to reduce water loss and shield the central growing spear from sun, wind, and rain pooling. Leave the ties loosely in place for two to three months until the palm shows the first sign of a new spear emerging. Snip the twine carefully then so the fronds can fall back to their natural spread without tearing.
The first year
The first year after planting a Royal Palm is almost entirely an underground story. The palm is pushing new anchoring roots out of the root initiation zone into the native soil, building the foundation that holds a 50 to 100 foot tree against tropical wind and rain. During this period you should expect very little visible top growth, and some bronzing or yellowing of the older outer fronds is normal as the palm reallocates energy to roots.
The most common new-grower mistake is reading slow above-ground change as a sign the palm needs more help, and overcompensating with daily watering or heavy fertilizer. Both can kill a freshly planted Royal Palm. Soggy soil rots the new roots before they can establish, and a strong fertilizer push before the roots can absorb it burns the root tips and stunts the very system you are trying to grow.
A healthy first year looks like steady green color on the inner fronds, a central spear that stays firm when gently tugged, and one or two new fronds emerging by the end of year one.
What can go wrong
-
Bronzing or yellowing outer fronds in the first weeks
Mild transplant shock is the usual cause and the palm is reabsorbing nutrients from older fronds to feed new root growth. Keep the root ball evenly moist but not soggy, and avoid the urge to fertilize for at least three months. A small amount of older-frond yellowing is normal in the first season, but if the inner green fronds also turn yellow, look harder at watering frequency and drainage. -
Buried crownshaft (slow decline)
If soil or mulch is touching the smooth green crownshaft above the root initiation zone, the palm is slowly suffocating and the tissue under the soil will rot. Gently excavate the area around the trunk with your hands until you can see the root initiation zone level with the ground and the crownshaft fully clear. Done in the first six months, recovery is usually full, but a buried crownshaft caught after a year or two is often too far along to reverse. -
Soft, brown central spear that pulls out easily
This is spear pull, a fatal rot at the growing point caused by water sitting in the crown or by a buried crownshaft. Smell the base of the pulled spear, and if it smells sour or rotten the palm is past saving. To prevent spear pull on future plantings, never aim sprinklers into the crown, tie fronds upward for the first weeks so water sheds outward, and double-check the depth rule before backfilling. -
Mushy, blackened roots from waterlogged soil
Heavy clay, a low planting spot, or daily overwatering deprives roots of oxygen and causes root rot. Lift the surrounding mulch and check if the soil stays saturated for more than a day after watering, and if so, cut back to one slow deep soak every five to seven days. For severely waterlogged sites, the only durable fix is to lift the palm in cool weather and replant on a 12-inch sandy mound. -
Palm leaning or rocking in wind
Anchoring roots have not yet locked the palm into the surrounding soil, and any movement shears off the new roots as they try to form. Refresh the bracing with three angled padded 2x4 boards strapped to the trunk and staked into firm ground, holding the palm motionless. Leave the braces in place for a full six to nine months on container palms and up to a year on balled palms before testing whether the palm holds itself. -
No new spear after six months
A healthy freshly planted Royal Palm should push at least one new spear within the first six warm months. If nothing has emerged, gently feel the central growing point for firmness and check the depth at the trunk base. A firm spear and a buried crownshaft usually means the palm is alive but smothered, so excavate to the root initiation zone. A soft hollow spear means the growing point has rotted and the palm will not recover. -
Frizzled, deformed new fronds
Frizzle top is a manganese deficiency common in alkaline or limestone soils across south Florida, and it shows up as weak, thin, withered new fronds emerging from the crown. Apply a manganese sulfate soil drench around the root zone at the label rate in spring, and follow up with a palm-specific slow release fertilizer that contains manganese once the palm has been in the ground six months. Untreated frizzle top progresses to spear collapse and palm death within a season or two. -
Cold damage after a winter cold snap
Royal Palm starts to take frond damage below 28°F and an unestablished young palm can die outright in a hard freeze. After a cold event, resist the urge to immediately cut off damaged fronds since they continue to shelter the central spear, and wait until steady warm weather returns in spring to remove only fully brown tissue. Going forward, water the soil deeply before a forecast freeze, and on small palms, drape frost cloth from the ground over the crown for the night.
About This Article
