How to Grow a Puakenikeni
Plant Puakenikeni in full sun to part shade, in rich well-drained soil, in USDA zones 10 to 11 only. Outside those zones, grow in a large pot moved indoors before any night below 50F. Pick the open flowers at dusk for the strongest scent, and expect first blooms in year 3 or 4.
Where to plant
Puakenikeni is a tender tropical tree from the South Pacific that grows hardy in USDA zones 10 and 11 only. It will not survive frost. In any cooler zone, the only realistic option is a large container that lives outdoors in summer and moves to a bright warm indoor spot before the first cold night.
Sun
Six or more hours of direct sun produces the heaviest flowering. In zones with intense afternoon sun (south Florida, low elevations in Hawaii), light afternoon shade keeps the leaves from scorching during dry summer stretches.
Indoor plants in cooler climates need the brightest window in the house, ideally south-facing, and benefit from a grow light during the short days of winter.
Drainage
Roots rot fast in standing water. Dig a one-foot test hole and fill it with water. If it drains within a few hours, the spot is fine. If water sits overnight, build a raised mound a foot above grade or plant in a large container with generous drainage holes.
Soil
Rich, loamy soil with plenty of organic matter is what this tree wants. In a container, use a quality potting mix amended with extra perlite or pumice for drainage. Sandy native soils benefit from a generous compost amendment before planting.
Space
Puakenikeni grows into a small tree 10 to 25 feet tall with a similar spread when planted in the ground in the tropics. Give it 10 feet of clear space in every direction. Plant near a lanai, doorway, or open window so the nightly fragrance reaches the house.
How to plant
Plant in spring once nights stay reliably above 55F. Container-grown trees can go in any time during the warm season. New roots establish fastest when soil temperatures sit in the 70s.
-
1Dig a wide hole Twice as wide as the root ball but only as deep. A wide hole lets the lateral roots spread sideways into loose soil and establish faster than they would in a narrow deep hole.
-
2Loosen the root ball If the roots circle tightly inside the nursery pot, tease them apart by hand or score the outside with a clean knife. Roots that go in the ground circling tend to stay circling and slowly strangle the tree.
-
3Set the tree slightly high The top of the root ball should sit about an inch above the surrounding soil. The plant settles as the soil compacts, and a buried trunk flare invites rot at the base.
-
4Backfill with native soil and compost Mix a couple of shovels of compost into the dug-out soil and use that to fill in around the root ball. Avoid pure compost or potting mix in the planting hole, since the roots get lazy in rich soil and never spread into the wider yard.
-
5Water deeply Soak the entire root zone until the top six inches feel uniformly damp. This first watering settles the soil around the roots and is the most important watering of the tree's first year.
-
6Mulch two to three inches deep Use shredded bark or wood chips, kept a few inches back from the trunk. Mulch keeps the shallow root zone cool, holds moisture between waterings, and protects against weed competition.
Watering and feeding
Watering
Water deeply twice a week through the first growing season to help the tree establish, soaking the root zone rather than splashing the leaves. Drip irrigation or a soaker hose at the base works best.
After the first year, a deep weekly soak through the dry season keeps the foliage glossy and supports continuous flowering. Container plants dry out faster and may need water two or three times a week in hot weather, less in cool weather. The top inch of soil should feel dry before the next watering.
Feeding
Feed monthly through the warm growing season with a balanced slow-release fertilizer or one labeled for flowering tropicals. Heavy feeding in winter pushes weak growth, so back off entirely once nights cool.
Container plants exhaust their soil nutrients faster than in-ground trees. A diluted liquid feed every two weeks during the bloom flush keeps flowering steady.
Pruning
Puakenikeni flowers on new wood, meaning each season's blooms come from fresh growth. Light pruning right after a flush of bloom encourages the next round and shapes a young tree into the open form lei makers prefer.
When to prune
Prune lightly after each main flush of bloom through the warm season. Avoid heavy cuts in late fall or winter, since cool weather slows recovery and leaves cut ends exposed to rot.
What to cut
Remove any dead, broken, or crossing branches at the collar. Cut spent flower stems back by a few inches to encourage branching and more bloom points. Take out any vertical water sprouts that shoot straight up from main limbs.
Shape the tree to keep flowers within easy reach for picking. An open vase form with three to five main scaffold branches works well for trees grown for lei flowers.
Container plants
Container trees need yearly pruning to stay a manageable size for the lanai or living room. Cut the longest leaders back by a third each spring before active growth begins. Pinch the tips of new shoots through the summer to keep the canopy full.
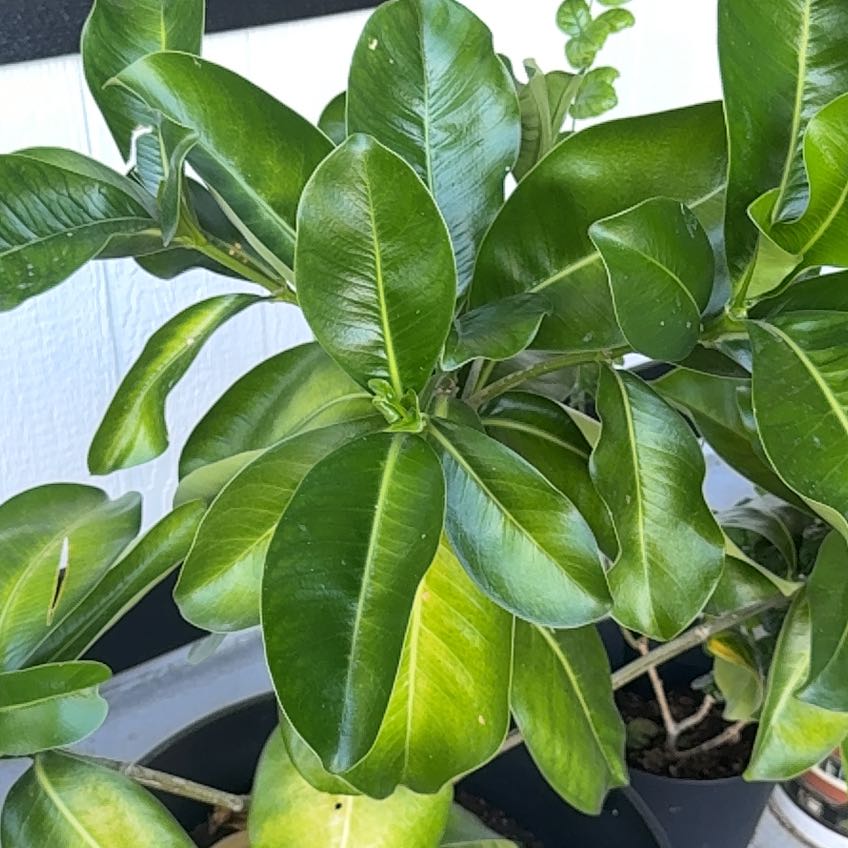
Blooming and color
Puakenikeni is grown for the fragrant flowers used in Hawaiian leis. Each flower opens white in the evening, turns golden by morning, and deepens to a rich orange before it falls. The whole tree releases a sweet honey-like scent that carries on still warm nights.
Bloom timing
Established trees flower year-round in the tropics, with the heaviest flushes in the warm months. First bloom comes in year 3 or 4 from a young nursery tree. Container plants bloom less reliably than in-ground trees and may take longer to start.
Picking flowers for leis
Pick the newly opened white flowers at dusk, when the scent is strongest and the petals are firm. Each flower lasts about a day on the tree before fading. Pick only what you plan to string within the next 24 hours and store the picked flowers in a covered container in the refrigerator until you string them.
A traditional lei uses 50 to 80 flowers strung end-to-end. A mature tree in heavy flush produces enough for several leis a week.
Color through the day
Even unpicked, the color change is part of the show. The tree carries white, gold, and orange flowers at the same time during a heavy flush, with each individual bloom moving through the sequence over about a day and a half.
Common problems and pests
Most Puakenikeni complaints come from cold damage and watering missteps. The tree is generally pest-resistant in its native range, but indoor plants in cooler climates face a different mix of issues.
Leaves dropping after a cold night
Temperatures below 50F cause leaf drop, and a hard frost can kill the tree outright. Container plants must move indoors before the first cool night. Outdoor trees in marginal zones benefit from a covered patio location and a frost cloth on the coldest nights.
Yellow leaves with green veins
Iron deficiency, common in alkaline soils or container plants in old potting mix. Apply a chelated iron foliar spray for a quick correction. Long-term, repot container plants with fresh acidic mix or amend in-ground soil with elemental sulfur or pine bark to lower the pH.
No flowers on a mature tree
Most often caused by too little sun, too much nitrogen, or too small a container. Move the plant to a brighter spot if it gets fewer than six hours of direct sun. Switch to a low-nitrogen bloom fertilizer for one season. Container plants pot-bound for years bloom less and benefit from a step up in pot size.
Sticky residue and black sooty mold
Scale insects feeding on sap and excreting a sugary residue that grows black mold. Wipe individual scales off with a cotton swab dipped in rubbing alcohol. Heavier infestations respond to horticultural oil sprayed in the cool of early morning. The sooty mold washes off with soapy water once the scale is gone.
Webbing on leaf undersides
Spider mites, common on indoor plants and on stressed outdoor trees during hot dry spells. Rinse the foliage thoroughly with a strong spray of water, focusing on the undersides of leaves. Repeat every few days for a week. Heavier infestations respond to insecticidal soap.
Sudden wilting with damp soil
Root rot from waterlogged soil. Check drainage by lifting the pot or digging a small hole next to the tree. If the soil feels soggy days after a watering, ease back on frequency and improve drainage. In containers, repot into fresh well-drained mix and trim any black mushy roots before replanting.
Pale washed-out leaves
Either nitrogen deficiency in starved soil or sunburn on a plant moved abruptly from shade to full sun. Feed a balanced fertilizer if the rest of the plant looks healthy and the new growth is weak. Move sun-damaged plants into part shade for two weeks before easing them back into full sun.
Brown leaf tips on container plants
Usually salt buildup from tap water or fertilizer residue. Flush the pot thoroughly every couple of months by running water through the soil until it streams clear from the drainage holes. Switching to rain water or filtered water also helps in areas with hard tap water.
Powdery white film on leaves
Powdery mildew, common on indoor plants in stagnant air. Improve airflow with a gentle fan and avoid splashing the leaves when watering. A horticultural oil or potassium bicarbonate spray clears established outbreaks. Outdoor trees with good airflow rarely show this.
About This Article
