Common Aloe Vera Problems & How to Fix Them
Aloe vera evolved on the Arabian peninsula — not in a rainforest, not in a garden center. It spent millions of years in rocky, gritty soil under six-plus hours of direct sun, soaking up occasional flash rains and then drying out for weeks. Its leaves are structural water reservoirs, its roots are shallow and flash-rain adapted, and its entire physiology is built around drought tolerance and intense light. Almost every problem owners run into starts with trying to grow this plant like a tropical.
The good news is the plant's own biology gives you a second chance when things go wrong. Healthy aloes produce pups from the base — clonal offsets that inherit the mother plant's genetics. Even if the central rosette rots past saving, any firm pup you can separate becomes a fresh start. So the rescue logic is different from most houseplants: you're not just saving the current plant, you're preserving the genetic line through its offsets.
Common Aloe vera Problems
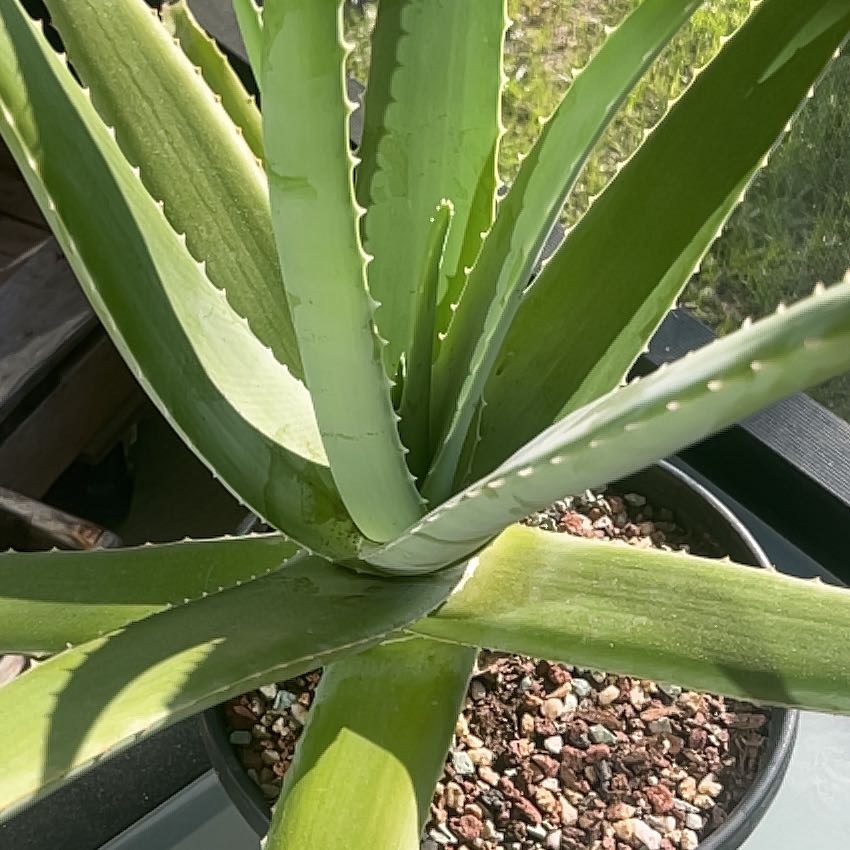
Leggy splayed rosette
The defining indoor aloe problem, and underdiagnosed because it develops slowly. Aloe vera leaves normally grow upright in a tight concentric rosette — that posture depends on strong direct light triggering the cell elongation pattern that keeps leaves vertical. Drop below about 6 hours of direct sun and the leaves lengthen horizontally instead, falling outward from the center, losing their gray-green color, and going floppy.
Fix the light first: south-facing window, or a grow light at close range for 12 hours a day. Existing splayed leaves don't re-stand — the cells are committed to that orientation — but the new leaves emerging from the central meristem will grow upright once light is adequate. Expect 3–5 new tight leaves before the rosette looks right again, which usually takes 2–4 months.
One shortcut: if the plant is badly misshapen, behead the central rosette above the soil line, let the cut callous for several days, and re-root it in dry gritty mix. The stump will also push pups. Aggressive but clean reset.
Mushy base
Soft, translucent, yellowing leaves at the base of the rosette — detaching from the plant with a gentle pull — mean the meristem is rotting. Aloe roots are shallow and flash-rain adapted, so sustained wet soil kills them within days; the rot then climbs into the central stem where all new leaf growth originates.
Work fast because the meristem is single-point-of-failure. Unpot the plant immediately, remove every soft leaf (they should come away easily), and trim any black or mushy root tissue back to firm white. Let the plant dry open-air on paper towel for 2–3 days so the wounds callous, then replant in bone-dry cactus mix and wait a full week before the first light watering.
If the central stem feels soft or hollow, the meristem is gone — the main plant can't be saved. Separate any firm pups from around the base and pot them individually. They'll grow into full plants and you haven't lost the genetics.
Shriveled leaves
Wrinkled, deflated, thin-looking leaves are the plant drawing down its internal water reserves because the soil has been bone-dry too long. The parenchymal gel inside each leaf is literally deflating — aloe leaves act like water tanks, and when the tank runs dry the walls collapse.
Water thoroughly — enough that water drains from the bottom of the pot. Plump leaves usually return within 24–72 hours as the parenchyma refills. If leaves stay shriveled after a deep soak, roots have died from earlier drought stress and the plant can no longer absorb water. Treat as rot recovery: unpot, trim dead roots, dry several days, replant in fresh gritty mix.
Once recovered, resist the urge to water more often. Aloes don't want moist soil; they want the desert rhythm of flood, then drought.
Brown tips
Aloe tips brown from three causes, in this rough order of likelihood: fluoride and dissolved salts from tap water accumulating in leaf tips over months; extended underwatering past the point shriveled leaves show; and very dry indoor air, particularly in heated winters. Aloe's thick cuticle means it's less tip-sensitive than dracaenas or spider plants, but chronic mineral buildup still shows eventually.
Switch to filtered, distilled, or rainwater. Flush the existing pot every few months by soaking it thoroughly under the tap until water runs out the bottom for a full minute — this leaches accumulated salts out the drainage holes.
Existing brown tips don't heal. Trim them at an angle with clean scissors to match the natural leaf point; new growth from the center emerges clean.
Yellow leaves
Aloe yellowing falls into two distinct patterns that need opposite responses.
Outermost individual leaves yellowing slowly and drying up is normal — aloes reabsorb their oldest leaves over time, pulling nutrients back into the central plant before the leaf is sloughed. Pull those off at the base once fully dry. This pattern is not a problem.
Multiple leaves yellowing evenly, often with soft or translucent texture, means rot. Check the soil: if it's wet, stop watering immediately and inspect the base as in the mushy-leaves rescue above. Overall pale yellow-green plants (not individual leaves) with firm leaves indicate insufficient light — move the plant to more sun.
Sunburn
Bleached white, papery patches or red-brown scorch marks appear when an indoor-grown aloe moves to direct outdoor sun without a transition period. The plant's thin cuticle hasn't built up the UV-reflective waxy layer that outdoor-acclimated aloes develop, so the surface cells burn within hours.
Move the plant back to partial shade immediately. Damaged tissue stays damaged — it won't re-pigment — but new leaves emerge with properly UV-adapted cuticles once the plant recovers. To transition back to direct sun safely: one hour of direct exposure per day the first week, two hours the second week, four hours the third, full sun by the fifth week.
Acclimation goes both directions: outdoor aloes moving indoors also need adjustment time, though the risk there is etiolation rather than sunburn.
Preventing Aloe vera Problems
About This Article
