Plant Care
›
Propagation
›
Polka Dot Begonia
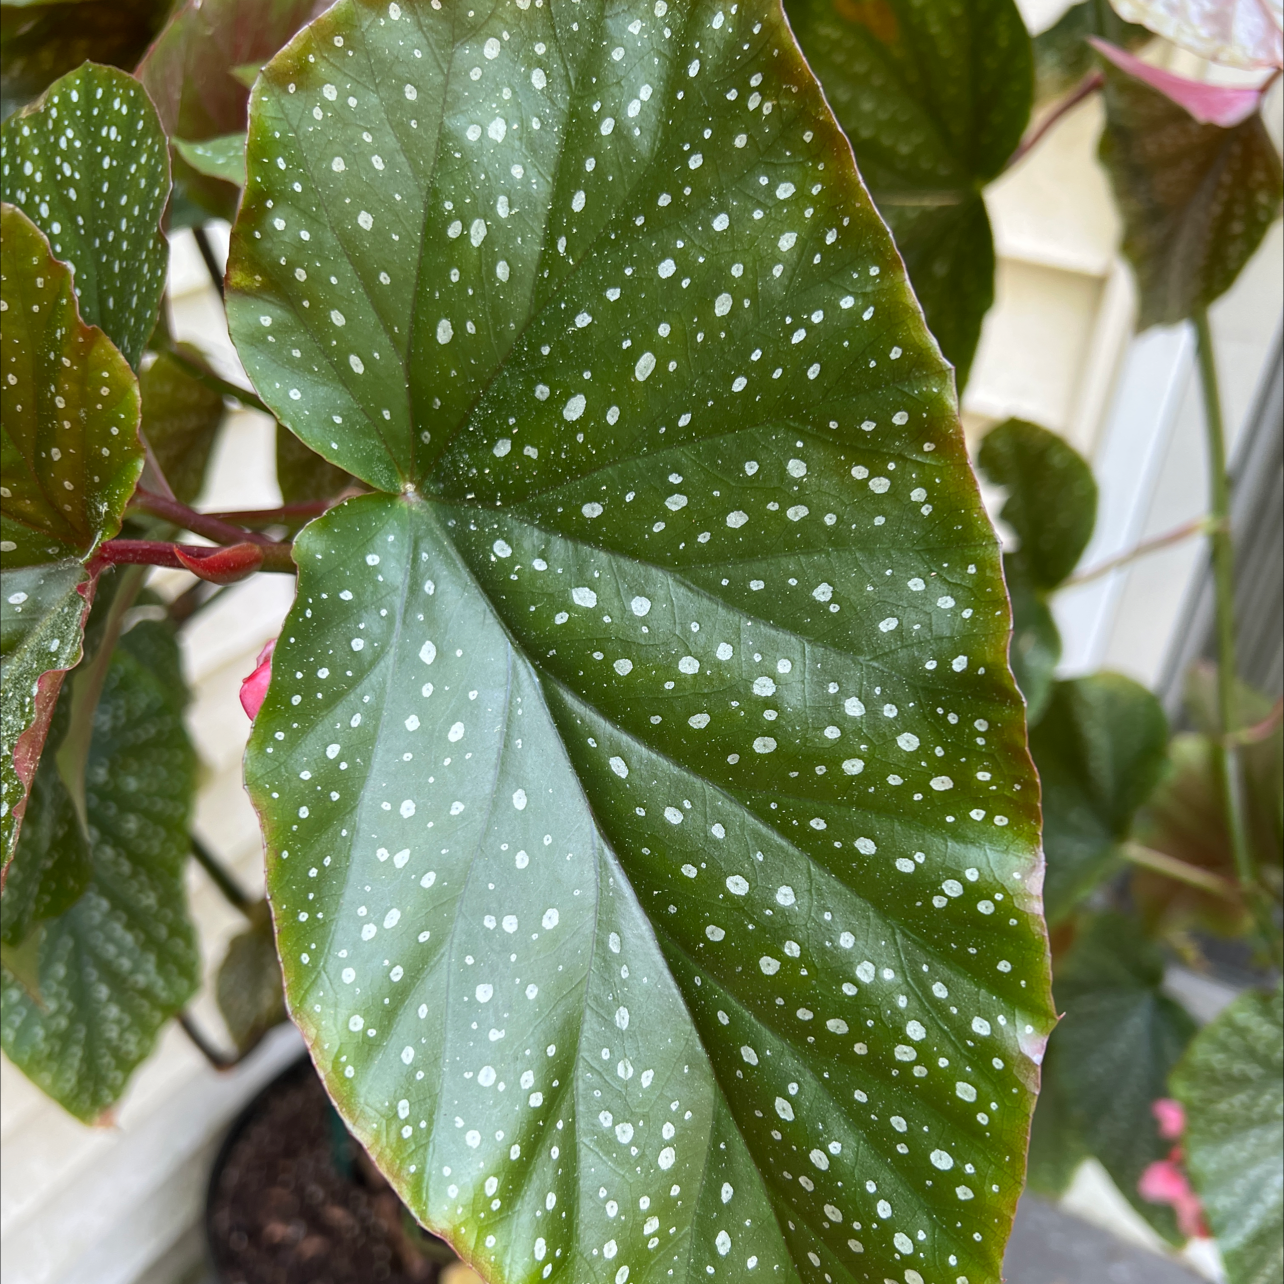
Begonia maculata
Reviewed by Kiersten Rankel M.S.
QUICK ANSWER
Water propagation roots a stem cutting in 3 to 5 weeks and is the most reliable method.
Soil propagation skips the risky water-to-soil transition and roots in 4 to 6 weeks, which suits multiple cuttings at once. Division works only on a mature plant with several main canes coming up from the soil and gives an instantly full new pot.
Soil propagation skips the risky water-to-soil transition and roots in 4 to 6 weeks, which suits multiple cuttings at once. Division works only on a mature plant with several main canes coming up from the soil and gives an instantly full new pot.
Stay on top of plant care
Get seasonal reminders for watering and fertilizing, personalized for your plants.
Try Greg Free
Pick your method
Tap one to jump to the walkthrough.
Water propagation
Best for beginners who want to watch roots form
Soil propagation
Best for rooting several cuttings at once
Division
Best when your plant has several canes coming up from the base
Water propagation
Time
3–5 weeks
Level
Beginner
Success rate
High
You'll need
Sterile pruners or a sharp knife
Clear glass jar
Filtered water (or tap left to sit 24 hours)
Bright indirect light
1
Find a healthy node on a cane
Look along a main cane for the bumps where leaves attach to the stem. Each bump is a node and is where roots will form.
A cutting without a node will never root, no matter how many leaves it has.
A cutting without a node will never root, no matter how many leaves it has.
2
Cut just below a node
Use sterile pruners to cut the cane half an inch below a node, leaving 2 leaves attached above. Aim for a cutting 4 to 6 inches long. Trim off any leaves that would sit underwater.
3
Submerge the node in water
Place the cutting in a clear jar so the bottom node is fully covered but the upper leaves stay dry. Use filtered water or tap left to sit overnight to off-gas chlorine.
4
Set in bright indirect light
Place the jar near a bright window but out of direct sun. Direct sun cooks the cutting through the glass.
Refresh the water every 5 to 7 days, or sooner if it turns cloudy.
Refresh the water every 5 to 7 days, or sooner if it turns cloudy.
5
Wait for 2-inch roots
First root nubs usually appear within 10 days. Wait until you see at least 4 roots that are each 2 inches long before potting up. A cutting potted with a single thin root often stalls.
6
Pot up in chunky aroid mix
Move the cutting to a 4-inch pot with chunky aroid mix or 50 percent potting soil and 50 percent perlite. Water in well and keep the soil lightly moist for the first 2 weeks while the water roots adapt to soil. After that, water when the top inch dries.
WATCH FOR
Mushy clear tissue at the submerged cut end. That is rot from bacteria in stale water, which polka dot begonias are especially sensitive to. Re-cut half an inch above the damage with a sterile blade, rinse the jar, and start over in fresh water.
Soil propagation
Time
4–6 weeks
Level
Intermediate
Success rate
Moderate
You'll need
Sterile pruners or a sharp knife
4-inch pot with drainage holes
Chunky aroid mix or 50/50 potting soil and perlite
Clear plastic bag or humidity dome
Rooting hormone (optional)
1
Take 4 to 6 inch node cuttings
Use sterile pruners to take cuttings that each include one node and one or two leaves. Trim large leaves in half horizontally so the cutting loses less moisture while it roots.
2
Dust the cut end in rooting hormone
This step is optional but speeds rooting by about a week. Tap the cut end against rooting hormone powder and shake off any excess.
Avoid soaking the cut in liquid hormone, which can burn cane begonia tissue.
Avoid soaking the cut in liquid hormone, which can burn cane begonia tissue.
3
Plant the node into damp mix
Fill the pot with chunky aroid mix and water until evenly damp. Push each cutting in so the node is buried about an inch deep. Press the soil firmly so each cutting stands upright.
4
Tent with a humidity bag
Cover the pot with a clear plastic bag or humidity dome to hold humidity near 70 percent. Polka dot begonia loves humidity and roots much faster under a tent. Open the bag for a few minutes every other day to let in fresh air.
5
Check at 4 weeks with a tug test
Give each cutting a gentle tug. Resistance means roots have anchored. No resistance means it is still working on it.
Most cuttings root within 4 to 6 weeks if they are going to root at all.
Most cuttings root within 4 to 6 weeks if they are going to root at all.
6
Remove the dome and resume care
Once the tug test passes, take the bag off and let the plant acclimate to room humidity over a week. Then move it to its long-term spot and water when the top inch of soil dries out.
WATCH FOR
Powdery mildew showing as a white dusting on leaves under the humidity dome. Polka dot begonias are prone to it in stagnant air. Vent the dome more often and trim affected leaves with sterile shears so the spores do not spread to healthy growth.
Division
Time
1–2 weeks
Level
Intermediate
Success rate
High
You'll need
Sterile knife or pruners
Two pots with drainage holes
Chunky aroid mix or 50/50 potting soil and perlite
Sterile sharp blade or pruners
1
Confirm there are separate canes
Division works only if your plant has produced two or more canes that come up from the soil as their own stems. A plant with one main cane cannot be divided.
Look for distinct cane bases at the soil line, not just leaves branching off one stem.
Look for distinct cane bases at the soil line, not just leaves branching off one stem.
2
Unpot and clear the soil
Lay the plant on its side and slide it out of the pot. Gently tease soil away from the root ball so you can see where each cane connects and how the roots are shared between them.
3
Cut between the canes
Use a sterile knife to slice straight down between two cane bases, splitting the root ball into pieces with at least one cane each. Aim to give each division a roughly equal share of roots.
4
Pot each division separately
Choose pots just slightly larger than each division's root mass. Fill with chunky aroid mix, settle the division in at the same depth it was growing before, and press the soil firmly around the roots.
5
Water in and rest in indirect light
Water each new pot until it drains and let it rest in bright indirect light for a week before resuming normal care. Polka dot begonias bruise easily so do not handle the canes.
Do not fertilize for the first 4 weeks while the cut roots seal over.
Do not fertilize for the first 4 weeks while the cut roots seal over.
WATCH FOR
Wilting leaves and cane droop in the days after division. A small amount is normal transplant shock for the first week, but if leaves stay limp after 10 days the plant is not recovering. Increase humidity around the new pot by tenting loosely with a clear bag for a few days.
Stay on top of plant care
Get seasonal reminders for watering and fertilizing, personalized for your plants.
Try Greg Free
About This Article

Kiersten Rankel M.S.
Botanical Data Lead at Greg · Plant Scientist
Editorial Process
Propagation methods verified against Begonia maculata growth data from Greg's botanical database, cross-referenced with USDA hardiness zone data and published horticultural research.
17,690+ Greg users growing this plant
USDA hardiness zones 10a–11b