Plant Care
›
Propagation
›
Pink Princess Philodendron
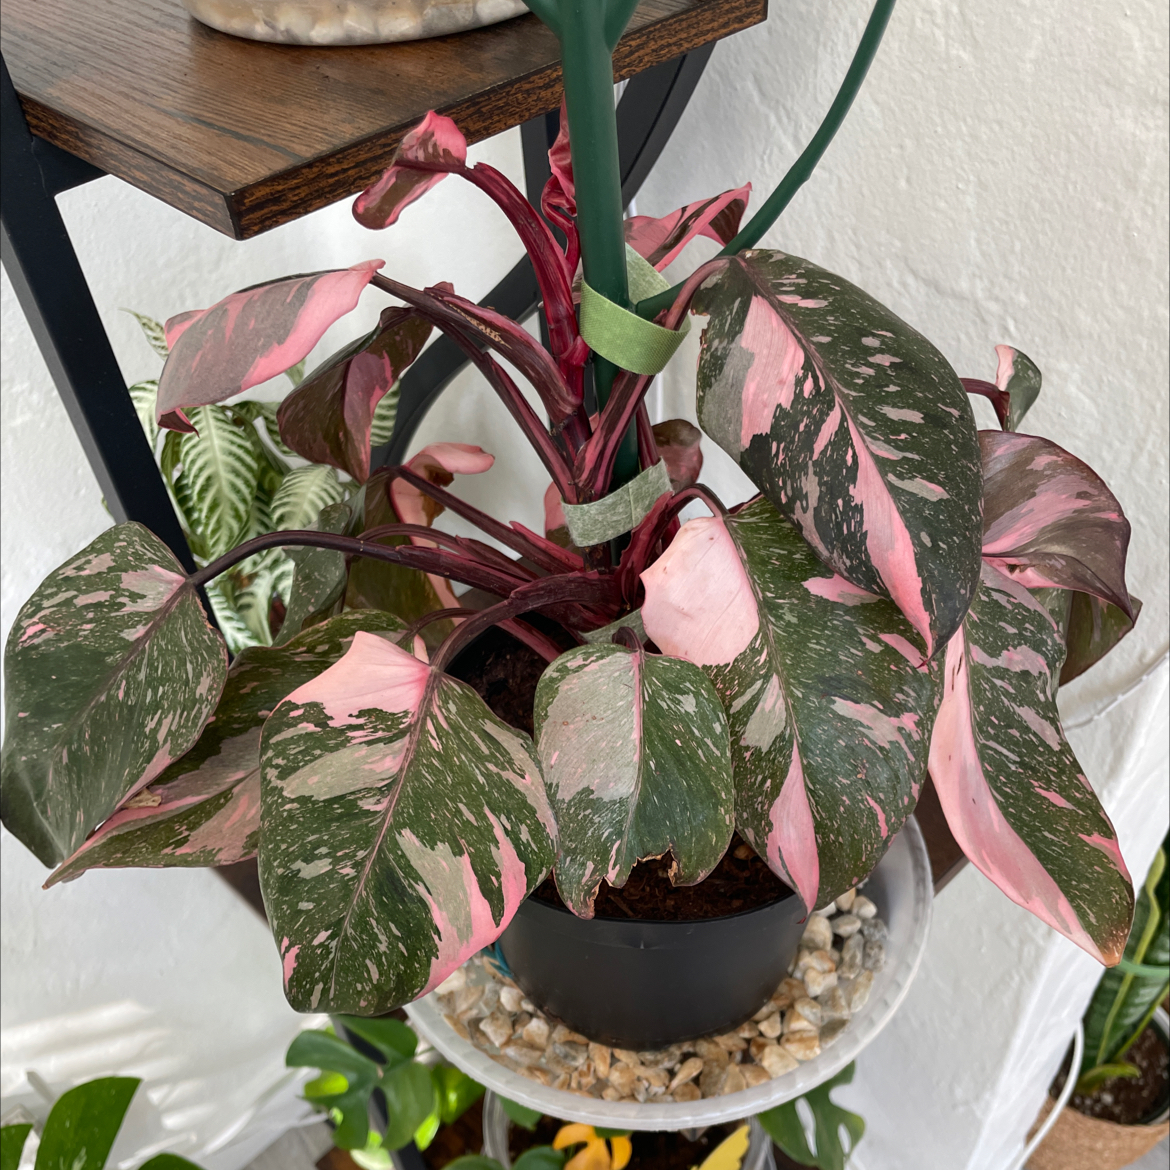
Philodendron 'Pink Princess'
Reviewed by Kiersten Rankel M.S.
QUICK ANSWER
Water propagation roots a node cutting in 3 to 6 weeks and lets you watch progress through the glass. Soil propagation skips the water-to-soil transition and roots in 4 to 8 weeks.
Air layering produces a fully rooted plant before you cut and works best when you want to preserve a heavily variegated section without risking it in water.
Air layering produces a fully rooted plant before you cut and works best when you want to preserve a heavily variegated section without risking it in water.
Stay on top of plant care
Get seasonal reminders for watering and fertilizing, personalized for your plants.
Try Greg Free
Pick your method
Tap one to jump to the walkthrough.
Water propagation
Best for beginners who want to watch roots form
Soil propagation
Best for cuttings with thick aerial roots already showing
Air layering
Best for preserving a heavily variegated section without risk
Water propagation
Time
3–6 weeks
Level
Beginner
Success rate
High
You'll need
Sterile pruners or a sharp knife
Clear glass jar
Filtered water (or tap left to sit 24 hours)
Bright indirect light
1
Pick a cutting with variegation you want to keep
Pink Princess produces sections of plain green, half-moon, and full pink leaves on the same vine. Whatever variegation pattern you cut is what you will get going forward.
A cutting with at least one half-and-half leaf usually produces the most stable variegation in new growth.
A cutting with at least one half-and-half leaf usually produces the most stable variegation in new growth.
2
Cut just below a node
Use sterile pruners to take a 4 to 6 inch cutting with one or two leaves and at least one node. Cut half an inch below the node. The node is the only place new roots will form.
3
Submerge the node in water
Place the cutting in a clear jar so the node is fully covered but the leaves stay dry. Use filtered water or tap left to sit overnight. Set the jar in bright indirect light.
4
Refresh the water weekly
Change the water every 5 to 7 days, or sooner if it turns cloudy. Cloudy water is the early sign of bacteria that will rot the cut. Rinse the jar each time.
5
Wait for a cluster of 2-inch roots
First nubs usually appear within 2 weeks but full rooting takes 3 to 6 weeks. Wait until you see at least 4 roots that are each 2 inches long.
A cutting potted with a single thin root often stalls.
A cutting potted with a single thin root often stalls.
6
Pot up in chunky aroid mix
Move the cutting to a 4-inch pot with chunky aroid mix made from potting soil, perlite, and orchid bark in roughly equal parts. Water in well and keep the soil lightly moist for the first 2 weeks while water roots adapt to soil. Then water when the top inch dries.
WATCH FOR
All-green new growth from a cutting that had pink variegation on the original leaves. The plant has reverted, which often happens when a cutting comes from a stem with limited variegation. Increase bright indirect light to encourage variegation in future leaves, and consider cutting back to the most variegated node and trying again.
Soil propagation
Time
4–8 weeks
Level
Intermediate
Success rate
Moderate
You'll need
Sterile pruners or a sharp knife
4-inch pot with drainage holes
Chunky aroid mix (potting soil, perlite, orchid bark)
Clear plastic bag or humidity dome
Rooting hormone (optional)
1
Take a node cutting with an aerial root
Use sterile pruners to take a 4 to 6 inch cutting that includes at least one node and one or two variegated leaves. A node with an aerial root already pushing out adapts to soil much faster than a fresh node.
2
Dust the cut in rooting hormone
This step is optional for Philodendron but speeds rooting by about a week. Tap the freshly cut end against rooting hormone powder and shake off any excess.
Avoid soaking the cut in liquid hormone, which can burn the tissue.
Avoid soaking the cut in liquid hormone, which can burn the tissue.
3
Plant the node into damp aroid mix
Fill the pot with chunky aroid mix and water until evenly damp. Push the cutting in so the node and any aerial root are buried about an inch deep. Press the soil firmly so the cutting stands on its own.
4
Tent with a humidity bag
Cover the pot with a clear plastic bag or humidity dome to hold humidity near 70 percent. Open the bag for a few minutes every other day to refresh the air and prevent mold. Set in bright indirect light.
5
Check at 6 weeks with a tug test
Give the cutting a gentle tug. Resistance means roots have anchored.
Most Pink Princess cuttings root within 4 to 8 weeks if the node is healthy and the soil stays damp but not soggy.
Most Pink Princess cuttings root within 4 to 8 weeks if the node is healthy and the soil stays damp but not soggy.
6
Remove the dome and resume care
Once the tug test passes, take the bag off and let the plant acclimate to room humidity over a week. Then move it to its long-term spot and water when the top inch of soil dries out.
WATCH FOR
Brown crispy patches on the variegated leaves under the humidity dome. The pink sections lack chlorophyll and burn easily under direct light, especially with extra heat from the dome. Move the pot out of any direct sun and vent the bag more often if you see browning spread.
Air layering
Time
6–10 weeks
Level
Advanced
Success rate
High
You'll need
Damp sphagnum moss
Clear plastic wrap
Twist ties or string
Sterile knife
Sharp pruners for final cut
1
Pick a node on a variegated section
Choose a node on a mature stem just below a section with the variegation you want to keep. Look for a node where an aerial root is already pushing out, ideally at least an inch long.
Thicker aerial roots turn into true roots faster than thin ones.
Thicker aerial roots turn into true roots faster than thin ones.
2
Wrap damp sphagnum around the node
Soak a fistful of sphagnum moss and squeeze out the excess so it is wet but not dripping. Pack the moss around the node and aerial root in a thick layer about the size of a tennis ball.
3
Seal with plastic wrap
Wrap the moss ball tightly with clear plastic wrap, leaving small gaps at top and bottom. Secure with twist ties or string. The wrap holds moisture in while letting you see roots through the plastic.
4
Keep moss damp for 6 to 10 weeks
Check the moss weekly. If it feels dry, peel the wrap back, mist with water, and re-seal. The moss should feel like a wrung-out sponge at all times.
Dry moss stalls root growth completely.
Dry moss stalls root growth completely.
5
Watch for thick roots filling the moss
Within 6 to 10 weeks you should see a network of white roots branching through the moss. Wait until the moss is full of roots, not just a few thin ones, before cutting. Premature severing leaves you with a weak plant.
6
Sever and pot up
Cut the stem just below the rooted moss ball with sharp pruners. Peel the plastic away but leave the moss in place around the roots. Pot the whole rooted bundle into chunky aroid mix and water in well.
WATCH FOR
Black or shriveled aerial root inside the moss after 4 weeks. The moss likely dried out at some point and killed the root. Unwrap, re-soak the moss, and re-wrap. If the original aerial root is fully dead, pick a new node a few inches above or below.
Stay on top of plant care
Get seasonal reminders for watering and fertilizing, personalized for your plants.
Try Greg Free
About This Article

Kiersten Rankel M.S.
Botanical Data Lead at Greg · Plant Scientist
Editorial Process
Propagation methods verified against Philodendron 'Pink Princess' growth data from Greg's botanical database, cross-referenced with USDA hardiness zone data and published horticultural research.
13,703+ Greg users growing this plant
USDA hardiness zones 9a–11b