Plant Care
›
Propagation
›
Fairy Duster
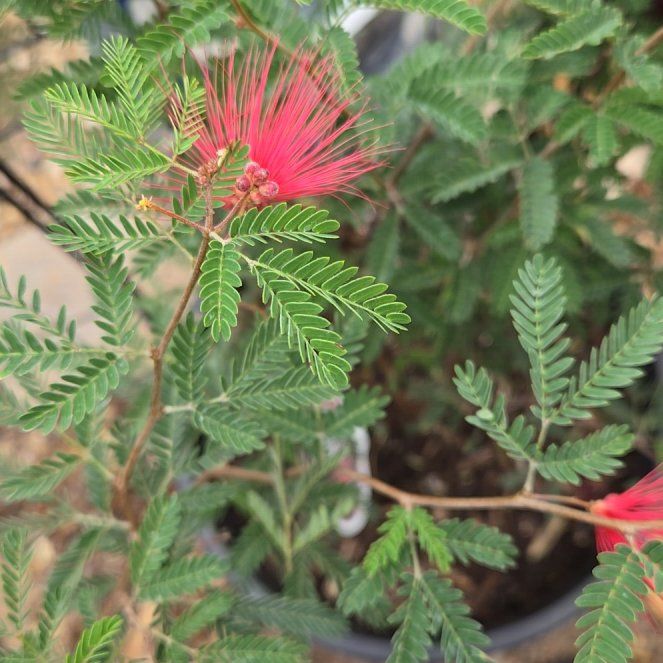
Calliandra eriophylla
Reviewed by Kiersten Rankel M.S.
QUICK ANSWER
Seed is the most reliable home method for fairy duster, but it requires scarification through the hard coat and produces flowering plants in 2 to 3 years.
Semi-hardwood cuttings taken in late summer root in 8 to 12 weeks under high humidity at 30 to 50 percent success. Cuttings give you a faster mature plant, seed gives you better long-term root development for a desert species that depends on a deep taproot.
Semi-hardwood cuttings taken in late summer root in 8 to 12 weeks under high humidity at 30 to 50 percent success. Cuttings give you a faster mature plant, seed gives you better long-term root development for a desert species that depends on a deep taproot.
Stay on top of plant care
Get seasonal reminders for watering and fertilizing, personalized for your plants.
Try Greg Free
Pick your method
Tap one to jump to the walkthrough.
From seed
Best for the patient grower starting from fresh pods
Semi-hardwood cuttings
Best in late summer when this year's growth is firming up
From seed
Time
8–10 months
Level
Intermediate
Success rate
Moderate
You'll need
Fresh fairy duster seed (collected from ripe brown pods)
Sandpaper or a small file
Bowl of warm water
Coarse sand or 50/50 sand-perlite mix
Deep 4 inch pots with drainage
Bright sun or grow light
1
Collect ripe pods in late spring or summer
Fairy duster pods turn brown and curl as they dry. Collect pods just as they begin to twist open, the seed inside is mahogany brown and rock-hard. Each pod holds 2 to 5 seeds.
2
Scarify each seed individually
Rub each seed against fine sandpaper or nick the coat with a small file. The goal is to break through the hard outer layer without damaging the embryo. Stop as soon as you see a lighter color underneath.
Calliandra is in the legume family and the seed coat is essentially waterproof. Unscarified seed germinates at under 5 percent.
Calliandra is in the legume family and the seed coat is essentially waterproof. Unscarified seed germinates at under 5 percent.
3
Soak overnight in warm water
Drop scarified seeds into a bowl of warm tap water and let them sit overnight. Viable seeds swell to nearly twice their original size by morning. Discard seeds that do not swell, the scarification missed the coat.
4
Sow half an inch deep in coarse mix
Push each swollen seed half an inch into pre-moistened coarse sand or sand-perlite mix in a deep pot. Use deep pots, fairy duster sends down a long taproot fast. Place pots in full sun or under a grow light at 75 to 85 degrees Fahrenheit.
5
Wait 2 to 4 weeks for germination
First leaves are bright green and ferny, looking just like miniature adult foliage. Keep the surface barely moist, do not soak. Calliandra seedlings rot in saturated mix even faster than they desiccate in dry mix.
6
Plant out in autumn
Once seedlings reach 4 to 6 inches tall, move them to their permanent spot in fall. Water in once at planting and then only during prolonged drought through the first summer. After year 1, fairy duster needs no supplemental water.
WATCH FOR
Seedlings collapsing at the soil line within the first 3 weeks. That is damping off from too much surface moisture. Switch to bottom watering, run a fan to dry the air, and remove visibly affected seedlings before the fungus spreads. Wilted seedlings that recover after a deep watering are fine, fairy duster handles drought stress better than most natives.
Semi-hardwood cuttings
Time
8–12 weeks
Level
Advanced
Success rate
Low
You'll need
Sterile sharp pruners
Rooting hormone (required)
Coarse sand or perlite
4 inch pots with drainage holes
Clear plastic dome or bag with stakes
Bottom heat mat (recommended)
1
Take cuttings in late August or September
Choose this year's growth that has firmed up but is not fully woody. The bark should still be greenish at the tip. Cut 4 inch sections with 3 to 4 leaf pairs in early morning when the plant is fully turgid.
2
Strip lower leaves and wound the base
Remove leaves from the bottom half of each cutting. Score the lowest inch with two shallow vertical cuts through the bark. Dip in rooting hormone and tap off excess.
Fairy duster will not root reliably without hormone. Skipping it drops success below 10 percent.
Fairy duster will not root reliably without hormone. Skipping it drops success below 10 percent.
3
Stick into coarse sand
Push each cutting 1.5 inches into pre-moistened coarse sand or perlite. Firm the medium so the cutting stays vertical. Space cuttings 2 inches apart.
4
Cover with a humidity dome and add heat
Tent the pot with a clear dome or a bag held off the leaves with stakes. Place on a heat mat at 75 to 80 degrees Fahrenheit. Bottom heat roughly doubles the rooting rate. Mist inside the dome daily.
5
Vent the dome at week 8
Open the dome for 1 hour the first day, doubling daily for a week. Tug a cutting at week 10. Resistance and small new green leaves at the tip mean roots are forming.
6
Pot up rooted cuttings into deep pots
Once roots are 1 to 2 inches long, move each cutting to a deep 1 gallon pot of cactus mix. Plant out the next spring. Even rooted cuttings need a full year in a deep pot to develop a strong root system before facing desert conditions.
WATCH FOR
Cuttings turning brown from the bottom upward in the first 4 weeks. That is rot from saturated medium or contaminated tools. Discard affected cuttings, sterilize the dome with diluted bleach, and stick fresh cuttings in dry sand. If most cuttings simply fail to root by week 14, switch to seed propagation. Calliandra is genuinely hard from cuttings and seed is the more reliable path at home.
Stay on top of plant care
Get seasonal reminders for watering and fertilizing, personalized for your plants.
Try Greg Free
About This Article

Kiersten Rankel M.S.
Botanical Data Lead at Greg · Plant Scientist
Editorial Process
Propagation methods verified against Calliandra eriophylla growth data from Greg's botanical database, cross-referenced with USDA hardiness zone data and published horticultural research.
46+ Greg users growing this plant
USDA hardiness zones 7a–10b
Citations:
University of Arizona Campus Arboretum
University of Arizona Campus Arboretum