Plant Care
›
Propagation
›
Cape Honeysuckle
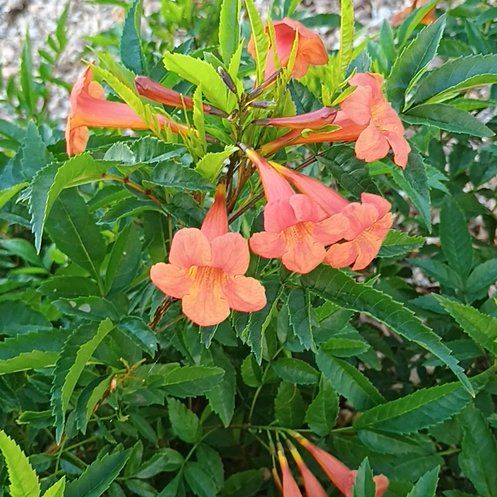
Tecomaria capensis
Reviewed by Kiersten Rankel M.S.
QUICK ANSWER
Softwood cuttings taken in late spring root in 4 to 6 weeks under a humidity dome and have a high success rate. Semi-hardwood cuttings taken in late summer root in 8 to 10 weeks and produce sturdier plants for planting out the following spring.
Ground layering pins a low branch to the soil and produces a pre-rooted plant in 8 to 12 weeks with almost no effort.
Ground layering pins a low branch to the soil and produces a pre-rooted plant in 8 to 12 weeks with almost no effort.
Stay on top of plant care
Get seasonal reminders for watering and fertilizing, personalized for your plants.
Try Greg Free
Pick your method
Tap one to jump to the walkthrough.
Softwood cuttings
Best in late spring for the fastest results
Semi-hardwood cuttings
Best in late summer for sturdier plants
Ground layering
Best for almost zero effort propagation
Softwood cuttings
Time
4–6 weeks
Level
Beginner
Success rate
High
You'll need
Sterile pruners
Rooting hormone (optional)
Perlite and peat mix (50/50)
4-inch pots with drainage
Clear plastic dome or bag
Bright indirect light spot
1
Take cuttings in late spring
Choose this year's new growth that has just started to firm up but still bends easily. Cut 4 to 6 inch tip sections in the morning when the plant is fully hydrated. Avoid stems with flower buds since flowering shoots root poorly.
2
Strip and prep the cutting
Remove leaves from the bottom half and pinch off the soft growing tip. Make a clean cut just below a leaf node with sterile pruners. Cape Honeysuckle roots reliably without hormone, but a quick dip speeds things up by about a week.
3
Stick into a moist mix
Fill 4-inch pots with a 50/50 perlite and peat mix and pre-moisten until water drips from the bottom. Push each cutting in 1 to 2 inches deep. Firm the mix around the stem so the cutting stands upright on its own.
4
Cover with a humidity dome
Place pots in bright indirect light at 70 to 80 degrees F under a clear dome.
Vent the dome for 10 minutes daily to prevent mold and mist lightly when leaves wilt rather than on a fixed schedule.
Vent the dome for 10 minutes daily to prevent mold and mist lightly when leaves wilt rather than on a fixed schedule.
5
Check for roots at 4 weeks
Give a gentle tug at 4 weeks. Resistance means roots have anchored. New tip growth is another rooted signal. If the cutting pulls free, push it back in and check again in 2 weeks.
6
Acclimate and pot up
Take the dome off gradually over a week to acclimate the cutting to room humidity. Move into a 1-gallon pot with general purpose mix and grow on in part shade outdoors for 4 to 6 weeks before full sun. Plant out in spring after the last frost has passed.
WATCH FOR
Black mushy stems just above the soil line. This is stem rot from too much humidity or a wet medium. Pull affected cuttings, increase venting, and let the surface dry slightly before re-covering. Survivors usually pull through once airflow improves.
Semi-hardwood cuttings
Time
8–10 weeks
Level
Beginner
Success rate
High
You'll need
Sterile pruners
Rooting hormone (recommended)
Coarse perlite and peat mix
Deep nursery pots
Clear plastic dome
Sheltered outdoor spot
1
Take cuttings in late summer
Choose this season's growth that has hardened to the point of bending without breaking. Cut 5 to 7 inch sections from the tips. Look for cuttings with a mix of green and brown bark indicating partial maturity.
2
Prep and wound the base
Strip leaves from the bottom half. Make a shallow vertical scrape on one side of the bottom inch with a sterile blade to expose the cambium.
This wound gives the cutting more surface area to push roots from and improves rooting on tougher semi-hardwood stems.
This wound gives the cutting more surface area to push roots from and improves rooting on tougher semi-hardwood stems.
3
Apply rooting hormone
Dip the wounded base in rooting hormone powder and tap off the excess. Hormone is more important for semi-hardwood than softwood since the older tissue is slower to root.
4
Stick into a coarse mix
Fill deep nursery pots with a coarse perlite and peat mix and pre-moisten until water drips from the bottom. Push each cutting in 2 inches deep. Use deep pots since semi-hardwood cuttings put down longer roots than softwood.
5
Cover and overwinter
Tent a clear dome over the pots and place in a sheltered outdoor spot or unheated greenhouse. Vent for 15 minutes daily to prevent mold. Cape Honeysuckle semi-hardwood cuttings root slowly through fall and winter so be patient.
6
Pot up in early spring
Roots fill the pot by early spring. Move rooted cuttings into 1-gallon containers with general purpose mix and grow on in part shade for several weeks before transitioning to full sun. Plant out after the last frost has passed.
WATCH FOR
Cuttings that drop all their leaves but still feel firm. This is leaf shed under stress, not failure. Leave them in place since Cape Honeysuckle often sets roots before pushing new leaves. Pull only if the stem turns soft or black.
Ground layering
Time
8–12 weeks
Level
Beginner
Success rate
High
You'll need
Long flexible low branch
Sterile knife
Rooting hormone (optional)
Garden staple or U-shaped wire
Compost or aged mulch
Sterile pruners for severing
1
Find a flexible low branch
Look for a healthy branch that bends easily down to the soil. Cape Honeysuckle has long pliable canes that are perfect for this method. The branch should reach the ground 6 to 12 inches away from the parent plant.
2
Wound the underside
Where the branch will touch the soil, scrape away a 1-inch strip of bark on the underside with a sterile knife.
Dust the wound lightly with rooting hormone if you have it. Hormone is optional here since this method works well without it.
Dust the wound lightly with rooting hormone if you have it. Hormone is optional here since this method works well without it.
3
Pin the branch to the soil
Bend the branch down so the wounded section sits on loose soil. Hold it in place with a garden staple or U-shaped piece of wire. The tip of the branch should curl upward beyond the buried section.
4
Cover with compost
Heap 2 to 3 inches of compost or aged mulch over the wounded section. Leave the branch tip and the rest of the original branch exposed. Water the buried area to settle the soil.
5
Keep moist for 8 to 12 weeks
Water the layering spot weekly so it stays evenly moist. Roots form at the wound over 8 to 12 weeks. New leafy shoots emerging from the buried section signal that rooting is well underway.
6
Sever and transplant
Once you see vigorous new growth, dig carefully under the rooted section to expose the new root mass. Cut the connection to the parent with sterile pruners. Lift the new plant and pot up or transplant directly to its final spot, keeping it watered for a few weeks while it settles in.
WATCH FOR
The buried section drying out and the wound healing without rooting. This means the soil dried before roots formed. Keep the layering spot consistently moist with weekly deep watering and re-mulch after heavy rain washes the cover thin.
Stay on top of plant care
Get seasonal reminders for watering and fertilizing, personalized for your plants.
Try Greg Free
About This Article

Kiersten Rankel M.S.
Botanical Data Lead at Greg · Plant Scientist
Editorial Process
Propagation methods verified against Tecomaria capensis growth data from Greg's botanical database, cross-referenced with USDA hardiness zone data and published horticultural research.