Plant Care
›
Propagation
›
Avocado
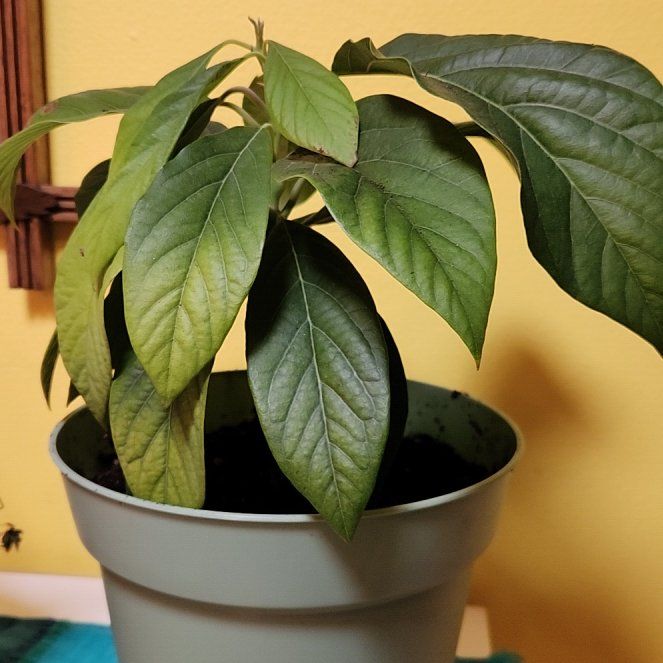
Persea americana
Reviewed by Kiersten Rankel M.S.
QUICK ANSWER
Seed sprouting from a grocery pit is the easiest method but takes 3 to 6 weeks to root and gives a tree that may never fruit. Softwood cuttings root in 6 to 10 weeks and produce a true copy of the parent, though success is mixed.
Grafting onto a seedling rootstock is how nurseries produce reliable fruiting trees, and it is the only method that gives you fruit in 3 to 5 years instead of 10 plus.
Grafting onto a seedling rootstock is how nurseries produce reliable fruiting trees, and it is the only method that gives you fruit in 3 to 5 years instead of 10 plus.
Stay on top of plant care
Get seasonal reminders for watering and fertilizing, personalized for your plants.
Try Greg Free
Pick your method
Tap one to jump to the walkthrough.
From seed
Best for an easy houseplant from a grocery pit
Softwood cuttings
Best for cloning a known variety from a friend's tree
Grafting
Best for getting fruit in years instead of decades
From seed
Time
3–6 weeks to sprout
Level
Beginner
Success rate
High
You'll need
Fresh avocado pit
Glass jar or cup
3 toothpicks
Filtered water (or tap left to sit 24 hours)
4-inch pot with drainage holes
Standard potting mix
1
Clean and dry the pit
Eat the avocado, then rinse the pit under warm water and rub off any clinging flesh. Dry the pit with a paper towel. The pointed end is the top and the wider flat end is the bottom.
2
Suspend the pit over water
Push 3 toothpicks into the pit at evenly spaced angles around its middle so it can rest on the rim of a jar. Fill the jar with water until the bottom inch of the pit is submerged.
Use filtered water or tap left to sit overnight to off-gas chlorine.
Use filtered water or tap left to sit overnight to off-gas chlorine.
3
Set in bright indirect light
Place the jar near a bright window but out of direct sun. Refresh the water every 5 to 7 days, or sooner if it turns cloudy. Keep the bottom of the pit constantly submerged.
4
Wait for the pit to crack
Within 3 to 6 weeks the pit will split down the middle and a single root will push out the bottom while a stem pushes from the top. Some pits take longer.
If nothing has happened by week 8, the pit is not viable and another grocery avocado will give you a fresh start.
If nothing has happened by week 8, the pit is not viable and another grocery avocado will give you a fresh start.
5
Pot up once roots reach 3 inches
Wait until the root is at least 3 inches long and the stem has its first leaves. Pot the pit into a 4-inch pot of standard potting mix with the top half of the pit still exposed above the soil. Water in well.
6
Pinch the top to encourage branching
Once the stem is 12 inches tall, pinch off the top inch with sterile shears to force side branches. Repeat each time the plant gains another foot of height. Without pinching, an avocado seedling grows as a single bare stem.
Note that grocery seedlings rarely fruit indoors and can take 10 plus years to flower at all.
Note that grocery seedlings rarely fruit indoors and can take 10 plus years to flower at all.
WATCH FOR
A pit that turns dark and shrivels without ever cracking. That means the pit dried out at some point or the avocado was over-ripe to start. Try a fresh pit from a firmer avocado and keep the bottom constantly submerged this time.
Softwood cuttings
Time
6–10 weeks
Level
Advanced
Success rate
Low
You'll need
Sterile pruners
4-inch pot with drainage holes
Well-draining potting mix
Clear plastic bag or humidity dome
Rooting hormone (required)
Heat mat set to 75–80°F
1
Take a tip cutting in early summer
Use sterile pruners to take a 6 inch tip cutting from new growth that has firmed up. The wood should bend but not crush easily.
Avocado cuttings are notoriously difficult to root and fully soft tips will rot before they root.
Avocado cuttings are notoriously difficult to root and fully soft tips will rot before they root.
2
Strip the lower leaves
Pull off all leaves on the bottom 3 inches of the cutting, leaving only 2 to 3 leaves at the top. Trim each remaining leaf in half so the cutting loses less moisture while it roots.
3
Dust generously in rooting hormone
Tap the cut end against rooting hormone powder and pat the bottom inch fully. Avocado cuttings need hormone to root at all, and even with hormone the success rate is below 40 percent.
4
Plant in well-draining mix on a heat mat
Fill the pot with mix amended with perlite, moistened to the texture of a wrung-out sponge. Push the cutting in 2 inches deep and press the soil firmly. Set the pot on a heat mat at 75 to 80°F. Bottom heat is the difference between rooting and rotting for avocado.
5
Tent with a humidity bag
Cover the pot with a clear plastic bag to hold humidity near 80 percent. Open the bag for a few minutes every other day to refresh the air. Mist the inside if the leaves look dry between airings.
6
Check at 8 weeks with a tug test
Give the cutting a gentle tug. Resistance means roots have anchored. If the cutting lifts freely or has turned black at the base, it has failed.
A 30 percent success rate is realistic even when every step is followed.
A 30 percent success rate is realistic even when every step is followed.
WATCH FOR
Leaves wilting and turning black within the first 2 weeks. That is rot from the cut end before any roots could form. Lift the cutting, trim half an inch off with a sterile blade, dust in fresh hormone, and replant in fresh damp mix on the heat mat. A second attempt sometimes works.
Grafting
Time
4–8 weeks to take
Level
Advanced
Success rate
Moderate
You'll need
Avocado seedling rootstock (1 to 2 years old)
Scion wood from a known fruiting variety
Sharp grafting knife
Grafting tape or parafilm
Pruning sealant or wax (optional)
1
Grow a seedling rootstock first
Start an avocado pit using the seed method and grow it for 1 to 2 years until the trunk is at least pencil thick. The rootstock provides hardiness and root vigor while the scion provides fruit quality.
Most commercial avocado trees are grafted because seedlings rarely produce true-to-type fruit.
Most commercial avocado trees are grafted because seedlings rarely produce true-to-type fruit.
2
Source scion wood
Take 4 to 6 inch cuttings of pencil-thick wood from the variety you want to grow, ideally Hass, Reed, or another reliable type. Cuttings should be from the most recent firm growth, not soft new tips. Wrap in damp paper towel and refrigerate if you cannot graft right away.
3
Make a cleft cut on the rootstock
With a sharp grafting knife, slice the rootstock trunk straight across about 12 inches above the soil. Make a 1-inch vertical cut down the middle of the cut surface to create a cleft.
Work quickly so the exposed tissue does not dry out.
Work quickly so the exposed tissue does not dry out.
4
Shape the scion to match
Trim the bottom of the scion into a long V-shaped wedge that fits snugly into the cleft. Make sure the green cambium layer of the scion lines up with the cambium of the rootstock on at least one side. Misaligned cambium will not fuse.
5
Wrap the join tightly
Insert the scion into the cleft and wrap the entire join with grafting tape or parafilm. The wrap holds the cambium in contact and seals out air. Cover the top cut of the scion with a dab of pruning sealant to slow water loss.
6
Wait 4 to 8 weeks for the take
Keep the grafted plant in bright indirect light at 70 to 80°F with consistent moisture. New growth pushing from the scion is the sign of a successful take, usually within 4 to 8 weeks. Once new leaves are firm, unwrap the tape and let the join air-cure for another month before any handling.
WATCH FOR
The scion turns brown and brittle while the rootstock pushes new shoots from below the graft. The graft has failed to fuse, usually from misaligned cambium or air drying the cut. Cut off the new rootstock shoots so they do not steal energy, slice the failed scion off cleanly, and try a fresh cleft graft when you have new scion wood.
Stay on top of plant care
Get seasonal reminders for watering and fertilizing, personalized for your plants.
Try Greg Free
About This Article

Kiersten Rankel M.S.
Botanical Data Lead at Greg · Plant Scientist
Editorial Process
Propagation methods verified against Persea americana growth data from Greg's botanical database, cross-referenced with USDA hardiness zone data and published horticultural research.
9,390+ Greg users growing this plant
USDA hardiness zones 9a–11b