Plant Care
›
Propagation
›
Black Currant
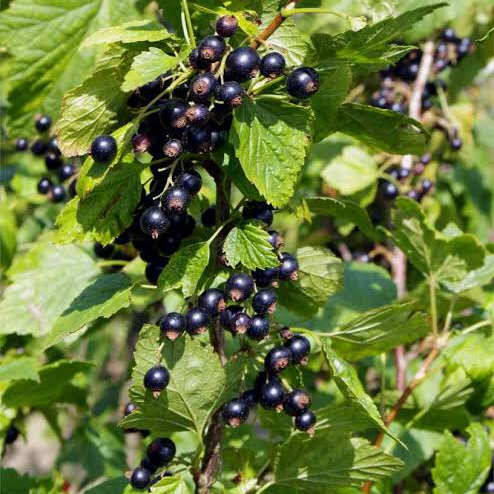
Ribes nigrum
Reviewed by Kiersten Rankel M.S.
QUICK ANSWER
Hardwood cuttings taken in late autumn root by spring and produce a fruiting bush within 2 to 3 years. Mound layering takes a full season but reliably yields several rooted plants from one parent. Division of an established crown gives an instant mature plant when you can dig up the bush, with first fruit the following summer.
Stay on top of plant care
Get seasonal reminders for watering and fertilizing, personalized for your plants.
Try Greg Free
Pick your method
Tap one to jump to the walkthrough.
Hardwood cuttings
Best in late autumn for cheap, dependable clones
Mound layering
Best when you want several rooted plants from one parent
Division
Best when you can lift a sprawling, mature bush
Hardwood cuttings
Time
5–7 months
Level
Beginner
Success rate
High
You'll need
10 to 12 inch hardwood cuttings of pencil thickness
Sterile pruning shears
Rooting hormone (recommended)
Prepared trench in well-drained garden soil
Mulch
Plant labels
1
Cut in late autumn
After leaves drop, take 10 to 12 inch sections from healthy one-year-old wood on a vigorous bush. Choose pencil-thick stems with at least 4 visible buds. Cut flat just below a bud at the base and angled just above a bud at the top so you remember orientation.
2
Strip lower buds
Unlike most fruiting shrubs, leave all buds intact for black currant. Buds below the soil line produce strong basal shoots, which is exactly what gives black currant its productive multi-stemmed habit.
This is the opposite of how you'd treat gooseberry or red currant cuttings.
This is the opposite of how you'd treat gooseberry or red currant cuttings.
3
Dip in rooting hormone
Tap the bottom end into IBA powder and shake off excess. Black currant roots well without hormone but the take rate jumps from 70 to over 90 percent with it.
4
Stick deep in a prepared trench
Make a 6 to 8 inch deep trench in well-drained soil. Push cuttings two-thirds deep, 6 inches apart, with only 2 to 3 buds visible above ground. Backfill and firm.
The deep planting is what produces the strong basal shoot system.
The deep planting is what produces the strong basal shoot system.
5
Mulch and overwinter
Top with 2 inches of mulch to prevent freeze-thaw heaving. Water once and ignore until spring. Cuttings need cold to break dormancy and roots form just before bud break.
6
Lift the next autumn
By autumn, rooted cuttings will have leafed out and put on 6 to 12 inches of growth. Lift carefully with a fork and transplant to permanent spots or 2-gallon pots.
WATCH FOR
Cuttings that leaf out in spring but never put on growth and die back by midsummer. That is a cutting that pushed leaves on stored energy without forming roots. The cause is usually warm dry soil that broke dormancy too early. For next year, plant in a north-facing or shaded spot and mulch heavily to keep the soil cool.
Mound layering
Time
6–9 months
Level
Beginner
Success rate
High
You'll need
An established black currant bush, 3 or more years old
Pruning shears
Loose compost or sandy soil
Garden trowel
Mulch
1
Cut the parent back hard in late winter
Prune all stems to 4 to 6 inches above ground while the plant is fully dormant. The hard cut forces a thicket of new shoots from the crown in spring.
2
Mound soil over new shoots
Once shoots reach 6 inches in late spring, pile loose compost or sandy soil around them so only the top inch of each shoot is visible. Keep mounding as shoots grow taller through summer.
The mound should end up 8 to 12 inches deep by midsummer.
The mound should end up 8 to 12 inches deep by midsummer.
3
Water through the season
Keep the mound evenly moist all summer. Roots form along the buried portion of each shoot. Drying out at any point delays rooting by weeks.
4
Check roots in autumn
Gently scrape away soil at the base of one shoot. Each shoot should have its own small root cluster. If roots are sparse, mound back up and wait until next spring.
5
Sever and lift
Cut each rooted shoot from the parent crown with sharp shears, keeping as many roots as possible attached. Lift carefully with a hand fork.
6
Plant or pot immediately
Move rooted shoots into 2-gallon pots or permanent spots. Water in deeply and mulch. The parent recovers and can be layered again in 2 to 3 years.
WATCH FOR
Buried shoots that yellow and stop growing midsummer. That usually means the mound dried out and roots formed only at the surface. Mound back up with damp compost and water more often. Once buried wood loses moisture, those shoots rarely catch up that season.
Division
Time
1 season
Level
Intermediate
Success rate
High
You'll need
A mature black currant bush with multiple crowns
Sharp spade
Pruning saw or loppers
Sterile pruning shears
Compost
Mulch
1
Dig in late autumn or early spring
Wait until the plant is fully dormant. A damp day after rain makes the root ball lift cleanly. Drive a sharp spade in a wide circle 12 inches out from the crown.
2
Lift the entire plant
Pry the bush out with the spade and shake loose soil from the roots. You should see several distinct crowns each with its own roots and stems.
3
Split the crown
Use a pruning saw or sharp spade to cut between natural crown divisions. Each piece should have at least 3 stems and a fist-sized clump of roots.
Discard any rotted or hollow center sections.
Discard any rotted or hollow center sections.
4
Trim and clean up
Cut back damaged roots and shorten the tallest stems by a third with sterile shears. This balances the smaller root system against fewer leaves to support.
5
Replant immediately
Move divisions to new spots within an hour. Plant 2 inches deeper than the original soil line so basal buds get buried, which encourages strong shoot regrowth. Water in deeply and surround with compost.
Mulch heavily.
Mulch heavily.
6
Skip fertilizer the first year
Fresh divisions need to rebuild roots before adding nitrogen. Water through summer and expect a partial crop the following year.
WATCH FOR
Divided plants that leaf out in spring then suddenly wilt and die back during the first heatwave. That is transplant shock from a root system that did not catch up. Shade with row cover for 2 weeks after summer transplant, water deeply twice a week, and accept that fall division is the safer window.
Stay on top of plant care
Get seasonal reminders for watering and fertilizing, personalized for your plants.
Try Greg Free
About This Article

Kiersten Rankel M.S.
Botanical Data Lead at Greg · Plant Scientist
Editorial Process
Propagation methods verified against Ribes nigrum growth data from Greg's botanical database, cross-referenced with USDA hardiness zone data and published horticultural research.
117+ Greg users growing this plant
USDA hardiness zones 3a–8b