Plant Care
›
Propagation
›
Witch Hazel
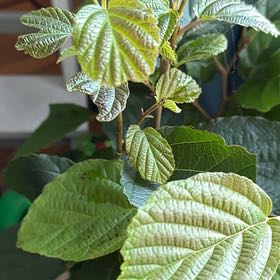
Hamamelis virginiana
Reviewed by Kiersten Rankel M.S.
QUICK ANSWER
Ground layering of a low branch is the most reliable home method and produces a planting-size shrub in 18 to 24 months.
Stratified seed sown after a long double-stratification gives many seedlings but takes 18 months to germinate. Softwood cuttings work but only succeed about 30 percent of the time, so layering and seed are stronger choices.
Stratified seed sown after a long double-stratification gives many seedlings but takes 18 months to germinate. Softwood cuttings work but only succeed about 30 percent of the time, so layering and seed are stronger choices.
Stay on top of plant care
Get seasonal reminders for watering and fertilizing, personalized for your plants.
Try Greg Free
Pick your method
Tap one to jump to the walkthrough.
Ground layering
Best when you want one new shrub reliably
From seed
Best for native plant gardens with patience
Softwood cuttings
Best as a backup when you cannot wait for seed
Ground layering
Time
18–24 months
Level
Beginner
Success rate
High
You'll need
Sterile knife
Landscape staple or U-shaped wire
Compost-amended soil
Mulch
Sterile pruners for severing
1
Pick a low flexible branch
In early spring before bud break, find a 1 to 2-year-old branch on the lower part of the shrub that bends to the ground without breaking. Strip the leaves from the section that will be buried. Mark a spot 18 inches back from the branch tip.
2
Wound the underside
Make a shallow 2-inch cut along the underside of the branch at the marked spot. Slice through the bark and the green cambium but not through the woody core.
Wedge the cut open with a toothpick to keep it from healing closed. The wound is where roots emerge.
Wedge the cut open with a toothpick to keep it from healing closed. The wound is where roots emerge.
3
Pin the wound underground
Dig a 4-inch trench, lay the wounded section in it with the cut facing down, and pin it firmly with a landscape staple. The branch tip should curve back up out of the trench. Backfill with compost-amended soil.
4
Water and mulch
Soak the buried section to settle the soil around the wound. Cover with 3 inches of mulch. Witch Hazel needs damp roots to layer well. Keep the area moist through the first summer.
5
Wait two full seasons
Witch Hazel layers root more slowly than most shrubs. Do not check in the first year. Many layers do not develop a viable root system until the second growing season. The wait is real.
6
Sever and transplant
After 18 to 24 months, gently lift the soil from one end of the buried section to inspect roots. If the rooting is strong, sever the branch from the parent with sterile pruners and wait 2 weeks before lifting the new plant. If roots are sparse, rebury and wait another season.
WATCH FOR
The buried section produces a few thin roots after a year but the connection to the parent is doing all the work and leaves wilt the moment you sever. Witch Hazel layers must be fully self-supporting before separation. If the roots are not yet a fist-sized mass, leave the layer attached for another full season. There is no penalty for waiting.
From seed
Time
18 months germination
Level
Intermediate
Success rate
Moderate
You'll need
Mature seed capsules collected in fall
Bowl of warm water
Plastic bag with damp sand or peat
Outdoor seed bed or deep pots
Hardware cloth to protect from rodents
1
Bag the capsules in early fall
Witch Hazel capsules eject seeds explosively when ripe in October. Tie a paper bag or fine cloth bag over each capsule cluster in late September. The seeds collect in the bag instead of scattering several feet away.
2
Soak overnight
Drop the hard black seeds into a bowl of warm water and leave for 24 hours. Plump seeds are viable. Seeds that float after soaking are usually empty and can be discarded.
3
Begin double stratification
Mix viable seeds with damp sand in a plastic bag. Witch Hazel needs a 5-month warm-moist period followed by a 3-month cold-moist period to break dormancy.
Keep the bag at room temperature for the first 5 months, then move to the refrigerator at 35 to 40 degrees for another 3 months.
Keep the bag at room temperature for the first 5 months, then move to the refrigerator at 35 to 40 degrees for another 3 months.
4
Sow outdoors
After the stratification cycle, sow seeds half an inch deep in a prepared outdoor seed bed or deep pots filled with compost-mixed garden soil. Space seeds 4 inches apart. Water in once.
5
Protect from wildlife
Cover the bed with hardware cloth to stop chipmunks and squirrels from digging up the seeds. Mulch lightly with shredded leaves. Witch Hazel seeds are highly attractive to small mammals.
6
Watch for spring germination
Seedlings emerge the spring after sowing, roughly 18 months from the day you collected the seeds. Pot up first-year seedlings in fall and grow on in pots for one season before planting out the following spring.
WATCH FOR
Seedlings emerge but only at 20 percent of what you sowed. Witch Hazel has natural germination rates of around 30 to 50 percent even with perfect stratification. The double-stratification cycle is also unforgiving. If germination is below 10 percent, the warm or cold period was likely cut short. Re-treat any remaining seed with a full warm-cold cycle and try again next spring.
Softwood cuttings
Time
8–12 weeks
Level
Advanced
Success rate
Low
You'll need
Sterile pruners
Rooting hormone (required, IBA-based)
4-inch pots with drainage
Perlite and peat mix
Clear humidity dome
Bottom heat mat
1
Time the cutting carefully
Take cuttings in late June or early July from new growth that has just started to firm up. The wood should bend without snapping but feel slightly woody at the base. Witch Hazel softwood cuttings have a narrow window.
2
Cut 6-inch tip pieces
Snip 6-inch tip cuttings each with 3 to 4 nodes. Strip leaves from the lower two nodes. Cut the top two leaves in half across to reduce moisture loss while the cutting works on rooting.
3
Treat with strong rooting hormone
Witch Hazel is one of the harder woody natives to root from cuttings. A strong IBA-based hormone is required, not optional.
Dip the bottom inch in liquid rooting hormone and let drain for 30 seconds before sticking. Powder hormones are less reliable for this species.
Dip the bottom inch in liquid rooting hormone and let drain for 30 seconds before sticking. Powder hormones are less reliable for this species.
4
Stick in perlite-peat mix
Push each cutting 2 inches deep into damp perlite-peat mix in a 4-inch pot. The two stripped nodes should sit below the surface because that is where roots form. Firm the medium and water from below.
5
Cover and provide bottom heat
Set the pot inside a clear dome on a heat mat at 75 to 78 degrees. Bright indirect light, never direct sun. Mist the inside of the dome lightly every other day to maintain humidity above 90 percent.
6
Pot up survivors at week 10
Tug-test gently. Most cuttings will not have rooted. Pot up the few that resist into 1-quart pots and grow on under a humidity tent for another 6 weeks before normal conditions. Expect roughly 30 percent of cuttings to take.
WATCH FOR
Most cuttings turn black at the base and the leaves drop within 4 weeks. Witch Hazel softwood cuttings are simply unreliable. If failure rates run over 80 percent, this is normal for the species rather than a procedural error. Consider switching to ground layering or seed for any future propagation. Witch Hazel rewards patience over speed.
Stay on top of plant care
Get seasonal reminders for watering and fertilizing, personalized for your plants.
Try Greg Free
About This Article

Kiersten Rankel M.S.
Botanical Data Lead at Greg · Plant Scientist
Editorial Process
Propagation methods verified against Hamamelis virginiana growth data from Greg's botanical database, cross-referenced with USDA hardiness zone data and published horticultural research.
4+ Greg users growing this plant
USDA hardiness zones 3a–8a