How to Plant a Purple Heart
Plant Purple Heart in full sun for the richest purple color, in well-drained soil or a container with drainage holes. In zones 7 through 11 the plant lives outdoors year round, and gardeners in colder zones grow it as an annual or a houseplant. Stem cuttings root easily right in soil, so most people start from a cutting or a nursery plant in spring after the last frost. Expect cascading growth within six weeks.
When and where to plant
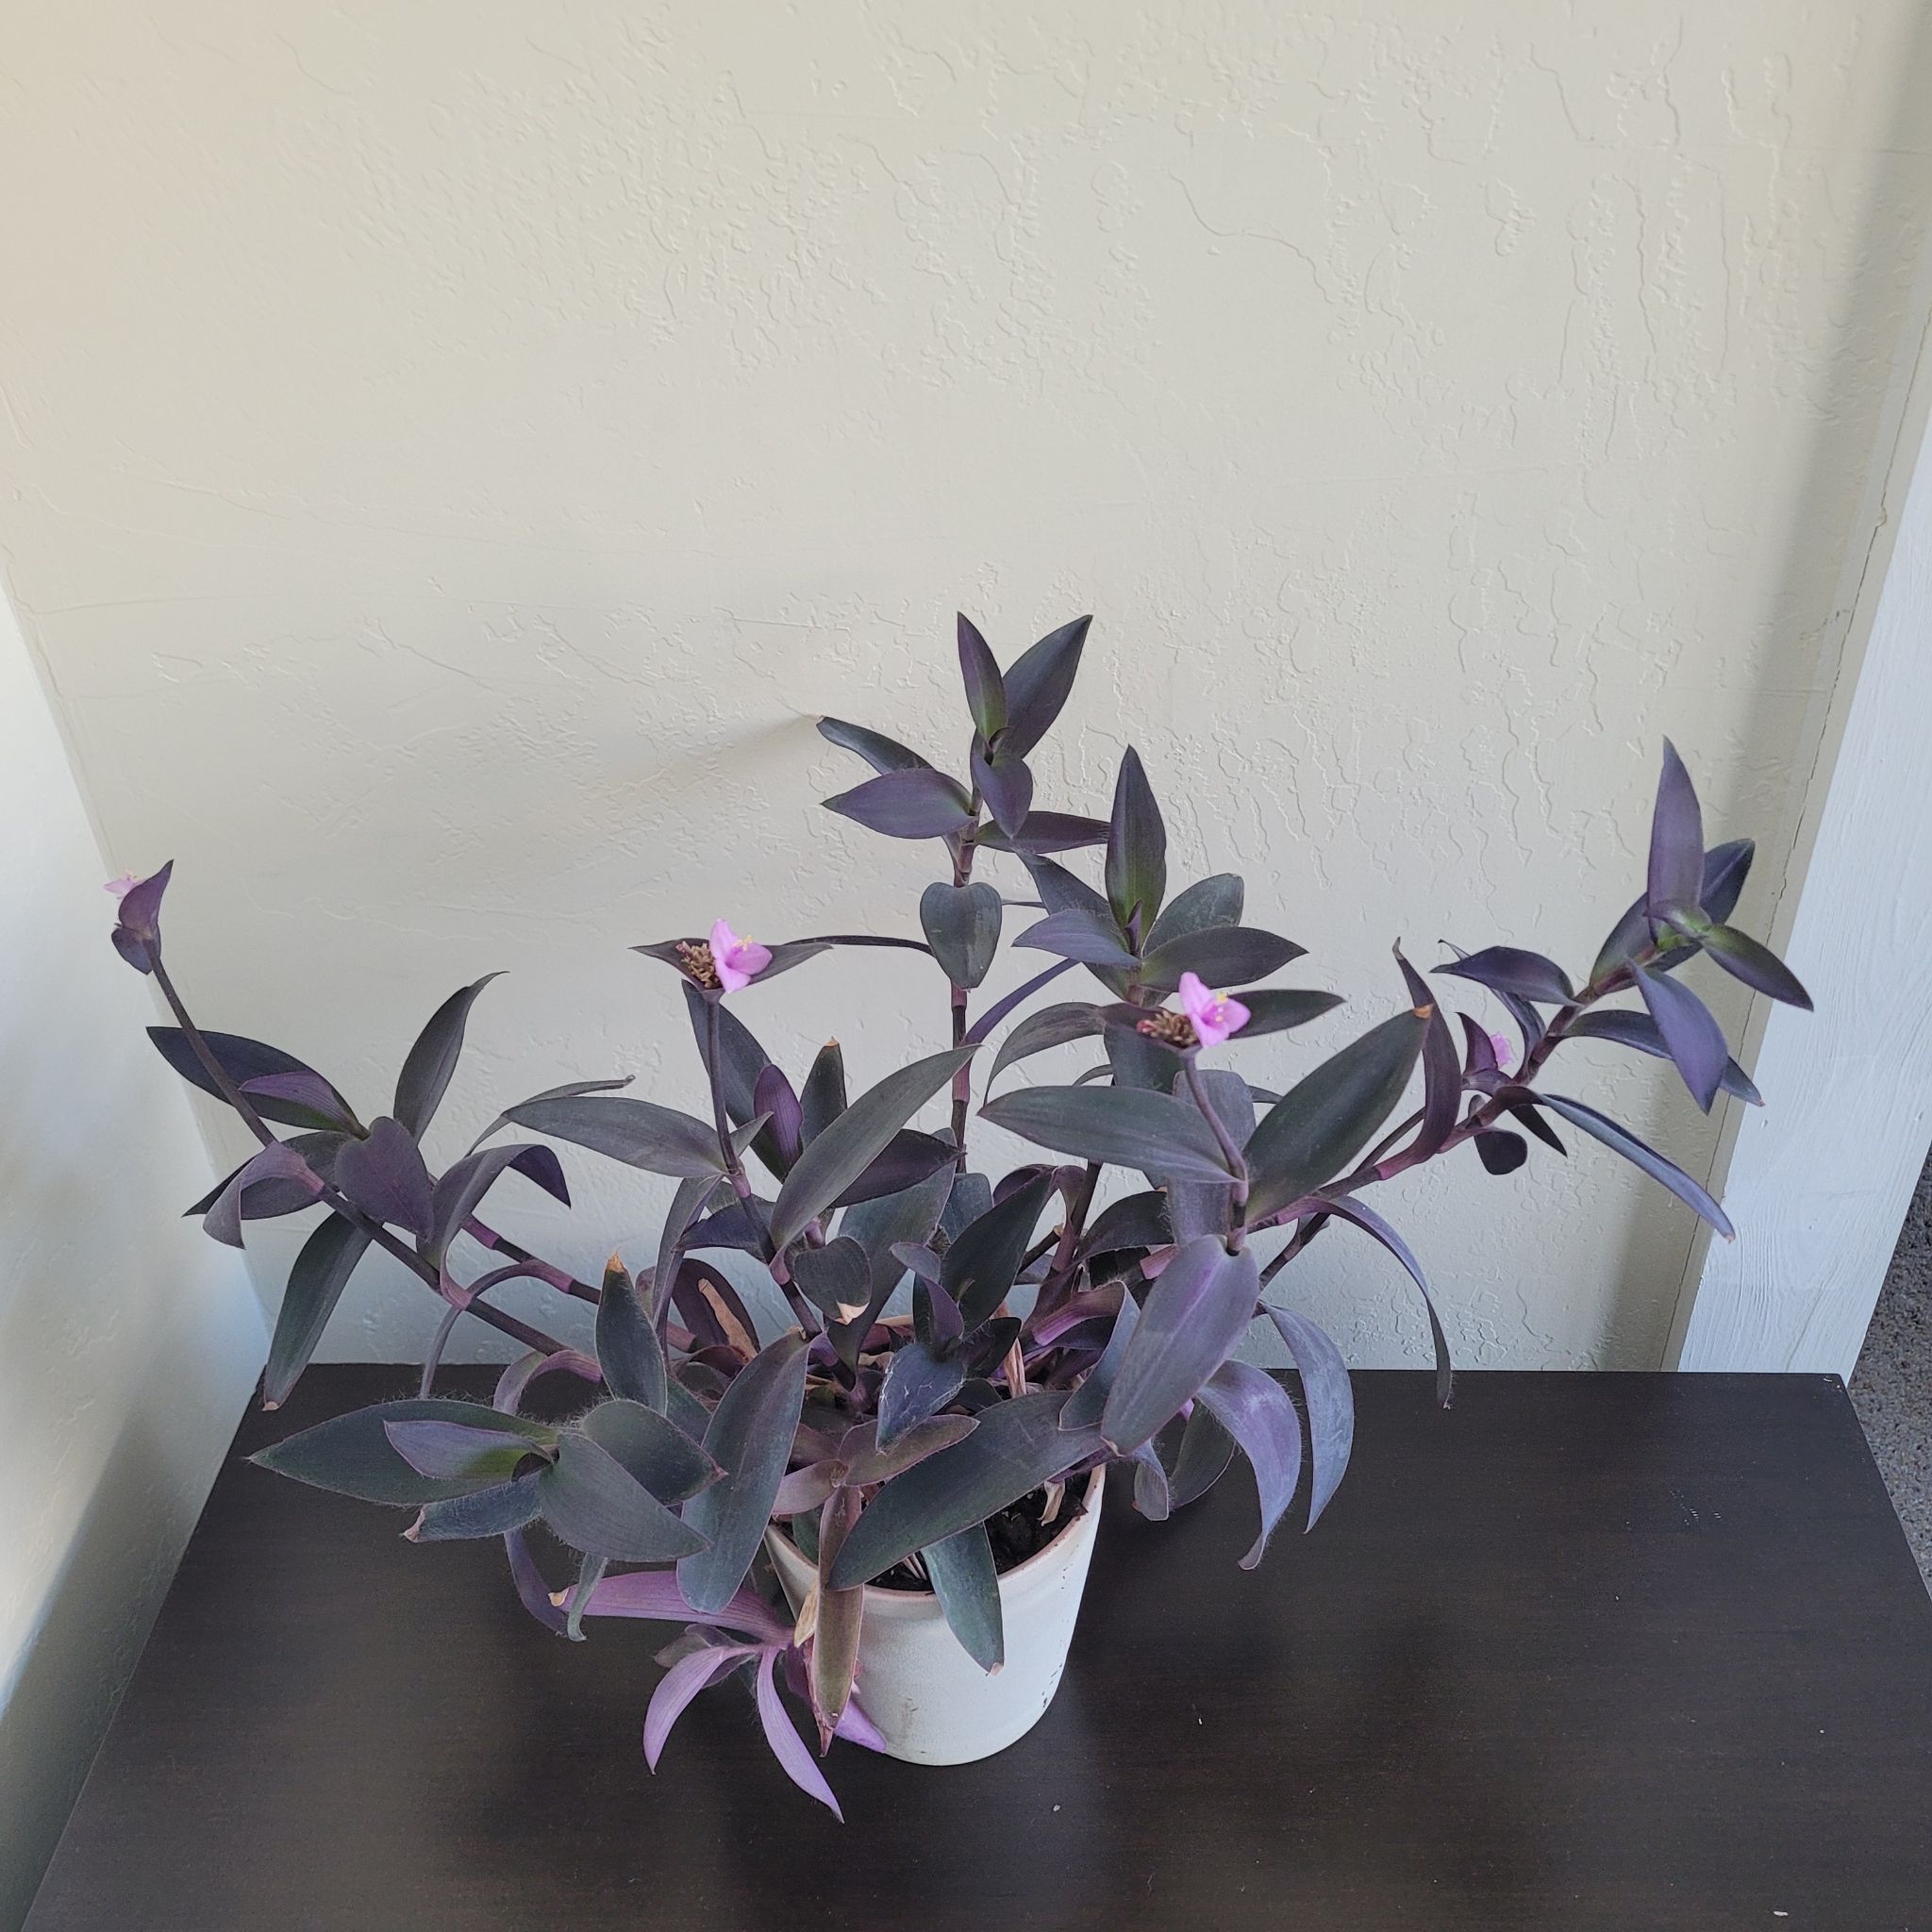
Purple Heart wants full sun, six or more hours of direct light a day, to hold its signature deep purple color. In partial shade the plant still survives, but the foliage shifts toward a duller green-purple and the trailing habit gets leggy. Indoor plants do best in a south or west window with the brightest light you can give them.
The plant is hardy in zones 7 through 11 and grows best after the last spring frost has passed, when soil and air temperatures stay reliably above 50 degrees Fahrenheit. In colder zones you can plant outdoors in late spring for a summer of trailing color, or keep the plant in a container that you bring inside before the first fall frost.
Good drainage is non-negotiable. The fleshy stems hold water on their own, and soggy soil at the crown is the quickest way to lose the plant to rot. In the ground, plant on a slight mound if your soil is heavy. In a container, a pot with drainage holes and a standard potting mix is plenty.
Space plants about 12 to 18 inches apart, since the trailing stems will fill in and spill over.
Planting from a stem cutting
Purple Heart is one of the easiest plants to start from a cutting, because the fleshy stems push roots from any leaf node touching soil. Take a 4 to 6 inch piece from a healthy stem tip and you have everything you need. The critical rule is to let the cut end dry for a few hours before planting, since a fresh wet cut pushed straight into moist soil often rots before it roots.
-
1Take a stem cutting Snip a 4 to 6 inch piece from a healthy stem tip with clean scissors, cutting just below a leaf node where a leaf joins the stem. Strip the lower two or three leaves so you have a bare section of stem to bury. The bare nodes are where most of the new roots will form.
-
2Let the cut end callus briefly Lay the cutting on a paper towel out of direct sun for two to six hours so the cut surface dries and seals over. Skipping this step is the most common reason a Purple Heart cutting rots in the soil before it can root. A short callus window costs you nothing and dramatically improves your odds.
-
3Prepare a small pot or planting spot For containers, fill a 4 to 6 inch pot with standard potting mix and water until the mix is evenly moist but not soggy. For in-ground planting, work the top few inches of soil so it is loose, and water lightly the day before. Either way the goal is moisture without standing water.
-
4Stick the cutting in the soil Push the bare lower stem about 2 inches into the soil so at least one stripped node sits below the surface. Firm the soil gently around the stem so the cutting stands on its own. Plant 2 or 3 cuttings together for a fuller look from the start, since each one will only branch slowly.
-
5Place in bright light and water sparingly Set the pot in bright indirect light for the first week so the cutting can root without being stressed by full sun. Once roots are forming, usually around week two, move the plant into full sun. Water only when the top inch of soil is dry to the touch, since too much moisture at this stage is the main risk.
Planting from a nursery transplant
A nursery transplant gets you to a full trailing look fastest, since the plant arrives with established roots and stems already cascading over the pot edge. The plant has been growing in protected greenhouse conditions, so the main job at planting is to ease it into your real sun and weather without scorching the leaves. Give the plant a few days in bright indirect light before moving to full sun outdoors.
-
1Harden off the plant first Set the nursery pot outside in a spot with bright indirect light for two to three hours on the first day, then bring it back in. Add an hour or two each day for three to five days, ending with the plant in full sun for most of the afternoon. This stepwise exposure prevents the sudden sun scald that turns greenhouse-soft leaves crispy.
-
2Pick a sunny spot and check drainage Choose a location with six or more hours of direct sun for the best purple color. Make sure water does not pool at the spot after rain, since fleshy Purple Heart stems are quick to rot in soggy soil. For containers, confirm the pot has drainage holes before you fill it.
-
3Dig a hole or fill the pot For in-ground planting, dig a hole 1 to 2 inches wider than the root ball and the same depth. For a container, choose a pot 1 to 2 inches wider than the nursery pot and add a base layer of potting mix so the top of the root ball will sit about an inch below the rim. Use standard potting mix, no special blend needed.
-
4Set the plant and backfill Slide the plant out of the nursery pot and gently loosen any roots circling tightly around the bottom. Place the root ball so its top sits at or just below the surrounding soil, then backfill around the sides with the soil you removed or fresh potting mix. Firm gently to remove large air pockets without compressing the soil hard.
-
5Water in and place in full sun Water slowly until the soil around the root ball is evenly moist and any settling has filled in. Leave the plant in its new home and let the top inch of soil dry between waterings going forward. For container plants set on a south or west deck, full sun from this day on is fine since the plant has already been hardened off.
The first month and a half
Purple Heart establishes quickly compared to most ornamentals. Cuttings root in about two weeks, and a nursery transplant typically holds its leaves without much drama from day one. The visible change you are watching for is fresh growth at the stem tips and color deepening in response to direct sun.
The most common new-grower mistake in these first weeks is overwatering. The fleshy stems already store moisture, and a daily watering routine quickly saturates the soil and rots the base. Let the top inch of soil dry between waterings and the plant will tell you what it needs.
Healthy first-month growth looks like firm upright stems, deepening purple color in the new growth, and the start of trailing or branching at the tips. If color stays muted green-purple, the plant is asking for more sun.
What can go wrong
-
Cutting rotting before it roots
A fresh cut pushed straight into wet soil is the usual cause. The cut tissue absorbs water before it can seal, and soil pathogens move in. Let cuts dry on a paper towel for two to six hours before planting, and water the soil only enough to keep it lightly moist, not soggy, while roots are forming. Bright indirect light during week one helps the cutting recover without stress from harsh sun. -
Leaves fading to green-purple
Not enough direct sun is the cause. The deep purple pigment forms in response to strong light, and the plant fades toward green in shade or low light indoors. Move the plant to a spot with six or more hours of direct sun a day. Color shift back to deep purple usually happens within a week or two once the light is right. -
Wilting after transplant
Some leaf droop in the first day or two is normal as roots reconnect to the new soil. Persistent wilting usually means the soil is either too dry or, more often, too wet. Check the top inch of soil with a finger before adding water. If the soil feels saturated and the stems are limp, hold off on water and let the surface dry before the next session. -
Crispy leaf tips on a newly placed plant
Sun scald from moving a greenhouse-grown plant straight into full sun is the most common cause. The leaves were soft and used to filtered light, and intense direct sun pulls moisture out faster than the roots can replace it. Harden off any new nursery plant for three to five days in increasing sun before leaving it in full afternoon light. Damaged leaves will not recover but new growth comes in tougher. -
Mushy stems at the soil line
Crown rot from soggy soil is the culprit. Purple Heart stems hold water on their own, so saturated soil at the base smothers the crown and lets rot spread fast. Lift the plant if the soil is staying wet, and either replant on a mound, switch to a pot with better drainage, or add coarse material to the mix. Going forward, water based on whether the top inch of soil is dry rather than on a fixed schedule. -
Leggy stems with sparse leaves
Too little light makes the plant stretch toward whatever it can find, producing long thin stems with wider spacing between leaves. Move the plant to a sunnier window or outdoor spot and pinch the long stems back by half. The cut points push new branching growth, and the plant fills in with shorter denser stems over the next few weeks. -
Frost damage on outdoor plants
Purple Heart is a tender plant and turns mushy at the first hard frost. In zones 7 and warmer the plant returns from the roots in spring, but in colder zones it dies completely. Take cuttings of any plant you want to keep before the first frost forecast, root them indoors over winter, and replant outside the following spring once temperatures stay reliably above 50 degrees Fahrenheit. -
Slow rooting on cuttings
Cool soil and too much moisture are the two main causes. Cuttings root fastest when the soil is around 70 degrees Fahrenheit and moist but not wet. If you started a cutting in early spring or in a cold room, move the pot to a warmer spot with bright indirect light. Check progress at three weeks by giving the stem a very gentle tug, since rooted cuttings resist being pulled out.
About This Article
