How to Plant a Douglas Fir
Plant Douglas Fir in early spring or early fall on a cool, well-drained site with at least six hours of sun. Set the root flare at or just above the finished soil level. Dig a hole twice as wide as the root ball, no deeper. Space trees fifteen to twenty feet apart. Water deeply once a week through the first full year. Expect modest top growth as roots establish in year one.
When and where to plant
Douglas Fir is a cool-climate conifer native to the Pacific Northwest and the interior Rockies, and it carries those preferences into your yard. The plant thrives where summers are mild, winters are cold but not bitter, and the soil stays evenly moist. It is hardy in zones 4 through 6 and grows best in full sun, with at least six hours of direct light each day. In hot southern zones, this tree struggles with summer heat and is generally not the right pick.
Plant in early spring once the ground has thawed, or in early fall about six weeks before your first hard freeze. Both windows give the roots time to settle into native soil before the next stress season. Avoid summer plantings, because heat and dry wind pull water out of fresh foliage faster than new roots can replace it.
The site must drain well. Douglas Fir tolerates a range of soil pH from slightly acidic to neutral, but it will not tolerate standing water around the roots. Heavy clay or low ground that pools after rain causes root rot. On poorly drained sites, plant on a slight mound or in a raised bed.
Allow fifteen to twenty feet between trees for a landscape planting, or ten feet for a tighter screen. A mature Douglas Fir reaches seventy feet or more, so keep at least twenty feet from buildings, foundations, and overhead lines.
Planting a container-grown tree
The single most important rule for any conifer like Douglas Fir is the root flare, where the trunk widens into the surface roots, must sit at or just above the finished soil level. Trees buried below the flare slowly suffocate over two to five years, often without any obvious early warning. The second rule is drainage. Douglas Fir roots need air as much as water, so a hole that holds standing water will rot the plant from below.
-
1Pick a cool planting day Aim for an overcast morning in early spring after the last hard frost or in early fall about six weeks before your first hard freeze. Hot sunny weather pulls moisture out of freshly transplanted needles faster than new roots can replace it. If the forecast is warm, plant at first light and rig temporary shade cloth through the first afternoon.
-
2Dig the hole twice as wide Measure the root ball, then dig a hole twice as wide and the same depth, not deeper. A wide hole loosens soil so the new roots can push out laterally into native ground. Skipping width is the easiest way to slow establishment on clay or compacted sites where Douglas Fir already has to work harder to spread.
-
3Find and set the root flare The root flare is the slight trunk widening where the wood transitions into the major surface roots. Brush soil away from the top of the root ball with your fingers until you can see this flare clearly, then position the tree so the flare sits at or just above your finished soil level. Trees buried below the flare suffocate slowly over two to five years and rarely recover once symptoms appear.
-
4Score the roots if they are circling Lift the tree out of the container and look at the sides of the root ball. If you see roots wrapping around in a spiral, use a clean knife to make three or four shallow vertical cuts down the sides, about half an inch deep. Scoring signals the roots to branch outward into native soil instead of continuing to circle, which they often never break out of on their own.
-
5Backfill, water in, and mulch Hold the tree upright as you backfill the hole with the same native soil you removed, firming gently to remove large air pockets. Water the planting hole slowly until the soil settles, then top with two to three inches of bark mulch in a wide ring, keeping the mulch four inches back from the trunk. Mulch piled against the bark holds moisture against living wood and invites the same rot the root flare rule is meant to prevent.
Planting a balled-and-burlapped tree
Larger Douglas Fir trees often arrive balled-and-burlapped, with the root ball wrapped in burlap and sometimes inside a wire basket. These trees lost a significant share of their roots when they were dug at the nursery, so the goal in the first year is steady moisture and zero stress while they regrow that root mass. The root flare rule still applies, and finding the flare matters even more here because nursery wrap often hides several inches of trunk under burlap and twine.
-
1Plant the same day the tree arrives A balled-and-burlapped tree starts losing condition the moment it leaves the nursery, and the wrapped roots dry out fast. Schedule delivery for a day you can plant, or keep the ball shaded and well watered until you get it in the ground. The longer it sits above ground, the harder year one will be.
-
2Dig wide and skip the deep hole Measure the root ball, then dig a hole two to three times as wide and exactly the same depth, never deeper. Lower the tree into the hole gently, using the ball itself rather than the trunk to lift, then check that the top of the ball sits level with or slightly above the surrounding soil. Tipping the tree by the trunk separates the roots from the soil mass inside the burlap.
-
3Cut away wire, twine, and burlap from the top Once the tree is positioned, cut and pull back the top third of the burlap, plus any twine wrapped around the trunk, plus the top of any wire basket. Burlap and twine that stay above grade wick moisture away from the root ball and girdle the trunk as it grows. Leave the burlap on the sides and bottom in place, since pulling it loose down there disturbs the root ball.
-
4Find the root flare and adjust Brush soil and burlap away from the top of the ball until you can see where the trunk widens into surface roots. If the flare is buried under several inches of nursery soil, gently scrape that excess away. Add soil under the ball if the flare ends up too low, never on top of the ball to bury the flare.
-
5Backfill, water deeply, and mulch wide Backfill around the ball with the native soil you removed, firming gently in layers and watering as you go to settle out air pockets. Build a shallow watering basin around the outside of the root ball, then water the entire planting deeply with several gallons. Spread two to three inches of bark mulch across the whole basin, keeping it four inches back from the trunk so the bark stays dry.
The first year
The first year for a newly planted Douglas Fir is mostly an underground story. The plant is moving energy from top growth into pushing roots out into the native soil, building the foundation that supports decades of steady upward growth. You should not expect much visible change on top during this period.
The most common new-grower mistake is reading slow above-ground growth as a sign of trouble and overcompensating with extra water or fertilizer. Both can cause real problems. Soggy roots invite the rot Douglas Fir is most vulnerable to, and fertilizer pushes weak leafy growth before the root system can support it. Stick to deep weekly watering and skip the fertilizer for the first full year.
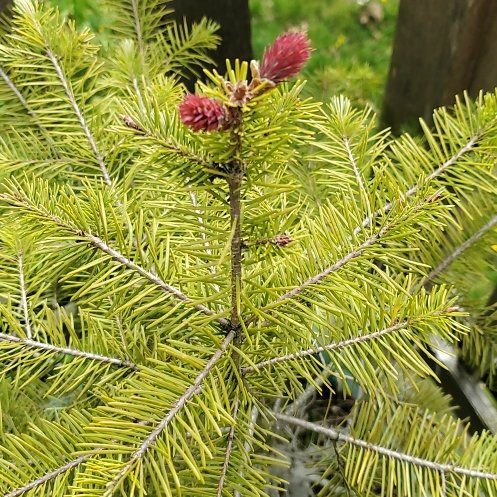
Healthy first-year growth looks like steady needle color, no significant browning beyond a small amount of normal interior needle drop, and one short push of soft fresh green needles at the branch tips in late spring or early summer.
What can go wrong
-
Browning needles in the first weeks
Transplant shock from heat or dry wind drying the needles faster than new roots can rehydrate them is the usual culprit. Check that the root ball is staying moist, not soaked, by pushing a finger two inches into the soil at the edge of the ball. Water deeply at the base and avoid wetting the foliage during the hottest part of the day. If the planting day was warmer than forecast, rig temporary shade cloth for the first week. -
Buried root flare (slow decline)
If the flare disappeared into the planting hole or under added mulch, the tree is slowly suffocating. Gently excavate the area around the trunk with your hands until you can see the trunk widening into roots, then pull soil and mulch back from that point. Done within the first year, recovery is usually full. Done after several years, the decline is often too far along to reverse and the tree fades over the next two to three seasons. -
Mushy or rotting roots from waterlogged soil
Heavy clay or a low planting spot collects water and starves roots of oxygen, leading to root rot. Lift the tree if the ground is staying saturated for more than a day after rain, and either replant on a six-inch mound or move to a better-drained site. Going forward, water based on whether the soil feels dry an inch down rather than on a fixed schedule. Douglas Fir wants moisture, not standing water. -
Drought stress in late summer year one
Until the roots reach beyond the original planting hole, the tree depends on you for water. Dry stretches in July and August cause the needles to dull, fade slightly grayish, and droop at the tips. Water deeply once a week through the first full year, giving the equivalent of one inch of rain across the root zone. Refresh the mulch ring to a two to three inch depth if it has thinned, which slows evaporation between waterings. -
Leader die-back at the top of the tree
The vertical leader sometimes fails in the first year after planting, especially on stressed trees, leaving a brown or limp tip. Trim the dead leader back to the nearest healthy lateral branch in early spring, then gently tie that lateral upright to a thin stake so it takes over as the new leader. Keep watering and avoid fertilizer through the first full year, since a stressed tree pushed with fertilizer often loses the new leader too. -
Sun scald on the south or west side
On hot exposed sites, intense afternoon sun can scorch the bark on young trees and leave dry brown patches on needles facing the sun. Move the planting if you have not yet committed, or rig temporary shade cloth on the south and west sides through the first summer. Long term, Douglas Fir prefers cool sites, so a hot dry exposure is a sign the location is wrong for this plant and a different conifer may serve better. -
Winter desiccation on exposed sites
Cold dry winter wind pulls moisture from the needles faster than frozen roots can replace it, leaving rusty brown patches on exposed branches by early spring. Water deeply right before the ground freezes hard in late fall, especially in zones 4 and 5. A temporary burlap windbreak helps for the first winter on a wind-exposed site. The damage looks alarming but a healthy tree usually pushes fresh needles in spring. -
Roots circling at the surface
If you skipped the scoring step or planted a tree that was already heavily pot-bound, the roots sometimes keep growing in their original circle instead of pushing outward. You may see roots emerging at the surface near the trunk after a season or two. Gently scrape soil away and cut any roots that are starting to encircle the trunk, since left alone they can eventually girdle and kill the tree. Refresh the mulch ring once you are done.
About This Article
