How to Grow a Don Juan Climbing Rose
Plant Don Juan Climbing Rose in full sun, in rich well-drained soil, and give it a sturdy structure to climb on from day one. Train the main canes horizontally rather than straight up so the side shoots set the heaviest bloom. Prune in late winter while the plant is dormant.
Where to plant
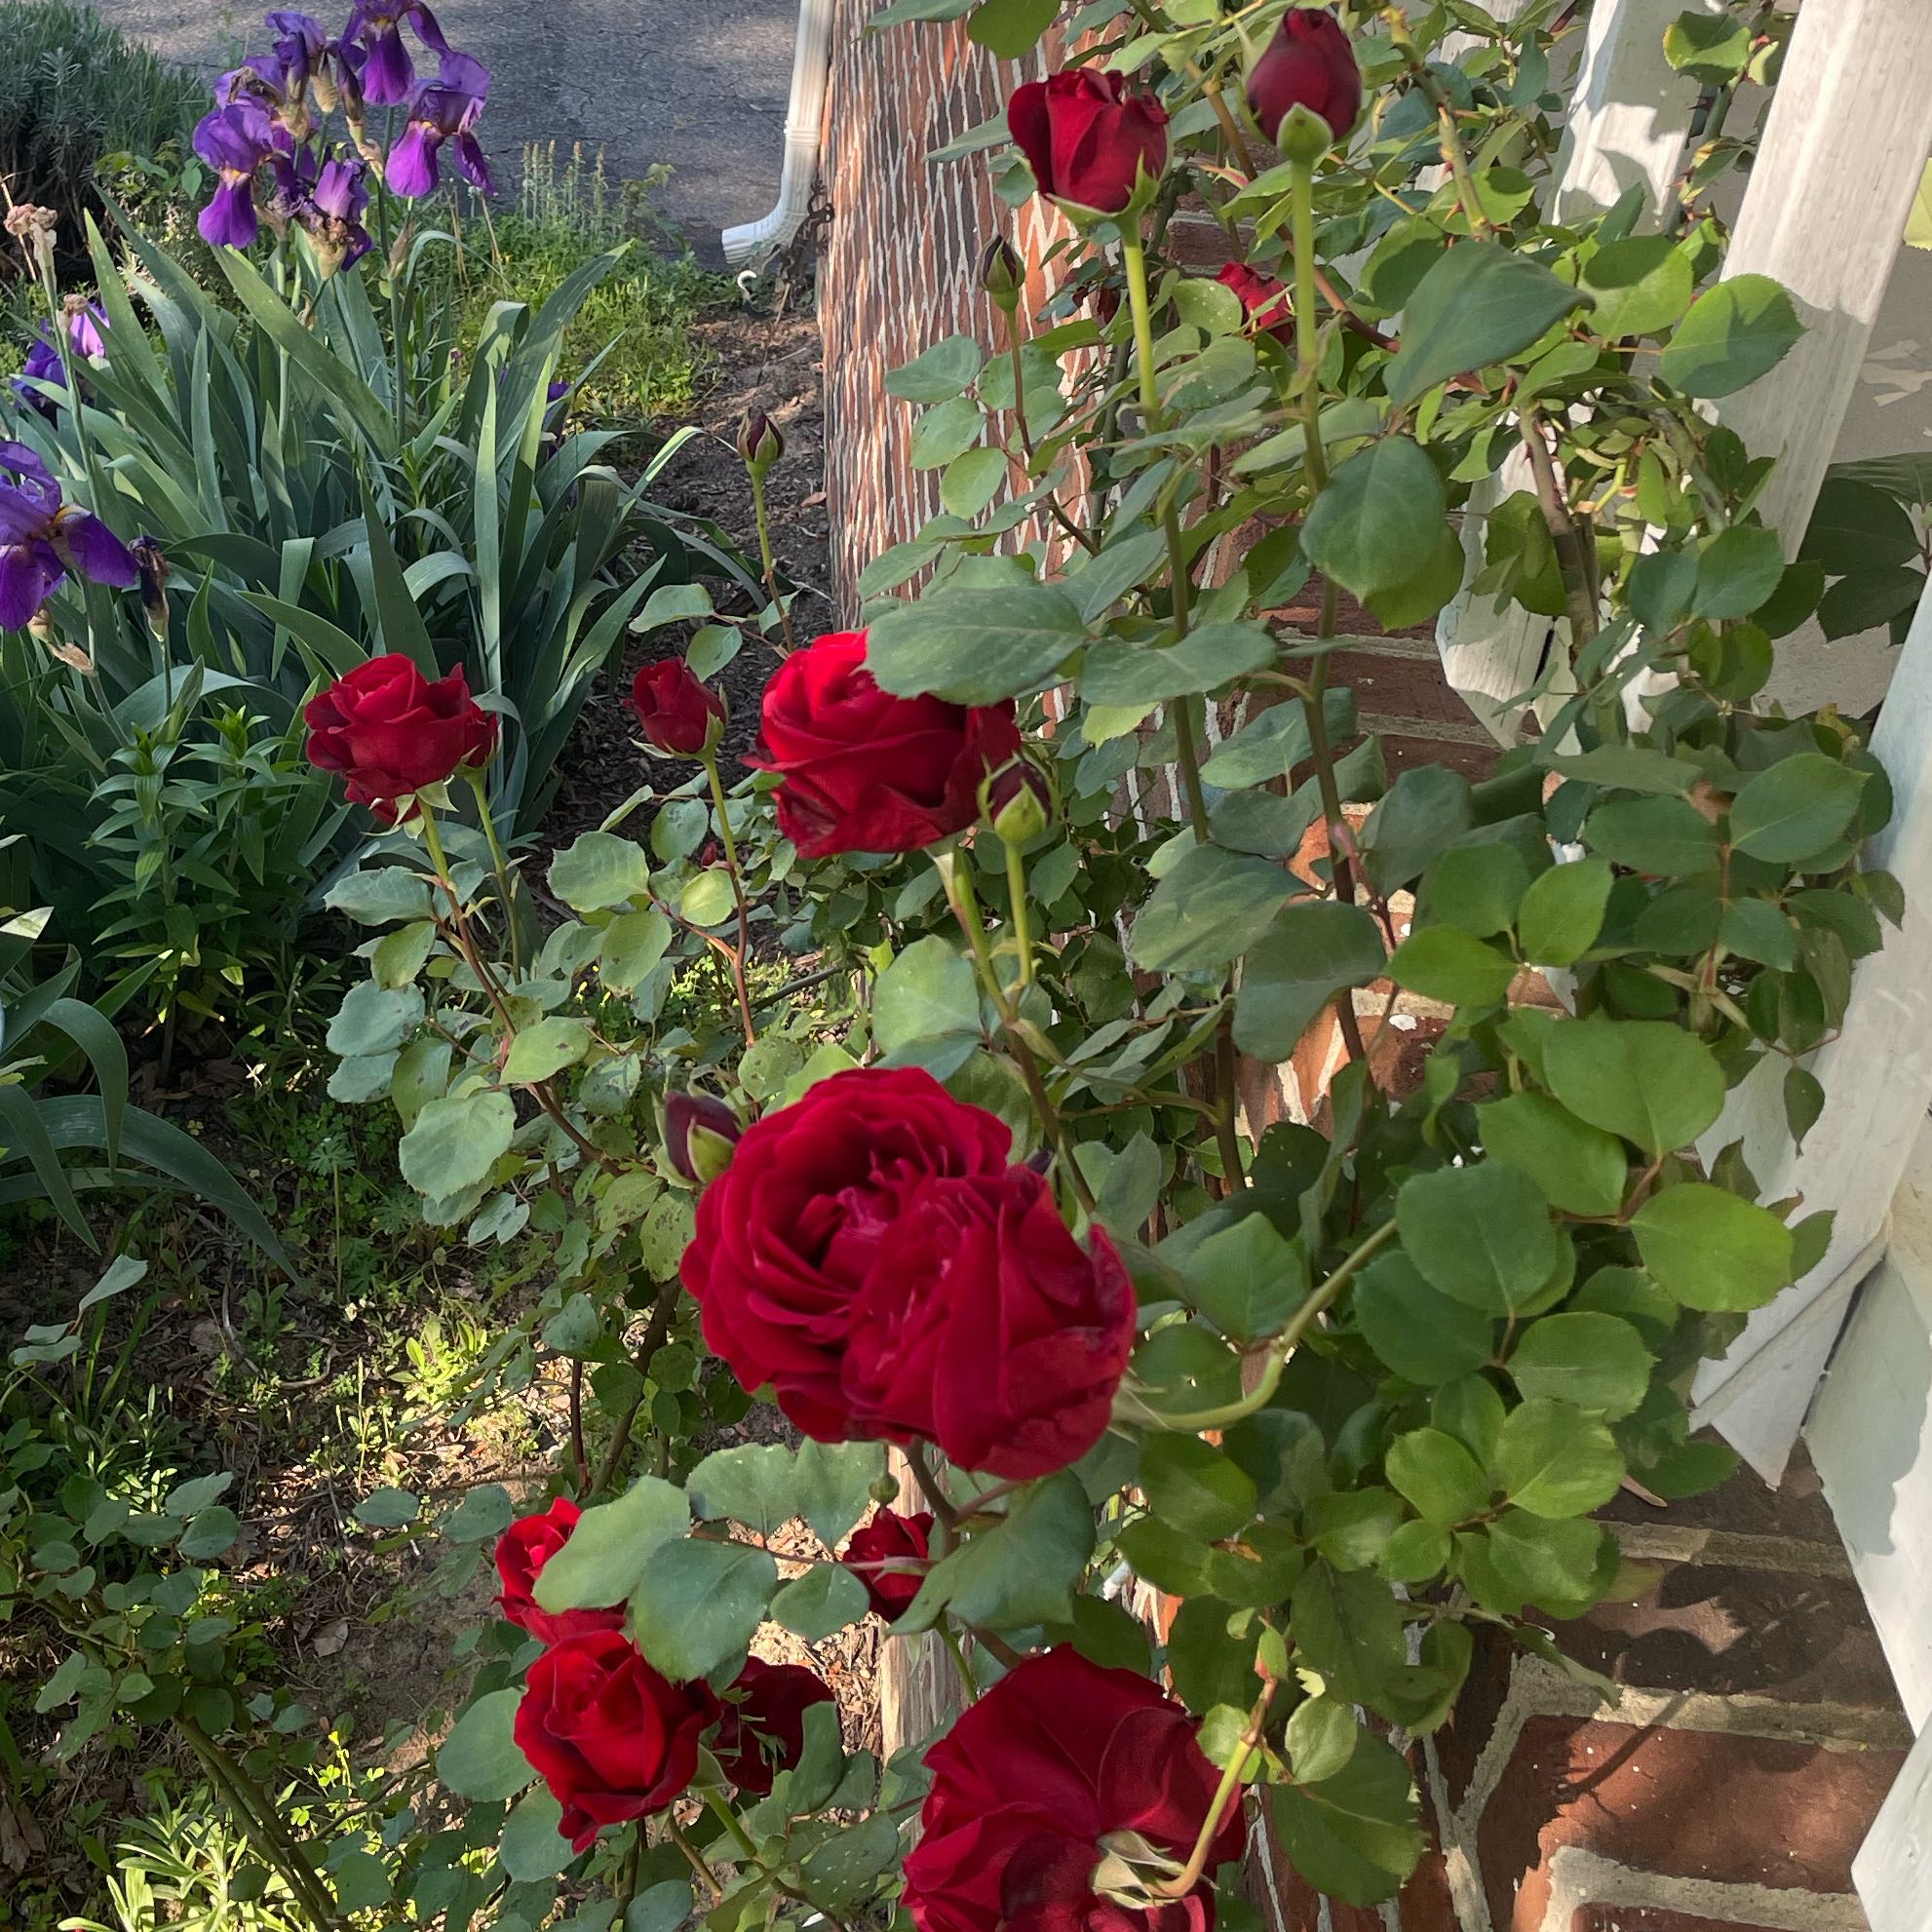
Don Juan Climbing Rose is a deciduous climbing rose for USDA zones 6 through 9 (5 with winter protection). The plant reaches 8 to 12 feet on a strong structure and produces deep red fragrant blooms across a long summer window.
Sun
Full sun is required for heavy bloom. At least six hours of direct sun a day, eight or more is better. Less than four hours of sun produces a leafy climber with sparse flowers and more disease pressure. Morning sun is especially valuable since it dries the foliage early in the day and reduces black spot.
Drainage
Well-drained soil is essential. The roots rot in heavy clay that stays wet. Dig a one-foot test hole and fill with water. If it drains within a few hours, the spot is fine. If water sits longer, build a raised mound 6 to 12 inches above grade and plant the rose on top of it.
Soil
Rich garden soil with plenty of organic matter is what this rose wants. Work three to four inches of compost into the planting area before you set the rose in. Climbing roses are heavy feeders and produce poorly in lean ground.
Space and the support
Choose the structure at planting and set it firmly in place before the rose goes in. A sturdy arbor, pergola, trellis, or chain link fence rated for the load all work. Lightweight decorative trellises bend under the weight of mature canes. Position the rose 8 to 12 inches in front of the support to allow room for the base to expand, and leave enough air space around the plant for good airflow.
How to plant
Plant in early spring after the last frost or in fall at least six weeks before the first hard frost. Bare-root roses go in earlier in the season, while container-grown roses can be planted any time during the growing season.
-
1Soak bare-root roses before planting Submerge the roots in a bucket of water for 4 to 8 hours before planting. The soak rehydrates the dry roots and gives the plant a much stronger start. Skip this step for container-grown roses, which are already well watered.
-
2Dig a wide deep hole Twice as wide as the root ball and 12 to 18 inches deep. The wide hole lets the roots spread sideways into loose ground, and the depth accommodates the graft union (the swollen spot where the named variety joins the rootstock).
-
3Set the graft union at the right depth In zones 6 and warmer, set the graft union about an inch above the soil line. In zone 5 and colder, set the graft union 2 to 3 inches below the soil surface to protect it from hard winter freezes. The graft union is the most cold-sensitive part of the plant.
-
4Backfill with amended soil Mix the dug-out soil with two or three shovels of compost and use that to fill the hole. Avoid pure compost or potting mix in the planting hole, since roots get lazy in overly rich soil and never reach into the surrounding ground.
-
5Train the main canes horizontally Loosely tie the longest canes to the support in a horizontal or fan pattern using soft twine or rose ties. Horizontal training is the key to heavy climbing rose bloom — side shoots emerge along the horizontal cane and each shoot sets flowers, where a straight-up cane blooms only at the tip.
-
6Water deeply and mulch Soak the entire planting area until the top six inches feel uniformly damp. Mulch with two to three inches of shredded bark or compost, kept a few inches back from the canes. Mulch holds moisture, shades the roots, and reduces disease splash from the soil.
Watering and feeding
Watering
Water deeply once or twice a week through the first growing season, soaking the root zone rather than wetting the leaves. A drip line or soaker hose at the base works best. Wet foliage encourages black spot, the most common rose disease.
Established plants in average soil need a deep weekly soak through dry spells, more often in sandy ground or hot weather. Consistent moisture matters more than total volume — uneven watering stresses the plant and reduces bloom quality.
Feeding
Feed three times per growing season with a balanced rose fertilizer or a slow-release general-purpose feed. First feeding in early spring as new growth pushes, second after the first bloom flush, and third in midsummer to support the late-season repeat bloom.
Stop feeding by early August in cold-winter zones so new growth has time to harden off before the first frost. Cold zone plants need to slow down before winter, and late nitrogen leaves tender shoots that freeze back.
Pruning and support
Don Juan Climbing Rose blooms on the side shoots that emerge from older canes, so the pruning strategy is different from bush roses. The main canes stay on the plant for several years, and the annual pruning focuses on the side shoots and on removing the oldest tired canes.
Ongoing tying and training
Through the growing season, tie new long canes loosely to the support as they grow, training them in a horizontal or fan pattern. Avoid letting canes grow straight up — horizontal training produces 5 to 10 times more flowers per cane.
Use soft twine, plant ties, or strips of old t-shirt material. Avoid wire that cuts into the canes as they thicken.
Late-winter main pruning
Prune in late winter while the plant is still dormant, about 2 to 4 weeks before the last frost. Remove any dead, broken, or diseased canes at the base. Cut the side shoots (the smaller branches off the main canes) back to 3 to 6 inches, with the lowest cut just above an outward-facing bud. Each pruned side shoot will produce one or more new flowering stems in spring.
Take out one or two of the very oldest, woodiest main canes at ground level each year once the plant is mature. This renewal cut encourages fresh strong canes from the base.
Deadheading through the season
Cut off spent flowers as they fade, snipping the stem back to the first set of five healthy leaves. Deadheading stops the plant from setting hips and encourages a second flush of bloom in midsummer. Stop deadheading in early fall so the plant slows down and prepares for winter — the developing hips signal the rose to begin dormancy.
Blooming and color
Don Juan Climbing Rose is grown for the deep velvety red flowers and rich rose fragrance. The blooms open in late spring and repeat in flushes through summer with proper deadheading.
Bloom timing
The first heavy flush opens in late May or June depending on the zone, with each bloom 4 to 5 inches across in classic high-centered rose form. The plant repeat-blooms in lighter flushes every 5 to 6 weeks through summer if you deadhead consistently, with a final flush often in early fall before frost.
Fragrance
The scent is one of the strongest in the climbing rose category — a classic deep rose fragrance with a hint of fruit. The fragrance is strongest in midmorning before the day heats up. Plant near a window, doorway, or seating area where the scent can be appreciated daily through the bloom window.
Cutting for arrangements
The long stems make excellent cut flowers. Cut stems early in the morning when the buds are just starting to open, with at least five sets of leaves below the bloom. Strip the lower leaves, recut the stem under water at an angle, and place in a clean vase. Cut blooms hold for 5 to 7 days indoors.
Fall hips
If you stop deadheading in early fall and let the last blooms set hips, the rose develops orange-red rose hips that hold through winter. The hips are a minor secondary feature and a useful cold-season look, plus they feed birds in winter.
Common problems and pests
Most Don Juan Climbing Rose complaints fall into one of three categories — fungal diseases that thrive in humid weather, common rose insects, or sparse bloom from canes trained straight up instead of horizontally. The plant is otherwise vigorous and reliable in a sunny spot with good airflow.
Black spots on leaves with yellowing
Black spot, the most common rose disease, spread by water splash from infected leaves. Remove and discard affected leaves and any that fall to the ground. Avoid overhead watering and water early in the day so foliage dries quickly. Mulch beneath the plant to reduce splash. A weekly fungicide spray starting in early spring is sometimes needed in humid climates.
Sparse bloom on tall canes
Canes trained straight up bloom only at the tips, while horizontally-trained canes set side shoots and flowers along the entire length. Retrain the main canes to grow more horizontally or in a fan pattern, tying them loosely to the support. The first season after retraining gives a much heavier bloom.
Aphids on new growth and buds
Small green or pink insects clustered on shoots and developing buds. Knock them off with a strong spray of water early in the morning. Heavier infestations respond to insecticidal soap. Lady beetles eat aphids fast, so let any that show up stay on the plants.
Spider mites in hot dry weather
Fine stippling on leaves and faint webbing in the leaf joints during summer heat. Spray the undersides of the leaves with a strong jet of water every few days. Insecticidal soap or horticultural oil clears heavier infestations. Adequate watering through dry spells is the best prevention.
Holes chewed in flower buds
Often rose chafer beetles or Japanese beetles, depending on the region. Hand-pick beetles in the early morning when they are slow and drop them in soapy water. Bag traps placed well away from the rose bed reduce populations but can attract more beetles to the yard, so place them carefully. Heavy infestations may need a targeted insecticide labeled for ornamental beetles.
Powdery mildew on new growth
White dusty film on the leaves, common in cool nights with warm days. Improve airflow by thinning crowded growth during the late winter pruning. Avoid late-day watering that leaves foliage damp overnight. A potassium bicarbonate or horticultural oil spray every 7 to 10 days slows the spread.
Cane dieback after winter
Dead-looking cane tips in early spring are common after harsh winters, especially in zones 5 and 6. Wait until new growth pushes in late spring before cutting anything. Cut dead canes back to the lowest green bud or back to a healthy lateral. Winter protection with mulch piled around the base in cold zones reduces the damage.
Suckers from the rootstock
Long thin canes with different-looking leaves emerging from below the graft union. These are shoots from the rootstock, not the named variety, and should be removed. Trace each sucker back to the rootstock and tear it off cleanly rather than cutting, which leaves a stub that resprouts.
Rose rosette disease
Distorted red growth that looks witches'-broom-like, often with thick clusters of thorns. The disease is fatal to roses and spreads via tiny mites. Remove and bag the entire plant including the roots, and do not replant another rose in the same spot for at least a year. The disease is increasingly common in the southeastern United States and remains incurable.
About This Article
