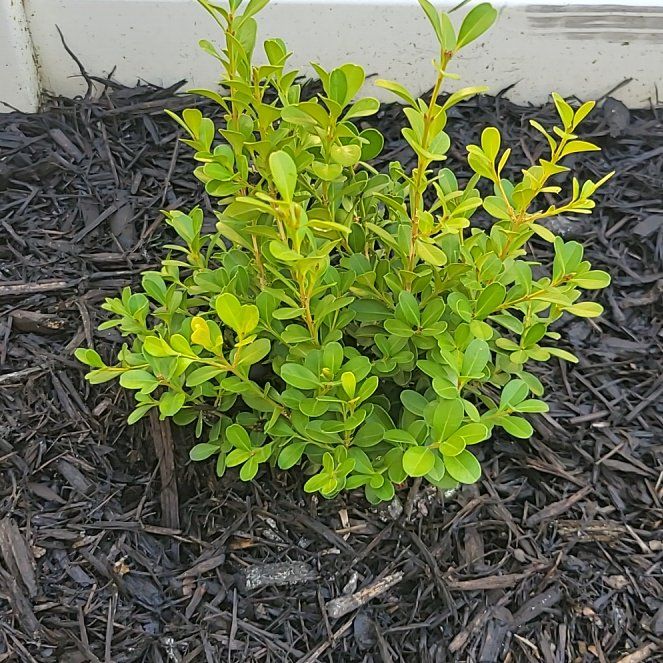
How to Grow a Japanese Boxwood
Plant Japanese Boxwood in full sun to part shade and well-drained slightly alkaline soil. The compact evergreen reaches 3 to 4 feet tall and tolerates summer heat better than most boxwoods. Shear lightly once or twice between late spring and mid summer to shape it, and watch for boxwood blight in humid weather.
Where to plant
Japanese Boxwood is a small evergreen shrub for USDA zones 6 through 9. The plant matures into a rounded bush 3 to 4 feet tall and roughly as wide in eight to ten years. It is the most heat-tolerant of the boxwoods and a workhorse for low hedges, edging, and foundation plantings in warm climates.
Sun
Full sun to part shade. Four to six hours of direct sun produces the densest growth and the deepest green foliage. Less than four hours produces sparse leggy stems.
In zone 9, light afternoon shade keeps the leaves from scorching during summer heat waves. Avoid deep shade anywhere in the range, which produces a thin open shrub.
Drainage
Well-drained soil is critical. Boxwood root rot is the fastest way to lose the plant, and it spreads easily through wet ground. Dig a one-foot test hole and fill it with water. If it sits overnight, build a raised mound 6 to 12 inches above grade and plant on top of it.
Soil
Slightly alkaline to neutral, loamy, and rich in organic matter is ideal. Work a few inches of compost into the planting area before setting the shrub in. Acidic clay can be amended with lime to bring the pH closer to neutral.
Space
For a hedge, space plants about 2 feet apart on center. The shrubs knit together within three to four years and form a continuous low wall. For a standalone shrub, give each plant at least 4 feet of clear space in every direction to mature into its natural rounded form.
How to plant
Plant Japanese Boxwood in early spring after the last hard frost or in early fall at least six weeks before the first hard frost. Container-grown plants establish reliably year-round in mild climates, though spring and fall produce the strongest root growth.
-
1Dig a wide shallow hole Twice as wide as the root ball and only as deep as the root ball is tall. Boxwood roots spread sideways, and a wide saucer-shaped hole helps them establish faster than a narrow deep one.
-
2Inspect and tease the roots Slide the root ball out of the nursery pot and look for thick roots circling the outside. Gently tease any circling roots outward or score the outside of the root ball with a knife. Circling roots never straighten on their own and eventually strangle the shrub.
-
3Set the shrub slightly high Position the root ball so the top sits about an inch above the surrounding soil. The shrub settles as the soil compacts, and a buried crown rots faster than a high one. Buried trunks are also the most common entry point for boxwood blight.
-
4Backfill with native soil and compost Mix a few handfuls of compost into the dug-out soil and use that to fill the hole. Avoid pure compost or potting mix in the hole, which causes roots to stay in the rich pocket rather than spreading into the wider yard.
-
5Water deeply Soak the entire root zone until the top six inches feel uniformly damp. This is the most important watering of the shrub's first year.
-
6Mulch two to three inches deep Use shredded bark or wood chips, kept a few inches back from the trunk. Mulch keeps the shallow boxwood roots cool and holds moisture between waterings. Skip mulching directly against the trunk, which holds moisture against the bark and invites disease.
Watering and feeding
Watering
Water deeply once a week through the first two growing seasons to help the shrub establish, soaking the root zone rather than splashing the leaves. Drip irrigation or a soaker hose at the base is ideal.
After year two, Japanese Boxwood handles moderate drought well. A deep weekly soak through extended summer dry spells keeps the foliage looking fresh. Avoid overhead watering, which leaves the leaves wet and invites foliar disease.
Feeding
Feed once in early spring as new growth starts, using a slow-release balanced fertilizer or one labeled for evergreen shrubs. Boxwoods are light feeders, and heavy nitrogen produces lush soft growth that attracts pests and fails to harden off before winter.
A second light feeding in late spring helps a heavily sheared hedge recover. Stop feeding entirely by midsummer so the plant can harden off before winter.
Pruning
Japanese Boxwood tolerates regular shearing better than most evergreens, which is why the plant works so well as a hedge or topiary. The most useful pruning rule is to shear in early summer once the new growth has finished, then again lightly in mid summer if needed for shape.
When to shear
Shear after the first flush of new growth hardens off in late spring, usually June. A second light shearing in late July keeps a formal hedge sharp through the rest of the season. Avoid shearing after mid August, since fresh growth pushed by late cuts will not harden before winter and dies back in the first freeze.
Thinning the interior
Every two to three years, hand-prune a few inner stems out to let light and air into the interior of the shrub. Boxwoods that are only sheared on the outside develop a dense outer shell and a hollow brown interior, which is the most common entry point for fungal disease. A small pair of pruners and ten minutes per shrub solves this.
Cut to a bud or branch junction rather than leaving stubs. Stubs die back and provide entry for disease.
Renovating an overgrown shrub
If the shrub has outgrown its space, Japanese Boxwood tolerates a hard cutback better than most boxwoods. In early spring, cut the entire plant back by up to one third. The shrub resprouts from older wood and fills back in within a couple of seasons. For very overgrown shrubs, stage the cutback over two to three years to reduce stress.
Blooming and color
Japanese Boxwood is grown for the dense evergreen foliage and the formal structure it provides year-round. The small yellow-green flowers in spring are inconspicuous but quietly attract early pollinators, and the leaves stay glossy green through every season.
Year-round structure
The defining feature is the evergreen foliage that holds its color in every season. A well-tended hedge or pair of foundation shrubs anchors a winter garden when nothing else has leaves. The small leaves take a shear cut cleanly, which is why the plant is the go-to for formal hedging and topiary.
Bronzing in winter
In zone 6 and 7, the foliage often turns a bronze or orange tint through cold winters and returns to green in spring. This is normal cold-acclimation behavior, not disease damage. Burning intensifies in shrubs exposed to harsh winter wind, so a windbreak on the north or west side reduces it.
Wrapping young shrubs with burlap during the first few winters reduces winter burn until the root system can fully support the foliage.
Spring bloom
Small yellow-green flowers open in spring along the older wood. The flowers are hardly noticeable and produce no fragrance worth seeking out, but they attract early native bees and a few small butterflies. The flowers fade quickly and do not affect the look of the shrub.
Common problems and pests
Most Japanese Boxwood trouble traces to root rot, poor pruning timing, or boxwood blight in humid climates. Diagnosing the symptom carefully usually points to one of those three causes.
Sudden wilting and dieback of one branch
Almost always root rot from a wet spot in the soil, or volutella canker entering through a pruning wound. Trace the affected branch back to its origin and cut at least a few inches into healthy wood, disinfecting pruners between cuts with rubbing alcohol. Check soil drainage and replant on a raised mound if necessary.
Bronze or orange foliage in winter
Winter burn from cold dry wind, which pulls moisture out of the leaves faster than the frozen roots can replace it. The damage is mostly cosmetic and the foliage greens up by mid spring. Wrap young shrubs with burlap during the first few winters and add a windbreak on the windward side.
Brown circular spots on leaves followed by leaf drop
Boxwood blight, a destructive fungal disease that spreads in humid weather and on wet leaves. Affected plants drop their leaves quickly and the bare stems develop black streaks. Remove and destroy affected plants entirely, never compost them. Disinfect pruners and any tools between plants. Boxwood blight has no cure once established and prevention is the entire strategy.
Tiny green caterpillars defoliating new growth
Box tree moth larvae, which can strip a hedge within weeks during a heavy infestation. Inspect the interior of the shrub for webbing and small green caterpillars with black heads. Hand-pick light infestations or spray with Bt (Bacillus thuringiensis), which is highly effective against caterpillars and harmless to bees. Heavier infestations may need a follow-up spray ten days later.
Yellow leaves with black mold
Boxwood psyllid feeding on new growth and excreting sticky honeydew that grows sooty mold. Wash the residue off with soapy water once the pest is gone. Horticultural oil sprayed in early spring before bud break controls overwintering eggs. Light psyllid damage rarely affects the health of the shrub long-term.
Cupped curled new leaves
Boxwood leafminer, a small fly whose larvae tunnel inside the leaves and cause blistering and cupping. Damage is mostly cosmetic on healthy shrubs. Pick off and destroy heavily damaged leaves. Systemic insecticide soil drench applied in late spring controls heavier infestations, though many gardeners simply tolerate light damage.
Hollow brown interior with green outer shell
Caused by repeated outer shearing without interior thinning. The dense outer shell blocks light and air from reaching the inside, and the interior leaves die. Thin a few inner stems out in late winter to let light back into the shrub, and the interior fills back in within a season or two.
Roots showing at the soil line
Surface roots indicate either soil erosion or planting too high. Top-dress with an inch of soil mixed with compost to cover exposed roots, but never bury the trunk flare. If the original planting depth was too high, gently mound additional soil around the surface roots rather than digging the plant up.
Dieback after a hard pruning
Caused by cutting back into wood that is too old to resprout, or shearing in late summer when fresh growth cannot harden off. Stage future hard pruning over two to three years rather than doing it all at once, and finish all shearing by mid August. The dieback itself can be cut out cleanly back to healthy wood and the shrub usually recovers.
About This Article
