How to Grow a Soursop
Plant Soursop in full sun, in rich well-drained soil, in USDA zones 10 to 11 only. Outside those zones, grow in a large container moved indoors before any night below 50F. Hand-pollinate the flowers at dusk to set fruit reliably, and expect first harvest in year 3 to 5.
Where to plant
Soursop is a tender evergreen tropical tree from the Caribbean and Central America. It grows hardy outdoors only in USDA zones 10 and 11, where temperatures stay above 50F year-round. Any frost kills young trees outright and seriously damages mature ones. In cooler climates, the only realistic option is a large container that summers outside and winters indoors.
Sun
Six to eight hours of direct sun produces the strongest growth and the heaviest fruit set. Young trees benefit from light afternoon shade in their first year while they establish, then a move into full sun in year two.
Indoor container plants need the brightest window in the house, ideally south-facing, plus supplemental grow lights through the short days of winter.
Drainage
Soursop roots rot fast in soggy soil. Dig a one-foot test hole and fill it with water. If it drains within a few hours, the spot is fine. If water sits overnight, build a raised mound a foot above grade or grow in a container with generous drainage holes.
Soil
Rich, loamy, slightly acidic soil with plenty of organic matter suits Soursop best. In a container, use a quality potting mix amended with extra perlite or pumice. Heavy clay native soils need a generous compost amendment and a raised planting site for drainage.
Space
Soursop grows into a small tree 15 to 30 feet tall with a similar spread in the tropics. Give it 15 feet of clear space in every direction. Plant well clear of buildings and overhead utility lines. Container plants stay smaller (8 to 12 feet) and can be kept compact with annual pruning.
How to plant
Plant in spring once nights stay reliably above 55F. New roots establish fastest when soil temperatures sit in the 70s. Container-grown trees can go in any time during the warm season.
-
1Dig a wide hole Twice as wide as the root ball but only as deep. The lateral roots spread sideways into loose soil and establish faster than they would in a narrow deep hole.
-
2Loosen the root ball If the roots circle tightly inside the nursery pot, tease them apart by hand or score the outside with a clean knife. Circling roots tend to stay circling and slowly girdle the tree as it matures.
-
3Set the tree slightly high The top of the root ball should sit about an inch above the surrounding soil. The plant settles as the soil compacts, and a buried trunk flare invites rot at the base.
-
4Backfill with native soil and compost Mix a couple of shovels of compost into the dug-out soil and use that mix to fill the hole. Avoid pure compost or potting mix, since roots get lazy in overly rich soil and never spread into the surrounding yard.
-
5Water deeply Soak the entire root zone until the top six inches feel uniformly damp. This first watering settles the soil around the roots and is the most important watering of the tree's first year.
-
6Mulch two to three inches deep Use shredded bark or wood chips, kept a few inches back from the trunk. Mulch keeps the shallow root zone cool, holds moisture between waterings, and suppresses weeds.
Watering and feeding
Watering
Water deeply twice a week through the first growing season to help the tree establish, soaking the root zone rather than splashing the leaves. Drip irrigation or a soaker hose at the base works best.
After the first year, a deep weekly soak through the dry season keeps the canopy full and supports steady fruit development. Soursop drops its fruit when soil moisture swings hard, so consistent watering through fruit set and ripening is the single best thing you can do for yields. Container plants dry out faster and may need water two or three times a week in hot weather.
Feeding
Feed every two months through the warm growing season with a balanced slow-release fertilizer or one labeled for tropical fruit trees. Young trees benefit from a higher-nitrogen blend in their first two years to build canopy.
Once the tree starts flowering, switch to a fertilizer with more potassium and phosphorus to support fruit set. Back off feeding entirely in the cool season to avoid pushing tender new growth that gets cold-damaged.
Pruning
Soursop fruits on the trunk and main branches, so pruning is mostly about keeping the canopy open and the tree at a manageable height. Heavy structural pruning is best done at the end of the cool season just before new growth pushes.
When to prune
Prune in late winter or early spring before new growth begins. Light shaping cuts can be made any time during the warm season. Avoid heavy pruning in late fall, since cuts heal slowly through cool weather and stay open to disease.
What to cut
Remove any dead, broken, or crossing branches at the collar. Take out vertical water sprouts that shoot straight up from main limbs. Thin the canopy enough that you can see daylight through it from below, which improves airflow and reduces fungal problems on the fruit.
Keep the tree topped at a height you can reach with a fruit-picking pole. Soursop fruit gets heavy (3 to 8 pounds each) and a tree allowed to grow tall puts fruit out of practical reach.
Container plants
Container Soursop needs yearly pruning to stay at a manageable size for the patio or greenhouse. Cut the main leaders back by a third each spring before active growth begins. Pinch the tips of new shoots through the summer to keep the canopy compact and stocky.
Harvest
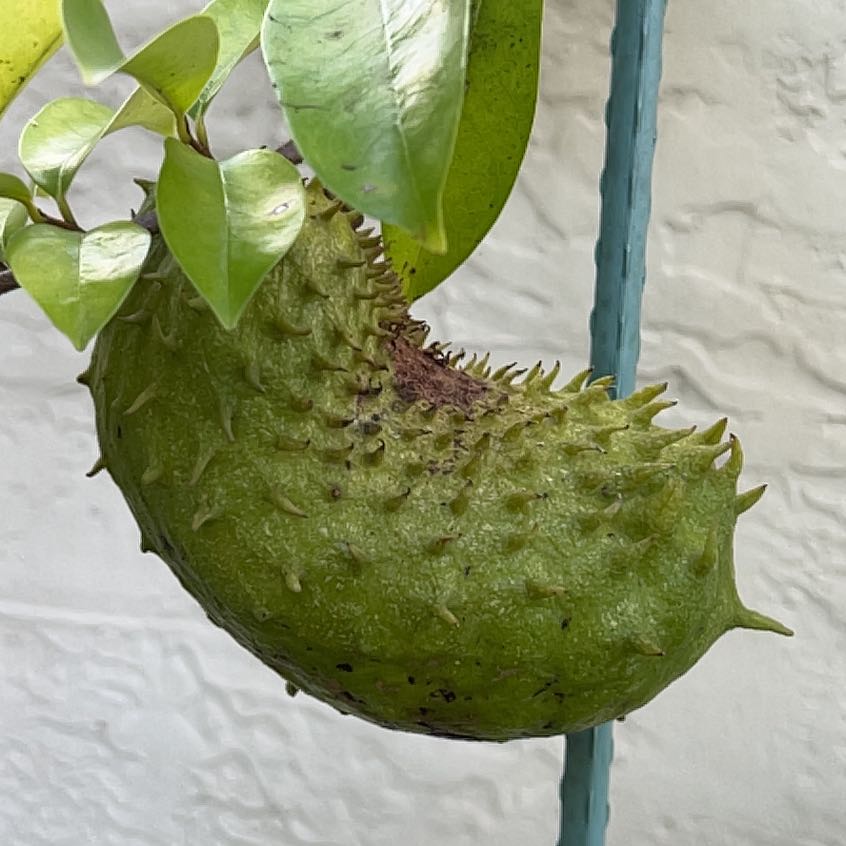
Soursop is grown for the large, spiny, kidney-shaped green fruit. The flesh is white, soft, juicy, and tangy-sweet with a flavor often compared to a mix of pineapple, strawberry, and banana. Each fruit weighs 3 to 8 pounds at maturity.
When fruit is ready
The skin lightens from dark green to a slightly yellow-green and the spines soften and become farther apart. The fruit gives slightly when pressed firmly, similar to a slightly underripe avocado. Pick at this stage and let the fruit finish ripening on the counter, since fully tree-ripe fruit drops and bruises easily.
First fruit comes in year 3 to 5 from a young grafted nursery tree. Seedling trees take longer (5 to 8 years) and have unpredictable fruit quality.
Hand pollination for better yields
Soursop flowers are poorly pollinated by most insects in cultivation outside the native range. Hand-pollinating in the evening dramatically improves fruit set. Use a small soft brush to transfer pollen from the male phase flowers (with brown pollen visible on the inner petals) to the female phase flowers (sticky stigma exposed). Even five minutes of hand work during the bloom flush triples typical fruit set.
Picking and storing
Cut fruit from the branch with pruners, leaving a short stem attached. Pulling the fruit damages the branch. Ripe fruit on the counter holds for two to three days before the flesh oversoftens. Refrigerated ripe fruit lasts a week.
The flesh freezes well. Scoop out the pulp, remove the inedible black seeds, and freeze the pulp in containers for smoothies and ice cream year-round.
Common problems and pests
Most Soursop complaints come from cold damage, root rot, and poor fruit set. The tree is otherwise productive once mature.
Leaves dropping after a cold night
Temperatures below 50F cause leaf drop, and a freeze can kill the tree outright. Outdoor trees in marginal zones benefit from a south-facing wall, a frost cloth on the coldest nights, and a couple inches of fresh mulch over the root zone before winter. Container plants must move indoors before the first cool night.
Fruit dropping while still small
Premature fruit drop is usually caused by inconsistent watering, poor pollination, or nutrient stress. Mulch the root zone two to three inches deep to even out soil moisture. Hand-pollinate flowers in the evening to boost set. Apply a balanced fertilizer with extra potassium during the bloom and early fruit-development window.
Powdery white fluff on stems or fruit
Mealybugs feeding on sap and excreting a sugary residue. Wipe small infestations off with a cotton swab dipped in rubbing alcohol. Heavier infestations respond to horticultural oil sprayed in the cool of early morning. Check the undersides of leaves and the base of the fruit stem where mealybugs hide.
Sticky residue and black sooty mold
Scale insects or mealybugs feeding on sap and excreting a sugary substance that grows black mold on the leaves and fruit. Treat the underlying pest first with horticultural oil or insecticidal soap. The sooty mold washes off the foliage with soapy water once the pest is controlled.
Black or brown spots on the fruit
Anthracnose, a fungal disease that thrives in warm wet weather. Prune to improve airflow through the canopy and remove any fruit showing spots so the disease does not spread. A copper fungicide applied to developing fruit slows the spread during prolonged wet weather.
Sudden wilting with damp soil
Root rot from waterlogged soil, often after a heavy rain on poorly drained ground. Check the planting site by digging a hole next to the tree to feel how wet the soil is below the surface. Ease back on watering and improve drainage with a raised mound or French drain. Severely affected trees rarely recover.
Holes in fruit with sawdust-like residue
Fruit borers tunneling into developing fruit. Bag developing fruit with paper or fine mesh fruit bags once they reach baseball size to physically exclude the borers. Pick up and destroy any fallen fruit promptly so the larvae do not complete their life cycle in the soil below.
Yellow leaves with green veins
Iron deficiency, common on alkaline soils or in old container mix. Apply a chelated iron foliar spray for a quick correction. For a long-term fix, amend the soil with elemental sulfur to lower the pH or repot container plants with fresh acidic mix and use an acidic fertilizer.
Webbing on leaf undersides
Spider mites, common on stressed indoor or container plants during hot dry spells. Rinse the foliage with a strong spray of water, focusing on the undersides of leaves. Repeat every few days for a week. Heavier infestations respond to insecticidal soap.
Branch dieback at the tips
Often a sign of cold injury from the previous winter or fungal canker on stressed trees. Cut affected branches back to healthy green wood several inches below the visible damage. Sterilize the pruners with rubbing alcohol between cuts to avoid spreading disease.
About This Article
