How to Plant a Starfire Lily
Plant Starfire Lily bulbs in spring after the last frost, setting each bulb so the top third sits above the soil line in fast-draining soil and bright dappled shade. Space bulbs 8 to 10 inches apart and water once after planting, then keep the soil barely moist until shoots appear. Expect the spectacular red firework bloom in 6 to 10 weeks, with strap leaves following after the flower fades.
When and where to plant
Starfire Lily is a warm-climate African bulb that handles winters in zones 9 through 11 outdoors and grows beautifully in a container anywhere colder. The plant blooms in late spring or early summer once the soil has warmed and the bulb has broken dormancy, so plant in spring after your last frost when soil temperatures hold steady above 60°F.
The site needs bright dappled light or morning sun with afternoon shade. Full sun bleaches the foliage and can scorch the flower head, while deep shade prevents the bulb from storing enough energy to bloom the following year. Sharp drainage matters more than soil richness for this plant, since standing moisture rots the bulb faster than any other mistake. On heavy clay sites, plant on a raised mound or skip in-ground entirely and use a container with generous drainage holes.
Space bulbs 8 to 10 inches apart for a grouped planting, which is how the flower display reads best. In zones colder than 9, treat the plant as a container resident and bring the pot indoors before the first frost to overwinter dry.
Planting a bulb in the ground
Use this method in zones 9 through 11, where Starfire Lily can stay in the ground year-round. The single most important rule for this plant is to set the bulb shallow with the neck and tip sitting above the soil line. Bulbs buried fully rot within weeks because the species evolved in lean, fast-draining African soils and never developed defenses against constant moisture around the neck.
-
1Wait for warm settled weather Plant in spring once your last frost date has passed and soil at four inches deep holds above 60°F. Cold wet ground around a freshly planted bulb is the fastest path to rot, since the bulb's natural defenses are still inactive while it is dormant. A few extra weeks of waiting saves the whole planting.
-
2Build a fast-draining planting spot Loosen the soil to a depth of about eight inches and work in a generous handful of coarse sand or fine grit per planting hole if your ground tends to stay damp. On heavy clay, mound the planting area three to four inches above grade so excess water sheds away. Sharp drainage matters more than soil fertility for this plant.
-
3Set the bulb shallow with the neck exposed Dig a hole just deep enough that the bottom two-thirds of the bulb sits below ground and the upper third, including the pointed neck, sits clearly above the finished soil line. Position the bulb with the pointed end up and the flatter root plate down. Burying the neck causes rot, so when in doubt, plant a touch higher rather than deeper.
-
4Backfill and water in lightly Firm the loosened soil gently around the bottom of the bulb to remove large air pockets, leaving the upper third uncovered. Water once after planting to settle the soil, using enough to dampen the root zone but not enough to puddle. Hold off on more water until you see the first green shoot pushing up.
Planting a bulb in a container
Use this method in zones 8 and colder, where the bulb needs to come indoors for winter dormancy. Pick a pot only slightly wider than the bulb itself, since Starfire Lily flowers more reliably when the roots feel a little crowded. Drainage holes are non-negotiable, as a saucer that holds standing water will rot the bulb within a single growing season.
-
1Pick a snug pot with drainage holes Choose a container only one to two inches wider than the bulb at its widest point, with at least one large drainage hole at the bottom. A snug pot encourages the plant to put energy into the flower instead of into endless root growth. Terra cotta is ideal because it breathes and lets excess moisture evaporate from the sides.
-
2Mix a fast-draining potting blend Combine two parts standard potting mix with one part coarse sand or perlite and one part fine bark to create a blend that drains within seconds of watering. A standard houseplant mix on its own holds too much moisture around the bulb's neck. Fill the pot about halfway with this blend, leaving room to seat the bulb.
-
3Seat the bulb with the neck above the rim Set the bulb on the half-filled mix with the pointed end up, then add more mix around the sides until the bottom two-thirds of the bulb is supported and the upper third stands clearly above the finished soil. The neck and tip should be fully exposed. Burying the neck is the single most common mistake and the one that ends the planting fastest.
-
4Water once and place in bright shade Water lightly to settle the mix around the sides of the bulb, then let any excess drain fully from the pot. Set the container where it gets bright filtered light or a few hours of morning sun, with afternoon shade to protect the emerging flower head. Hold off on the next watering until you see the first shoot or until the top inch of mix feels dry.
From planting to first bloom
The first six to ten weeks after planting are when the bulb wakes from dormancy and pushes its dramatic flower head before any leaves appear. This leafless-bloom-first pattern is a trademark of the species and is the reason the common name references fireworks.
The most common new-grower mistake during this window is overwatering. The bulb has stored energy and water of its own, and it needs only a barely-moist root zone to break dormancy. Pouring water in to speed things up is the surest way to rot the bulb before any shoot ever appears, so resist the urge until you see green pushing up.
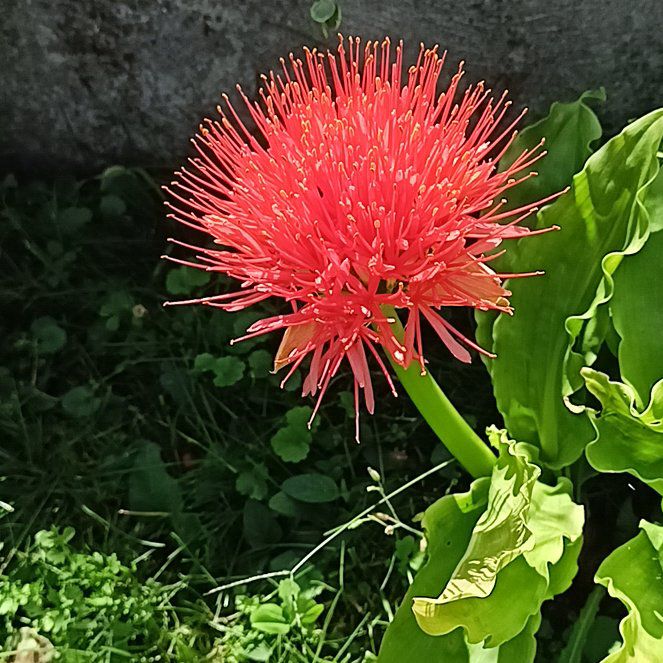
A healthy first season looks like a single thick flower stalk rising over a few weeks, opening into a spherical cluster of bright red blooms that lasts two to three weeks, followed by strap-shaped leaves that emerge as the flower fades and feed the bulb through summer.
What can go wrong
-
Bulb soft or mushy when you go to plant
The bulb has rotted in storage, usually from too much moisture or temperatures that dipped below freezing. Press gently around the neck and root plate. If either spot gives easily or smells sour, the bulb cannot be saved and should not go in the ground. Buy fresh stock and store any extras in a cool dry place with airflow until you are ready to plant. -
No green shoot after eight weeks
Either the soil never warmed enough to wake the bulb, or the planting site stayed too wet and the bulb rotted underground. Gently lift the bulb and inspect the root plate. A firm bulb with the neck intact can be replanted in a warmer, drier spot. A soft or hollow one is gone and should be replaced. Wait until soil holds above 60°F before trying again. -
Flower stalk leaning or falling over
The stalk is heavy and a flower head can tip a poorly anchored bulb, especially in a container with loose mix. Press the mix firmly around the base of the bulb to give the stalk more anchorage, and stake the stalk with a thin bamboo cane if it has already started to lean. Lower light from indoor placement also stretches the stalk and makes it weaker, so move the plant closer to a bright window. -
Leaves emerge but no flower
The bulb did not store enough energy the previous growing season to set a flower bud. This usually traces back to too much shade, an early dormancy from lack of water during leaf growth, or a bulb that was simply too young when planted. Give the plant brighter dappled light this season and water consistently while the leaves are active. Many bulbs need a full year of recovery before they bloom again. -
Bleached or scorched patches on the flower head
Direct afternoon sun has burned the petals, which are thin and surprisingly sensitive for such a dramatic-looking flower. Move the pot to a spot with morning sun and afternoon shade, or rig temporary shade cloth over an in-ground planting for the bloom window. Damage already done will not recover on the current flower, but the next bloom cycle will be fine if the light is corrected. -
Yellow leaves with mushy bulb at the base
Root rot from overwatering or poor drainage is almost always the cause. Stop watering immediately and lift the bulb if possible to inspect the root plate. A bulb with a few firm sections can sometimes be saved by trimming the rot with a clean knife, dusting the cuts with cinnamon, and replanting in a much drier mix. A fully mushy bulb is unrecoverable. -
Leaves yellowing and dying back in fall
This is normal. The plant is entering its dormancy period and pulling stored energy from the leaves back into the bulb for next year's flower. Stop watering as the leaves yellow and let the foliage die back naturally. For container plants in cooler zones, move the pot to a cool dry spot indoors and hold it there until spring before resuming any water. -
Winter rot in storage or in the pot
The bulb stayed too wet during its dormancy window, which is a strict dry rest for this species. Container plants need to overwinter in a cool dry room with no water at all, and in-ground bulbs in zones 9 through 11 only need natural rainfall. If the bulb feels soft when you check it midwinter, lift it out, trim any visible rot with a clean knife, and dry it thoroughly before storing it again on a paper-lined tray.
About This Article
