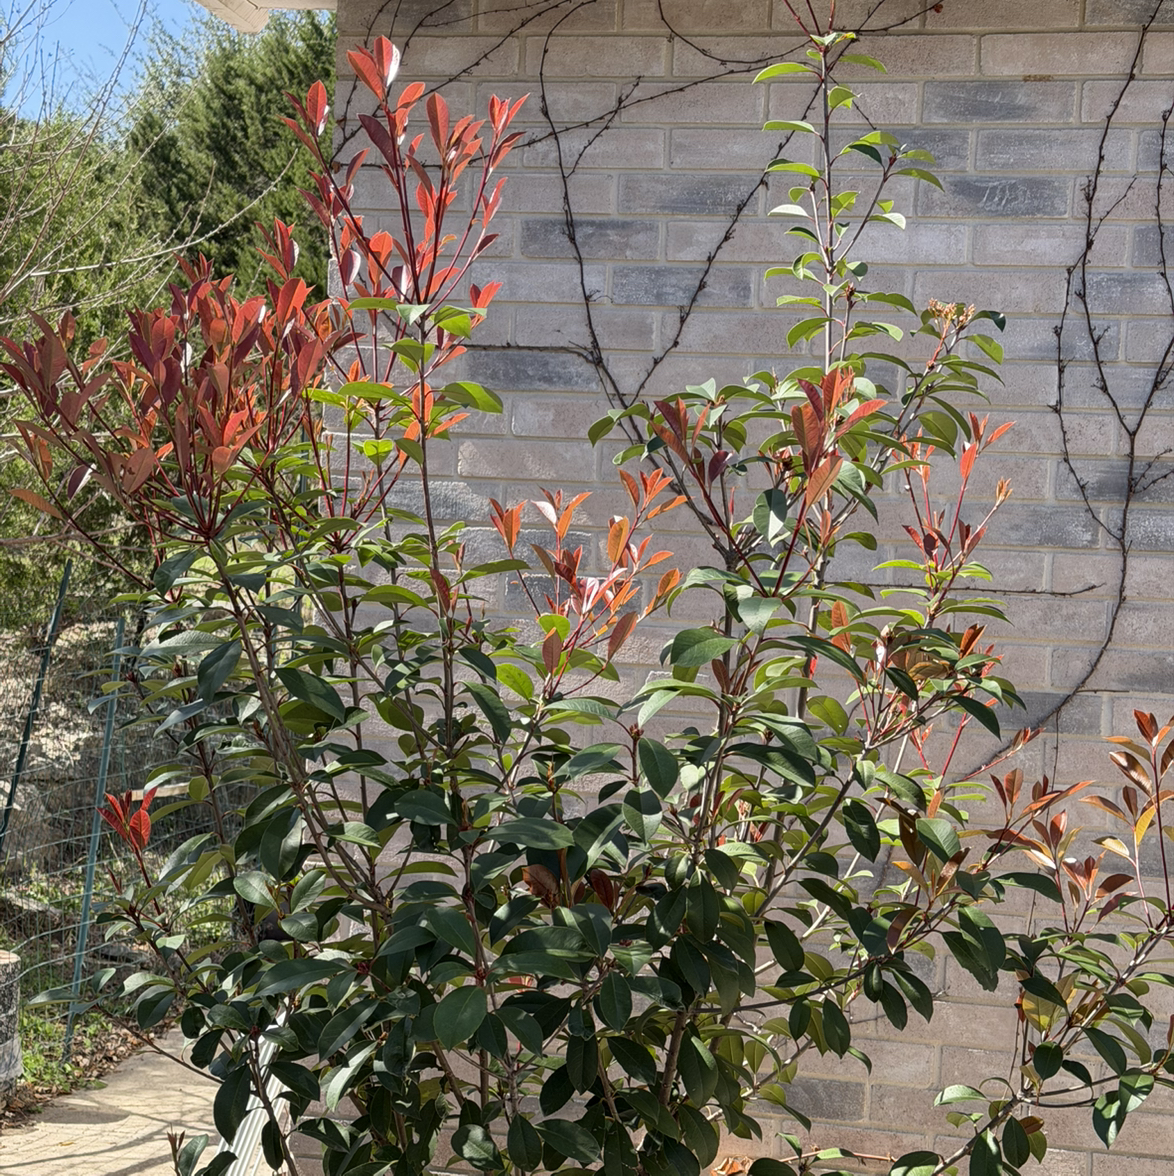
How to Grow a Red Tip Photinia
Plant Red Tip Photinia in full sun in well-drained soil, spacing plants 4 to 5 feet apart so air moves between them. Prune lightly two or three times a year to trigger fresh red leaf flushes, and bag any leaves with black spots to slow the fungal disease that plagues this shrub.

Where to plant
Red Tip Photinia is a fast-growing evergreen shrub for USDA zones 7 through 9. Untrimmed it reaches 10 to 15 feet tall and 8 to 10 feet wide in five to seven years, so the spot needs room for the full size or a commitment to regular pruning.
Sun
Full sun produces the strongest red color on new growth. Six or more hours of direct sun is the minimum for that signature spring flush. Part shade plants still grow well but the new leaves come in a duller bronze rather than bright red.
Avoid deep shade entirely. Shaded plants stretch, sprout sparse foliage, and become much more susceptible to the fungal leaf spot disease that troubles this shrub.
Drainage
Red Tip Photinia needs well-drained soil. Roots in soggy ground rot quickly and the plant declines from the inside out. Dig a one-foot test hole and fill it with water. If it drains within a few hours, the spot is fine. If water sits overnight, plant on a raised mound 6 to 12 inches above grade.
Soil
Average to fertile loamy soil works well, with a slight preference for slightly acidic over alkaline ground. Work an inch or two of compost into the planting area before you set the plant in. Heavy clay needs amending with coarse compost or planting on a mound.
Space and airflow
Crowding is the single biggest cause of leaf spot disease on this shrub. Space plants in a hedge at least 4 to 5 feet apart so air can move through the foliage and dry the leaves quickly after rain.
Avoid planting against a wall or solid fence where airflow is blocked. Allow at least two feet of clear space behind the plant from any solid surface.
How to plant
Plant in fall or early spring while the weather is cool, so the roots can establish before the heat of summer. Container-grown plants can go in any time during the growing season, but extra care with watering is needed in summer plantings.
-
1Dig a wide shallow hole Twice as wide as the root ball but only as deep as the root ball is tall. Red Tip Photinia roots spread sideways, so a wide hole helps them establish faster than a deep one.
-
2Loosen the root ball If the roots are circling tightly inside the nursery pot, gently tease them apart or score the outside with a knife. Circling roots stay circling unless you break the pattern, and an established plant with girdled roots eventually strangles itself.
-
3Set the plant slightly high The top of the root ball should sit about an inch above the surrounding soil. The plant settles as the soil compacts, and a buried crown rots faster than a high one in this species.
-
4Backfill with native soil and compost Mix a few shovels of compost into the dug-out soil and use that to fill the hole. Avoid filling the hole with pure compost or potting mix, since roots get lazy in overly rich soil and never spread into the surrounding yard.
-
5Water deeply Soak the root zone until the top six inches feel uniformly damp. This first deep watering settles the soil and is the most important watering of the first year.
-
6Mulch two to three inches deep Use shredded bark or wood chips, kept a few inches back from the trunk. Mulch cools the root zone, holds moisture, and reduces fungal spore splash-up onto the lower leaves.
Watering and feeding
Watering
Water deeply once a week through the first growing season, soaking the root zone rather than splashing the leaves. A soaker hose or drip line at the base is much better than overhead spray, which spreads fungal leaf spot quickly.
After the first year, the plant is moderately drought-tolerant and gets by on rainfall in most years. A deep weekly soak through extended summer dry spells keeps the foliage looking fresh and reduces the leaf drop that comes with drought stress.
Feeding
Feed in early spring as new growth starts, using a slow-release balanced fertilizer or one labeled for evergreen shrubs. A second light feeding in early summer encourages another flush of red new growth.
Stop feeding by late summer so the new growth hardens off before cold weather. Heavy late-season feeding produces soft growth that the leaf spot disease attacks first.
Pruning
Red Tip Photinia is grown for the bright red new growth, and every prune triggers a new red flush as the cut shoots push fresh leaves. Two or three light prunes a year give a long season of color, but each cut is also a wound that fungal leaf spot can enter, so timing and sanitation matter.
When to prune
The main prune happens in mid spring just as the first red flush starts to mature to green. A second light shaping in early summer keeps the form tight and triggers another red flush. A final light tidy in early fall, no later than six weeks before the first hard frost, gives the new growth time to harden off.
Avoid pruning in wet weather, since fungal spores enter through fresh cuts much more easily on wet plants. Sterilize the pruners with rubbing alcohol between plants in a hedge.
What to cut
Remove any dead, broken, or crossing branches at the base. Shorten longer shoots back to a leaf node to keep the form tight and encourage branching. For a hedge, run hand pruners across the surface rather than using power shears, since hand pruners cut individual stems back to a leaf and reduce the shredded leaf edges that invite disease.
Renovating an overgrown shrub
If the plant has outgrown its space or become bare at the base, renovate it gradually over three years. Each spring, cut one third of the oldest stems to within a foot of the ground. Fresh shoots fill in from the base, and by year three the plant has a new lower framework without ever losing all of its top growth at once.
Blooming and color
Red Tip Photinia is grown for the bright red flush of new growth that appears in spring and again after each light prune. The flowers exist but they are not the point of the plant for most growers.
The red flush
Each new shoot opens deep glossy red, gradually fading through bronze to dark green over four to six weeks. The first big flush in spring is the showiest, with the whole plant covered in red tips. Each subsequent prune produces a fresh smaller flush of red growth from the cut points.
Spring flowers
Clusters of small white flowers open in mid spring on shoots that grew last year. The scent is heavy and not to everyone's taste, sometimes described as fish-like. Many growers prune off the flower buds before they open to keep the smell down and direct energy into red leaf growth.
As a hedge
Red Tip Photinia is a classic hedge plant where the red color reads as a band along the top with each new flush of growth. A row of well-spaced plants knit together into a screen within three to four years and stay attractive year-round in the right climate.
Common problems and pests
Most Red Tip Photinia problems trace back to fungal leaf spot in humid weather and to poor airflow in tight hedge plantings. Air circulation and pruning sanitation prevent most issues.
Red spots on leaves that spread and drop
Entomosporium leaf spot is the disease that has reduced Red Tip Photinia hedges across the southeastern U.S. Small bright red spots appear on new leaves, expand into dark blotches with gray centers, and the leaves yellow and drop. Rake up and bag all fallen leaves, never compost them. Improve airflow by thinning the plant and avoiding overhead watering. A copper or chlorothalonil fungicide applied at the first sign and repeated every 10 to 14 days during wet weather slows new infection.
Black powdery coating on leaves
Sooty mold grows on the sticky residue left behind by aphids or scale insects feeding above. The mold itself is harmless but it shades the leaves and weakens the plant. Wash the residue off with soapy water and treat the underlying insect with insecticidal soap or horticultural oil.
Aphids on new growth
Small green or black insects cluster on tender new shoots in spring. Knock them off with a strong spray of water early in the morning. Insecticidal soap handles heavier infestations. Ladybugs eat aphids faster than any spray, so avoid broad-spectrum insecticides that kill them too.
Bumps on stems with sticky residue
Scale insects feed on sap and excrete the sticky residue that grows sooty mold. Wipe individual scales off with a cotton swab dipped in rubbing alcohol. Heavier infestations respond to horticultural oil sprayed in late winter while the plant is dormant.
Yellow leaves with green veins
Iron chlorosis shows up as yellow leaves with the veins still green, usually on alkaline soils. Apply chelated iron as a foliar spray for a quick fix and amend the soil with elemental sulfur or pine bark mulch for a long-term correction. Soil pH above 7 makes iron unavailable to the roots.
Whole branches dying back
Phytophthora root rot or canker can kill whole sections of the plant when the soil stays wet. Check the lower trunk for sunken, dark, oozing bark and the roots for blackened decay. There is no cure for advanced root rot. Improve drainage by raising the bed or moving to a drier spot, and replace severely affected plants rather than nursing them along.
Brown crispy leaves after winter
Winter burn happens when cold dry wind pulls moisture from evergreen leaves faster than the frozen roots can replace it. Wait until late spring before cutting damaged stems, since some apparently dead growth recovers once new buds push. A burlap windbreak the first winter helps young plants establish in exposed sites.
Leggy bare growth at the base
Long stretches of bare stem at the base usually mean the plant has too little light or has been sheared on top without thinning the interior. Improve light by removing overhead branches of nearby trees. Renovate the plant by cutting one third of the oldest stems to within a foot of the ground each spring over three years.
Caterpillars chewing leaves
Tent caterpillars and leafrollers occasionally show up on new spring growth. Hand-pick small infestations and crush them or drop into soapy water. A Bt (Bacillus thuringiensis) spray applied early when caterpillars are small handles larger outbreaks. Bt does not harm bees or ladybugs.
Powdery white film on leaves
Powdery mildew shows up in mild dry days followed by humid nights, more often on shaded plants. Improve airflow with selective pruning and avoid overhead watering. A potassium bicarbonate or horticultural oil spray at the first sign clears mild outbreaks.
About This Article
