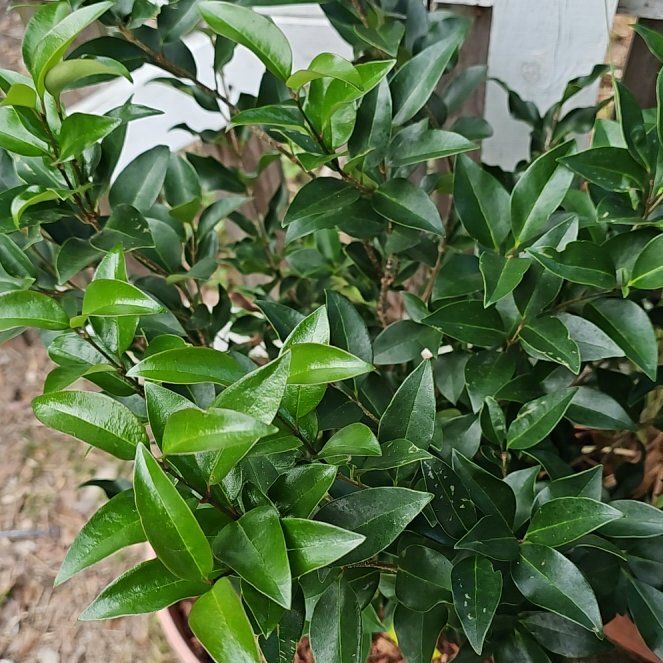
How to Grow an Osmanthus
Plant Osmanthus in full sun to part shade, in well-drained loamy soil, and give the shrub 6 to 15 feet of clear space at maturity depending on the species. The plant is grown for the small but intensely fragrant flowers, blooms most heavily in fall on most species, and needs only light pruning to shape.

Where to plant
Osmanthus is an evergreen flowering shrub or small tree in the genus Osmanthus, with several species widely grown in gardens. Most are hardy in USDA zones 7 to 10, though the hardiest species push into zone 6 with protection. Mature size varies widely by species, from compact 6-foot shrubs to small 25-foot trees.
Sun
Full sun to part shade. Full sun produces the heaviest bloom and densest growth. Part shade is fine and often beneficial in the hottest summer zones where afternoon sun can scorch the foliage of some species. Deep shade reduces both flowering and growth rate.
Drainage
Osmanthus needs well-drained soil. The roots are sensitive to waterlogged conditions and the shrub declines quickly in soggy spots. Dig a one-foot test hole and fill with water. If it drains within a few hours, the spot works. If water sits overnight, build a raised mound 8 to 12 inches above grade.
Soil
Loamy garden soil enriched with compost is ideal. Slightly acidic conditions suit most species well, with a target pH of about 6.0 to 6.5. Heavy clay benefits from a generous compost amendment and a raised mound. Very sandy soil benefits from extra compost to hold moisture.
Space
Spacing depends on the species you are planting. Compact species like the dwarf forms top out around 6 feet wide. Sweet osmanthus and the holly-leaved relatives can reach 15 to 25 feet tall and 10 to 15 feet wide at maturity. Plant near a window, doorway, or path to make the most of the powerful fragrance during bloom season.
How to plant
Plant container-grown shrubs in early spring after the ground thaws or in early fall at least six weeks before the first hard frost. Cool weather supports root establishment without summer heat stress.
-
1Dig a wide shallow hole Twice as wide as the root ball but only as deep. Wide shallow holes encourage roots to spread sideways into the surrounding soil rather than circling in a deep pocket.
-
2Loosen the root ball If roots are circling the inside of the nursery pot, gently tease them apart or score the outside with a sharp knife. Circling roots continue circling once planted unless the pattern is broken at planting time.
-
3Set the shrub slightly high The top of the root ball should sit about an inch above the surrounding soil. The plant settles as the soil compacts. A buried crown holds moisture against the trunk and rots over time.
-
4Backfill with native soil and compost Mix a few handfuls of compost into the dug-out soil and refill the hole, firming gently as you go. Avoid filling with pure compost or potting mix, since roots get lazy in overly rich pockets and never spread out into the surrounding yard.
-
5Water deeply Soak the entire root zone slowly until the soil settles. A first deep watering at planting is the most important watering of the shrub's first year.
-
6Mulch 2 to 3 inches deep Apply shredded bark or wood chip mulch in a 3-foot circle around the trunk, kept a few inches back from the trunk itself. Mulch keeps the shallow root zone cool and holds moisture between waterings.
Watering and feeding
Watering
Water deeply once a week through the first two growing seasons to help the shrub establish a strong root system. Soak the root zone slowly rather than splashing the foliage. Drip lines or a soaker hose at the base work best.
Once established, Osmanthus is moderately drought-tolerant and gets by on rainfall in most years. A deep weekly soak during extended summer dry spells keeps the foliage from yellowing or thinning. New growth and bud development through fall benefit from steady moisture.
Feeding
Feed once in early spring as new growth starts, using a balanced slow-release fertilizer or one labeled for acid-loving evergreen shrubs. A top dressing of compost around the dripline supplements or replaces synthetic feeding.
Avoid heavy nitrogen, which produces lush leafy growth at the expense of flowers. Stop all feeding by midsummer so new growth hardens off before winter and bud set for fall bloom is not pushed by late feeding.
Pruning
Osmanthus needs only light pruning, mostly to shape the shrub and remove any dead or crossing branches. The natural form is dense and well-shaped, and heavy shearing removes the year's flower buds. Most species bloom on year-old wood, so timing pruning right after bloom protects next year's flowers.
When to prune
Prune right after the main bloom flush ends. For fall-blooming species, that means late fall or early winter in mild climates and early spring just before new growth pushes in zone 7 and colder. For spring-blooming species, prune right after the spring flowers fade. Avoid pruning during peak summer heat.
What to cut
Remove dead, broken, or crossing branches at the base or back to a healthy outward-facing bud. Thin a few crowded interior branches to improve airflow. Light tip pruning controls the overall size and encourages a denser bushier form.
Avoid shearing the shrub into a tight formal hedge unless that is the intended look. Sheared Osmanthus blooms less heavily, since most of the flower-bearing wood is on the outer twigs that get cut off. For a hedge, lightly shear right after bloom and accept a lighter floral display.
Renovating an overgrown shrub
An overgrown shrub can be renovated by cutting one third of the oldest woody stems back to the ground each year for three consecutive years right after bloom. The remaining stems continue blooming while fresh shoots fill in from the base. By year three the shrub has a renewed framework with very little loss of bloom in any single year.
Blooming and color
Osmanthus is grown almost entirely for the intensely fragrant flowers. The blooms themselves are small (often only a quarter inch across) and easily missed at a glance, but the scent is one of the most powerful in the ornamental world. A mature shrub in full bloom perfumes a yard.
Bloom timing
Most commonly grown Osmanthus species bloom heavily in fall, often from late September through November in warmer zones, with a lighter second flush in spring. Some species are spring bloomers instead. The exact window depends on the species and the local climate, with cooler regions blooming later in fall.
Flowers open in small clusters along the year-old wood, hidden among the evergreen leaves. The visual show is subtle but the fragrance carries on a still day.
The fragrance
The scent is often described as a blend of apricot, peach, and jasmine. It is one of the most distinctive fragrances in the ornamental world and is used commercially in perfumery and in Chinese cuisine (osmanthus tea, jellies, and cakes).
Plant near a window, doorway, seating area, or along a frequently used path so the fragrance can be enjoyed daily during the bloom season. The scent is strongest in the cool early morning and at dusk on a still day.
Evergreen structure
Outside the bloom season, the shrub provides year-round structure with dense glossy evergreen foliage. Leaf shape varies by species, from holly-like with spiny edges to smooth-edged and lanceolate. The dark green canopy makes a useful backdrop for other flowering plants through the rest of the year.
Common problems and pests
Most Osmanthus complaints trace to either site conditions (drainage and sun) or to scale insects, which are the genus's most common pest. The shrub is otherwise low-maintenance and reliable.
Bumps on stems and leaves with sticky residue
Scale insects feeding on sap and excreting a sugary residue that drips on lower leaves. Wipe individual scales off with a cotton swab dipped in rubbing alcohol. Heavier infestations respond to horticultural oil sprayed in late winter while the shrub is dormant. The sticky residue often grows black sooty mold, which washes off with soapy water once the scale is gone.
Black sooty mold on leaves
A black powdery coating on the foliage, caused by a fungus that grows on the sticky honeydew excreted by scale, aphids, or whiteflies. The mold itself does not harm the plant much but it blocks sunlight and is unsightly. Treat the underlying insect to stop the honeydew supply, and wash the existing mold off with a soapy water spray once the pest is controlled.
Yellow leaves with green veins
Iron chlorosis on alkaline soils. Apply a chelated iron foliar spray for a quick fix and amend the root zone with elemental sulfur or pine bark mulch to gradually lower the pH. The target pH is roughly 6.0 to 6.5. Yellow leaves spread evenly across the canopy can also indicate root rot in soggy soils.
Browning leaf edges
Most often a sign of summer drought stress, salt damage near roads or pools, or winter desiccation in exposed sites. Water deeply during summer dry spells and mulch the root zone two to three inches deep. In windy winter sites, an anti-desiccant spray applied in late fall reduces leaf burn.
Few or no flowers
Almost always caused by pruning at the wrong time (after bud set for the next bloom), too much nitrogen fertilizer, or insufficient sun. Mark the calendar to prune only right after bloom, switch to a low-nitrogen fertilizer, and move to a sunnier spot if possible.
Winter dieback at the cold edge of the range
Dead-looking stem tips in early spring after a harsh winter, especially at the cold edge of the species' hardiness range. Wait until new growth pushes in late spring before cutting anything. Damaged wood often regrows from buds you cannot see at first. If a stem stays brown and brittle by late May, cut it back to the lowest green bud.
White powdery film on leaves
Powdery mildew, common in humid weather with poor airflow. Improve airflow by thinning crowded interior branches during post-bloom pruning. Avoid overhead watering and water at the base instead. Heavy outbreaks respond to a horticultural oil or potassium bicarbonate spray.
Holes chewed in leaves
Several caterpillars and beetles occasionally feed on Osmanthus leaves but damage is usually light. Hand-pick visible chewers or spray Bt (Bacillus thuringiensis) for caterpillars. Healthy shrubs tolerate moderate leaf damage with no lasting effect.
Root rot in soggy soils
Wilting that does not recover after watering, yellow leaves through the whole canopy, and a soft mushy root system when investigated. Almost always caused by poor drainage. Improve drainage by raising the planting area, replanting on a mound, or moving the shrub to a better spot. Heavily affected plants rarely recover.
About This Article
